Building a budget-friendly workstation for video editing is a smart investment that balances performance with affordability. Whether you’re a beginner or a seasoned editor, creating a custom PC tailored to your needs can drastically improve your workflow and reduce long-term costs. This guide walks you through selecting the right components, ensuring compatibility, and assembling a powerful machine capable of handling 4K video editing without breaking the bank.
The key to a cost-effective editing workstation lies in smart component choices. Modern video editing software like Adobe Premiere Pro and DaVinci Resolve demands significant processing power, particularly from the CPU, GPU, and RAM. However, with careful planning, you can avoid overspending on unnecessary high-end parts while still achieving smooth performance. This article covers every critical aspect, from component selection to assembly and software optimization, ensuring your workstation is both powerful and budget-conscious.
📌 Why Invest in a Custom Workstation for Video Editing?
Video editing has evolved from simple cuts and transitions to complex multi-layered projects requiring real-time rendering and smooth playback. While commercial pre-built systems exist, they often come with inflated prices or unoptimized configurations. A custom-built workstation allows you to:
- ✅ Save money by selecting only the necessary components.
- 🎯 Tailor performance to your specific editing needs.
- ⚙️ Future-proof your setup with upgradeable parts.
- 🛠️ Learn valuable technical skills in PC assembly and troubleshooting.
For 4K video editing, the demands are even higher. Raw 4K footage requires significant storage, processing power, and memory. A well-built budget-friendly workstation ensures you can edit efficiently without lag or crashes, even when working with multiple layers, effects, and high-resolution files.
💡 Professional tip: Prioritize a fast NVMe SSD for your operating system and active project files. This reduces load times and improves overall system responsiveness during editing sessions.
🔍 Understanding Your Video Editing Needs
Before diving into component selection, assess your specific workflow requirements. Ask yourself:
- What resolution do you primarily edit? 1080p, 4K, or even 8K?
- Do you work with raw footage or compressed files? Raw files demand more CPU and GPU power.
- What software do you use? Adobe Premiere Pro, Final Cut Pro, DaVinci Resolve, or others?
- Do you need GPU acceleration for effects and rendering? Some software, like DaVinci Resolve, relies heavily on GPU performance.
- Will you be exporting frequently? Faster storage and a powerful CPU can significantly reduce export times.
For this guide, we’ll focus on building a workstation optimized for 4K video editing using Adobe Premiere Pro and DaVinci Resolve. These two applications are industry standards, offering robust features for professional and amateur editors alike.
🔧 Essential Components for a Video Editing Workstation
Selecting the right components is the foundation of a high-performance editing PC. Below, we break down the most critical parts and their roles in video editing. Each component is chosen with a balance between cost and performance in mind, ensuring you get the best value for your money.
🖥️ Central Processing Unit (CPU): The Brain of Your Workstation
The CPU is the most critical component for video editing, as it handles complex calculations, encoding, and real-time processing. For 4K editing, you need a multi-core processor with high clock speeds. Here’s what to look for:
- Core Count: Aim for at least 8 cores, but 12-16 cores are ideal for handling large projects.
- Clock Speed: Higher clock speeds (e.g., 3.5 GHz or above) improve responsiveness.
- Brand: Both Intel Core i7/i9 and AMD Ryzen 7/9 processors are excellent choices.
For budget-conscious editors, consider the following CPUs:
| Component | Model | Core Count | Clock Speed | Price Range |
|---|---|---|---|---|
| Budget Option | AMD Ryzen 7 5800X | 8 cores / 16 threads | 3.8 GHz (4.7 GHz boost) | $250 – $300 |
| Mid-Range | AMD Ryzen 9 5900X | 12 cores / 24 threads | 3.7 GHz (4.8 GHz boost) | $400 – $450 |
| High-End | Intel Core i9-13900K | 24 cores / 32 threads | 3.0 GHz (5.8 GHz boost) | $550 – $600 |
The AMD Ryzen 7 5800X offers an excellent balance of performance and affordability, making it ideal for budget-friendly builds. If your budget allows, the Ryzen 9 5900X provides additional cores for smoother multitasking and faster exports. For professional-grade workloads, the Intel i9-13900K delivers unmatched performance but at a higher cost.
💡 Professional tip: Video editing software like DaVinci Resolve benefits significantly from AMD processors due to their superior multi-core performance. If you’re using Resolve, prioritize an AMD CPU over Intel for better rendering speeds.
🎮 Graphics Processing Unit (GPU): Accelerating Rendering and Effects
The GPU plays a crucial role in 4K video editing, particularly for real-time playback, effects rendering, and GPU-accelerated exports. While not as critical as the CPU, a powerful GPU can significantly reduce rendering times and improve overall workflow efficiency.
For video editing, look for GPUs with:
- VRAM (Video Memory): At least 8GB, but 12GB or more is ideal for 4K projects.
- CUDA Cores (NVIDIA) / Stream Processors (AMD): Higher numbers translate to better performance.
- Compatibility: Ensure the GPU supports your editing software (e.g., CUDA for Adobe Premiere Pro, OpenCL for DaVinci Resolve).
Here are some budget-friendly GPU options for video editing:
| Component | Model | VRAM | CUDA Cores / Stream Processors | Price Range |
|---|---|---|---|---|
| Budget Option | NVIDIA GeForce RTX 3060 | 12GB | 3584 | $300 – $350 |
| Mid-Range | AMD Radeon RX 6800 | 16GB | 3840 | $400 – $450 |
| High-End | NVIDIA RTX 4090 | 24GB | 16384 | $1600 – $1800 |
The NVIDIA RTX 3060 is a great entry-level option, offering 12GB of VRAM and excellent performance in Adobe Premiere Pro. The AMD Radeon RX 6800 is a strong competitor, providing 16GB of VRAM and better value for DaVinci Resolve users. If your budget stretches, the RTX 4090 is the ultimate GPU for 4K editing, with 24GB of VRAM and unparalleled rendering speeds.
💡 Professional tip: If you’re using Adobe Premiere Pro, NVIDIA GPUs are preferred due to their CUDA cores, which accelerate rendering and effects. For DaVinci Resolve, AMD GPUs are equally effective and often more budget-friendly.
🧠 Random Access Memory (RAM): Keeping Your Projects Smooth
RAM is essential for multitasking and handling large video files. For 4K video editing, you should aim for at least 32GB of RAM to ensure smooth performance. More RAM is beneficial if you work with multiple applications or large project files.
Here’s a breakdown of RAM options:
- Minimum for 4K Editing: 32GB DDR4
- Recommended for Future-Proofing: 64GB DDR4 or DDR5
- Type: DDR4 is widely available and affordable; DDR5 offers better performance but requires a compatible motherboard.
For a budget-friendly build, consider the following RAM kits:
| Component | Model | Capacity | Speed | Price Range |
|---|---|---|---|---|
| Budget Option | Corsair Vengeance LPX 32GB (2x16GB) | 32GB | 3200MHz | $80 – $100 |
| Mid-Range | G.Skill Trident Z Neo 64GB (2x32GB) | 64GB | 3600MHz | $180 – $220 |
| High-End | Corsair Dominator Platinum 64GB (2x32GB) DDR5 | 64GB | 6000MHz | $350 – $400 |
The Corsair Vengeance LPX 32GB kit is a reliable and affordable choice for most 4K editing tasks. If you need additional headroom for large projects, the G.Skill Trident Z Neo 64GB kit offers a good balance between performance and cost. For those who want the absolute best, DDR5 RAM like the Corsair Dominator Platinum 64GB provides unmatched speed and future-proofing.
💡 Professional tip: Always install RAM in dual-channel configuration (e.g., 2x16GB) to maximize performance. Avoid mixing different RAM speeds or capacities, as this can lead to instability.
💾 Storage: Fast Access for Smooth Workflows
Storage is a critical component for video editing, as it directly impacts load times, file transfers, and project responsiveness. For a budget-friendly workstation, you’ll need a combination of storage types:
- NVMe SSD (Primary Drive): For your operating system, software, and active project files. Aim for at least 1TB of capacity.
- HDD (Secondary Drive): For archival footage and large media libraries. A 4TB or 8TB HDD is ideal.
- M.2 SSD (Optional): For additional speed and storage expansion.
Here are some storage recommendations:
| Component | Model | Type | Capacity | Price Range |
|---|---|---|---|---|
| Primary SSD | Samsung 980 Pro | NVMe SSD | 1TB | $100 – $130 |
| Secondary HDD | Seagate BarraCuda 4TB | HDD | 4TB | $80 – $100 |
| Expansion SSD | WD Black SN850X | M.2 NVMe SSD | 2TB | $180 – $220 |
The Samsung 980 Pro is one of the fastest NVMe SSDs available, ideal for your primary drive. The Seagate BarraCuda 4TB HDD provides ample storage for archival footage at an affordable price. If you need additional speed for active projects, the WD Black SN850X offers 2TB of NVMe storage for faster file transfers.
📄 Motherboard: The Backbone of Your System
The motherboard connects all your components and determines compatibility. For a video editing workstation, look for a motherboard with:
- CPU Socket: Must match your chosen CPU (e.g., AM4 for Ryzen 5000 series, LGA 1700 for Intel 12th/13th Gen).
- RAM Slots: At least 4 slots for future RAM upgrades.
- Storage Options: Multiple M.2 slots and SATA ports for flexibility.
- Expansion Slots: PCIe x16 for GPU and additional cards.
Here are some motherboard recommendations based on your CPU choice:
| CPU | Motherboard Model | Chipset | RAM Support | Price Range |
|---|---|---|---|---|
| AMD Ryzen 7 5800X | MSI B550-A PRO | B550 | DDR4, up to 128GB | $120 – $150 |
| AMD Ryzen 9 5900X | ASUS ROG Strix B550-F | B550 | DDR4, up to 128GB | $180 – $220 |
| Intel Core i9-13900K | ASRock Z790 Pro4 | Z790 | DDR4/DDR5, up to 128GB | $180 – $220 |
The MSI B550-A PRO is an excellent budget-friendly option for AMD Ryzen CPUs, offering robust features without breaking the bank. The ASUS ROG Strix B550-F provides additional connectivity and better power delivery for high-end builds. For Intel CPUs, the ASRock Z790 Pro4 supports both DDR4 and DDR5 RAM, making it a versatile choice.
⚡ Power Supply Unit (PSU): Ensuring Stable Power Delivery
A reliable PSU is essential for any PC, especially for a workstation handling demanding tasks. Look for a PSU with:
- Wattage: At least 650W for mid-range builds, 850W for high-end systems.
- Certification: 80 Plus Bronze, Silver, Gold, or Platinum for efficiency.
- Modularity: Fully modular PSUs allow for cleaner cable management.
Recommended PSUs:
- Budget Option: Corsair CX650M (650W, 80 Plus Bronze)
- Mid-Range: EVGA SuperNOVA 750 G6 (750W, 80 Plus Gold)
- High-End: Corsair RM850x (850W, 80 Plus Gold, Fully Modular)
💡 Professional tip: Invest in a high-quality PSU from reputable brands like Corsair, EVGA, or Seasonic. A reliable PSU ensures stable power delivery and protects your components from damage.
🧊 Cooling: Keeping Your System Running Smoothly
Video editing workstations generate significant heat, especially under heavy loads. Proper cooling is essential to maintain performance and longevity. There are two main types of cooling to consider:
- Air Cooling: Cost-effective and reliable. Ideal for most builds.
- Liquid Cooling: More efficient for high-end systems but pricier.
Recommended cooling solutions:
- Budget Air Cooler: Cooler Master Hyper 212 EVO
- Mid-Range Air Cooler: be quiet! Dark Rock Pro 4
- High-End Air Cooler: Noctua NH-D15
- Liquid Cooler: Corsair iCUE H100i RGB PRO XT
The Cooler Master Hyper 212 EVO is a reliable and affordable air cooler that keeps temperatures in check. For more demanding builds, the be quiet! Dark Rock Pro 4 offers superior cooling performance. High-end systems may benefit from the Noctua NH-D15 or a liquid cooler like the Corsair iCUE H100i for optimal thermal management.
🔄 Assembly Process: Step-by-Step Guide
Now that you’ve selected your components, it’s time to assemble your budget-friendly video editing workstation. Follow these steps carefully to ensure a smooth and successful build.
🛠️ Tools and Preparation
Before you begin, gather the following tools and materials:
- ✅ Phillips-head screwdriver
- ✅ Anti-static wrist strap (optional but recommended)
- ✅ Thermal paste (if not pre-applied on your cooler)
- ✅ Zip ties for cable management
- ✅ Workspace with ample lighting and a clean surface
Ensure your workspace is free from static electricity, as this can damage sensitive components. If possible, work on a non-carpeted surface and avoid wearing wool or synthetic fabrics.
📦 Installing the CPU
1. Open the CPU socket on your motherboard by lifting the retention arm.
2. Align the CPU with the socket, ensuring the notches match. Do not force it into place.
3. Gently lower the CPU into the socket until it sits flat. Close the retention arm to secure it.
Important: Avoid touching the CPU pins or the socket contacts to prevent damage.
🧊 Installing the CPU Cooler
1. If your cooler requires thermal paste, apply a pea-sized drop to the center of the CPU.
2. Align the cooler with the mounting brackets on the motherboard.
3. Secure the cooler using the provided screws or clips. Tighten them in a cross pattern for even pressure.
4. Connect the cooler’s fan to the CPU_FAN header on the motherboard.
Tip: Ensure the cooler’s fan is oriented to blow air toward the rear of the case for optimal airflow.
💾 Installing RAM
1. Open the RAM slots on the motherboard by pushing down the clips on either side.
2. Align the notch on the RAM stick with the slot and press down firmly until the clips click into place.
3. Install RAM in slots A2 and B2 (second and fourth slots) for dual-channel performance.
Tip: Check your motherboard manual for the recommended RAM slot configuration.
🖥️ Installing the Motherboard into the Case
1. Place the I/O shield that came with your motherboard into the case’s rear opening.
2. Install standoffs into the case to match your motherboard’s screw holes. These prevent the motherboard from shorting against the case.
3. Lower the motherboard into the case, aligning it with the I/O shield and standoffs.
4. Secure the motherboard with screws, tightening them in a cross pattern for even pressure.
🎮 Installing the GPU
1. Remove the case’s PCIe slot covers corresponding to the GPU’s position.
2. Align the GPU with the topmost PCIe x16 slot on the motherboard.
3. Press down firmly until the GPU clicks into place in the slot.
4. Secure the GPU to the case using screws.
5. Connect PCIe power cables from the PSU to the GPU.
Tip: Ensure your PSU has enough PCIe power connectors for your GPU. Some high-end GPUs require multiple connectors.
💾 Installing Storage Drives
1. Mount the NVMe SSD in one of the M.2 slots on the motherboard. Secure it with a screw.
2. Install the HDD in a drive bay and connect it to the motherboard using a SATA cable and to the PSU for power.
3. For M.2 expansion, install the SSD in one of the available M.2 slots and secure it with a screw.
Tip: Refer to your motherboard manual for the correct M.2 slot configuration.
⚡ Connecting Power Supply
1. Install the PSU in the case, ensuring it’s oriented correctly for airflow.
2. Connect the 24-pin ATX cable to the motherboard.
3. Connect the 8-pin EPS cable to the CPU power header on the motherboard.
4. Connect PCIe power cables to the GPU.
5. Connect SATA power cables to the HDD and any other drives.
Tip: Route cables neatly to improve airflow and aesthetics. Use zip ties to secure them in place.
🔌 Final Connections and Power-On
1. Connect front panel cables (power button, USB, audio) to the motherboard. Refer to your motherboard manual for the correct pin assignments.
2. Double-check all connections, ensuring no cables are loose or misconnected.
3. Plug in the PSU and turn it on using the switch on the back.
4. Press the power button on the case to boot up your system.
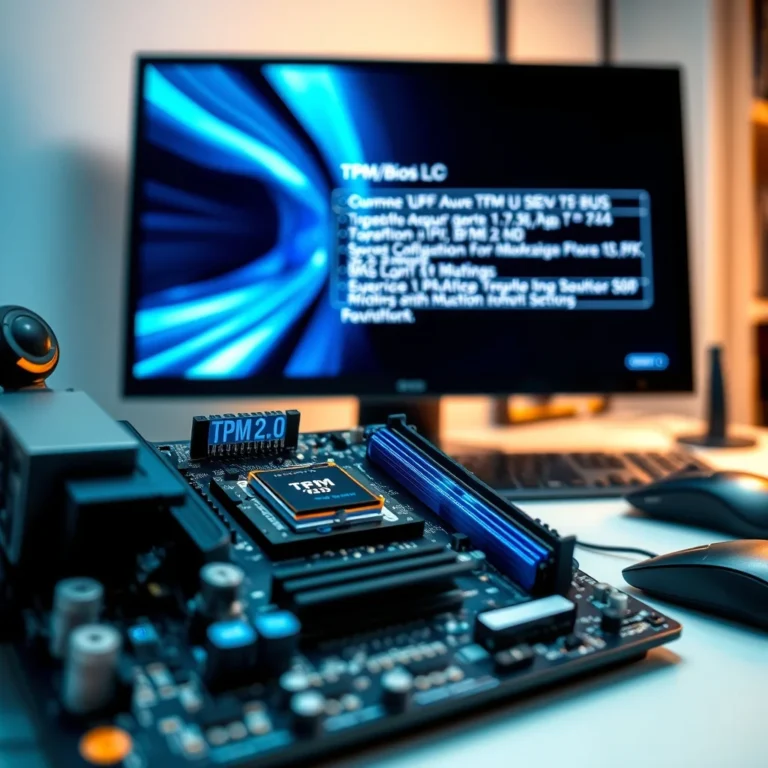
5. Enter the BIOS/UEFI by pressing the designated key (usually DEL or F2) during startup. Ensure all components are detected and adjust settings if necessary.
💡 Professional tip: If your system doesn’t boot, double-check your connections, especially the RAM and CPU power cables. Consult your motherboard manual for troubleshooting tips.
🖥️ Software Setup: Optimizing Your Workstation for Video Editing
Once your hardware is assembled, the next step is setting up your software environment. Video editing software like Adobe Premiere Pro and DaVinci Resolve require proper configuration to maximize performance. This section covers installation, optimization, and essential settings for a smooth editing workflow.
📥 Installing the Operating System
1. Create a Windows 11 installation media using the Media Creation Tool from Microsoft’s website.
2. Boot from the USB drive and follow the on-screen instructions to install Windows.
3. Partition your NVMe SSD for the operating system and allocate space for your projects.
4. Install drivers for your motherboard, GPU, and other components. These can usually be found on the manufacturers’ websites.
Tip: Use Windows Update to ensure all drivers are up to date.
🎯 Installing Video Editing Software
Adobe Premiere Pro:
- Download and install Adobe Creative Cloud from Adobe’s website.
- Subscribe to the Premiere Pro plan for access to the latest features.
- Launch Premiere Pro and navigate to Edit > Preferences > Media to optimize cache and preview settings.
DaVinci Resolve:
- Download DaVinci Resolve Studio from Blackmagic Design’s website.
- Install the software and ensure your GPU drivers are up to date.
- Launch Resolve and navigate to Project Settings > Memory and GPU to configure GPU acceleration.
Tip: Both Premiere Pro and DaVinci Resolve offer free versions, but the Studio versions provide additional features like advanced color grading and collaboration tools.
🚀 Optimizing Performance Settings
To ensure smooth performance during editing, tweak the following settings in your video editing software:
Adobe Premiere Pro:
- Media Cache: Set the cache location to your NVMe SSD for faster access.
- Playback Resolution: Use 1/4 or 1/2 resolution for smoother playback during editing.
- GPU Acceleration: Enable CUDA acceleration in Preferences > GPU Settings.
- Memory Allocation: Increase the RAM allocation to 80% for optimal performance.
DaVinci Resolve:
- GPU Processing: Enable CUDA or OpenCL in Project Settings > Memory and GPU.
- Cache Settings: Use DaVinci Resolve Disk Cache for faster rendering.
- Playback Settings: Select Performance mode for smoother playback.
- Color Management: Use DaVinci YRGB Color Managed for accurate color representation.
Tip: Keep your NVIDIA or AMD drivers updated to ensure compatibility with the latest software features.
🔧 Additional Software Recommendations
Beyond your primary editing software, consider installing the following tools to enhance your workflow:
- HandBrake: For encoding and converting video files.
- VLC Media Player: For quick media playback and format testing.
- OBS Studio: For screen recording and live streaming.
- Adobe Media Encoder: For batch exporting and format conversion.
- Shotcut: A free, open-source alternative for basic editing tasks.
💡 Professional tip: Use Adobe Media Encoder to offload export tasks from your editing software, freeing up resources for smoother editing.
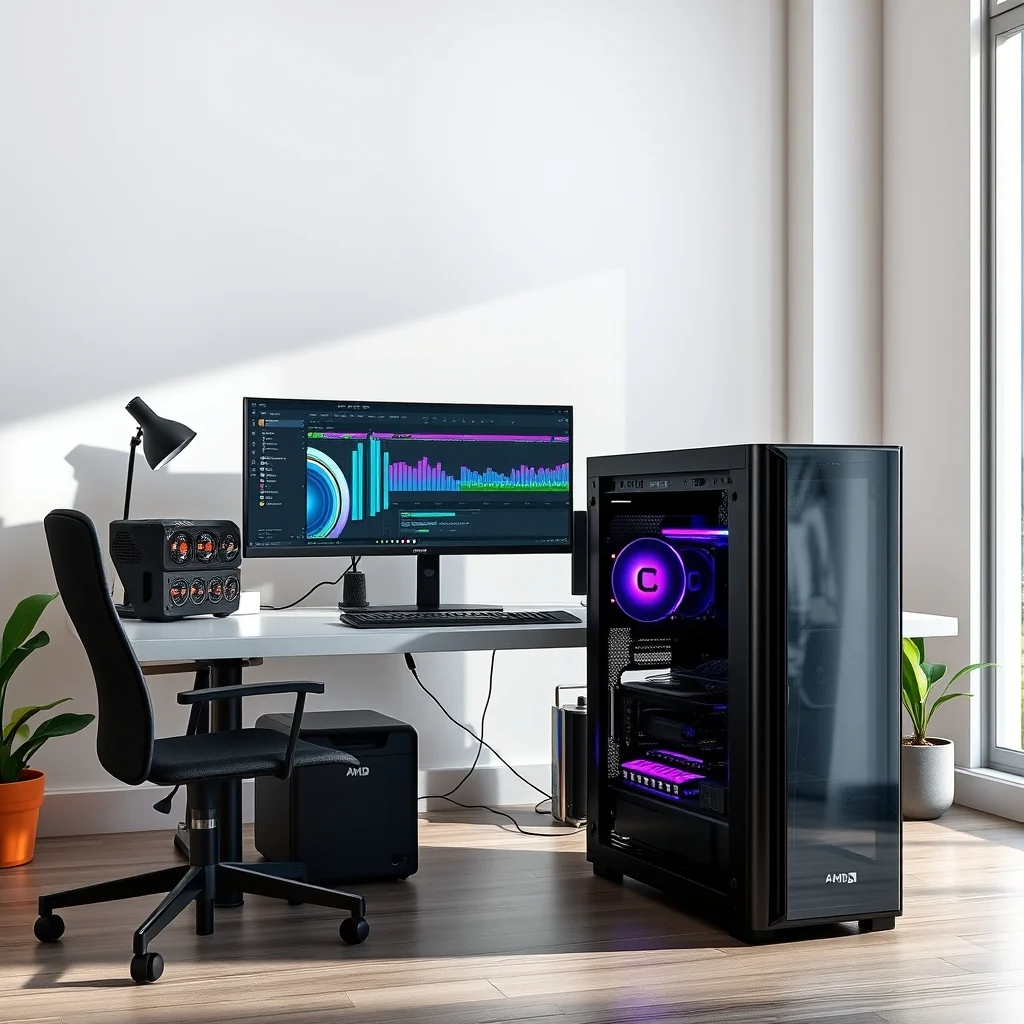
📊 Performance Testing and Benchmarking
After setting up your workstation and optimizing your software, it’s time to test its performance. Benchmarking helps you identify bottlenecks and ensure your system meets the demands of 4K video editing. Below are some tools and methods to evaluate your workstation’s capabilities.
🔍 Using Benchmarking Tools
Benchmarking tools measure your system’s performance in various tasks, including rendering, encoding, and real-time playback. Here are some popular options:
- PugetBench for Premiere Pro: Measures performance in Adobe Premiere Pro.
- PugetBench for DaVinci Resolve: Evaluates performance in DaVinci Resolve.
- Cinebench R23: Tests CPU rendering performance.
- Geekbench 6: Measures overall system performance.
- 3DMark: Assesses GPU performance in gaming and rendering tasks.
To run a benchmark:
- Download and install the benchmarking tool.
- Close all unnecessary applications.
- Run the benchmark and record the results.
- Compare your scores with online databases to gauge your system’s performance relative to others.
💡 Professional tip: Use PugetBench to test your system’s performance in your specific editing software. This provides the most accurate representation of how your workstation will handle real-world tasks.
🎬 Real-World Testing with 4K Footage
While synthetic benchmarks provide useful data, real-world testing with actual 4K footage is the best way to evaluate your workstation’s performance. Here’s how to conduct a practical test:
- Import a 4K project into your editing software.
- Apply effects and transitions to test real-time playback.
- Render a segment to measure export times.
- Multitask by running other applications in the background to test system stability.
If your workstation handles 4K footage smoothly with minimal lag, your build is successful. If you encounter performance issues, consider the following optimizations:
- ✅ Upgrade your CPU for better multitasking.
- 🎯 Increase RAM to 64GB if working with large projects.
- ⚙️ Optimize your storage setup by adding an additional NVMe SSD.
- 🔧 Update your GPU drivers for better acceleration.
💡 Pro Tips for Maximizing Performance
Building a budget-friendly workstation is just the first step. To get the most out of your system, follow these professional tips to optimize performance, reduce render times, and improve your overall editing experience.
🎯 Best Settings for Adobe Premiere Pro
- Enable Hardware Acceleration: Go to Edit > Preferences > GPU Settings and enable CUDA acceleration.
- Optimize Media Cache: Set the cache location to your NVMe SSD and allocate at least 50GB of space.
- Use Proxies: Create low-resolution proxies for smoother playback with large files.
- Adjust Playback Resolution: Use 1/4 or 1/2 resolution for editing, then switch to full resolution for final output.
- Disable Unnecessary Effects: Turn off real-time effects like Lumetri Color if they cause lag.
🌟 Best Settings for DaVinci Resolve
- Enable GPU Processing: Go to Project Settings > Memory and GPU and select CUDA or OpenCL.
- Use Disk Cache: Enable DaVinci Resolve Disk Cache in Project Settings for faster rendering.
- Optimize Playback: Select Performance mode in Playback Settings.
- Use Optimized Media: Transcode your footage to ProRes or DNxHD for smoother editing.
- Disable Background Processes: Close unnecessary applications to free up system resources.
🔧 General Performance Tips
- Keep Your System Updated: Regularly update your GPU drivers, operating system, and editing software to ensure compatibility and performance improvements.
- Monitor Temperatures: Use tools like HWMonitor to check your CPU and GPU temperatures. High temperatures can throttle performance.
- Clean Up Your Storage: Regularly delete unnecessary files and defragment your HDD to maintain optimal performance.
- Use an SSD for Active Projects: Store your current project files on your NVMe SSD for faster access and smoother performance.
- Optimize Power Settings: Set your Windows Power Plan to High Performance to maximize system resources.
💡 Professional tip: If you’re working with raw 4K footage, consider transcoding it to a more manageable format like ProRes or DNxHD to reduce CPU and GPU load during editing.
❌ Common Mistakes to Avoid
Building and optimizing a video editing workstation can be challenging, especially for beginners. Avoid these common mistakes to ensure a smooth and successful experience:
🚫 Skimping on RAM
Video editing software, particularly Adobe Premiere Pro and DaVinci Resolve, requires significant RAM to handle large project files and real-time effects. Insufficient RAM leads to lag, crashes, and slow exports. Always aim for at least 32GB, with 64GB being ideal for professional workloads.
🚫 Choosing a Weak GPU
A powerful GPU accelerates rendering, effects, and real-time playback. Skimping on a GPU or choosing an outdated model can result in sluggish performance, especially when working with 4K footage. Invest in a GPU with at least 8GB of VRAM for smooth editing.
🚫 Ignoring Storage Speed
Slow storage leads to long load times, sluggish file transfers, and poor overall performance. Your operating system, editing software, and active project files should be stored on an NVMe SSD for maximum speed. Secondary storage (e.g., HDD) can be used for archival footage.
🚫 Neglecting Cooling
Video editing workstations generate significant heat, particularly under heavy loads. Poor cooling leads to thermal throttling, reduced performance, and potential hardware damage. Invest in a reliable air cooler or liquid cooler to maintain optimal temperatures.
🚫 Skipping Driver Updates
Outdated drivers can cause compatibility issues, crashes, and performance bottlenecks. Regularly update your GPU drivers, motherboard drivers, and operating system to ensure smooth operation.
🚫 Overlooking Cable Management
Poor cable management restricts airflow, leading to higher temperatures and reduced performance. It also makes troubleshooting and future upgrades more difficult. Use zip ties and route cables neatly to improve airflow and aesthetics.
💡 Professional tip: If you’re experiencing crashes or instability, check your RAM settings in the BIOS. Incorrect RAM timings or voltages can cause issues.
🏁 Final Verdict: Is a Budget-Friendly Workstation Right for You?
Building a budget-friendly workstation for 4K video editing is a practical and cost-effective solution for editors of all levels. By carefully selecting components, optimizing your software, and following best practices, you can create a powerful machine that meets your editing needs without overspending. Here’s a recap of the key takeaways:
Pros of a Custom Workstation:
- ✅ Cost Savings: Avoid the markup on pre-built systems.
- 🎯 Customization: Tailor your PC to your specific editing requirements.
- ⚙️ Upgradeability: Easily swap out components as your needs evolve.
- 🛠️ Learning Experience: Gain valuable technical skills in PC assembly.
Cons to Consider:
- ❌ Time Investment: Building and optimizing a PC takes time and effort.
- 🔧 Technical Knowledge Required: You’ll need to research and troubleshoot components.
- ⚠️ Compatibility Risks: Choosing incompatible parts can lead to issues.
Who Should Build a Budget-Friendly Workstation?
- ✅ Beginner Editors: Looking to start video editing without a significant investment.
- 🎬 Intermediate Editors: Needing a powerful machine for 4K projects without overspending.
- ⚡ Professional Editors: Wanting a customizable, upgradeable system for long-term use.
- 💻 Tech Enthusiasts: Enjoying the process of building and optimizing a PC.
If you’re willing to put in the effort and research, a budget-friendly workstation is an excellent investment that will serve you well for years to come. By following the steps outlined in this guide, you can assemble a powerful editing machine that delivers professional-grade performance at an affordable price.
Call to Action:
Ready to build your budget-friendly video editing workstation? Start by selecting your components based on your needs and budget. Use this guide as a reference to ensure you choose the right parts and assemble them correctly. Don’t forget to optimize your software settings for the best performance. With the right setup, you’ll be editing 4K footage like a pro in no time!
❓ Frequently Asked Questions (FAQs)
-
Can I build a budget-friendly workstation for 4K video editing?
Yes! By carefully selecting components like a Ryzen 7 or Intel i7 CPU, 16-32GB of RAM, and a mid-range GPU, you can assemble a powerful workstation for under $1,000.
-
What is the minimum RAM required for 4K video editing?
The minimum RAM required for 4K video editing is 32GB. However, 64GB is recommended for smoother performance, especially when working with large project files or multiple applications.
-
Is an NVMe SSD necessary for video editing?
Yes! An NVMe SSD is essential for storing your operating system, editing software, and active project files. This significantly reduces load times and improves overall system responsiveness.
-
Do I need a high-end GPU for 4K video editing?
While not as critical as the CPU, a mid-range GPU with at least 8GB of VRAM is recommended for real-time playback, effects rendering, and GPU-accelerated exports.
-
Can I use a pre-built system for video editing?
You can, but pre-built systems often come with inflated prices or unoptimized configurations. Building a custom workstation allows you to choose the best components for your needs and budget.
-
How do I optimize Adobe Premiere Pro for better performance?
To optimize Adobe Premiere Pro, enable hardware acceleration, set the media cache location to your NVMe SSD, use proxies for large files, and adjust playback resolution to 1/4 or 1/2 for smoother editing.
-
What cooling solution is best for a video editing workstation?
A high-quality air cooler like the Noctua NH-D15 or a liquid cooler like the Corsair iCUE H100i is ideal for maintaining optimal temperatures during heavy workloads.
-
How do I troubleshoot performance issues in DaVinci Resolve?
If DaVinci Resolve is running slowly, check your GPU settings, enable disk cache, use optimized media, and close unnecessary background applications. Upgrading your CPU or RAM can also help.
-
What storage setup should I use for video editing?
A typical storage setup includes an NVMe SSD for your OS, software, and active projects and an HDD for archival footage. Adding a secondary NVMe SSD for additional speed is also beneficial.
-
Can I upgrade my workstation in the future?
Yes! One of the biggest advantages of a custom workstation is its upgradeability. You can swap out components like the CPU, RAM, GPU, and storage as your needs evolve and your budget allows.
📌 Summary: Key Takeaways for Building Your Workstation
Building a budget-friendly workstation for 4K video editing is a rewarding project that combines practicality with performance. Here’s a quick recap of the essential steps and tips:
- ✅ Prioritize your CPU and RAM for the best editing performance.
- 🎯 Choose a mid-range GPU with at least 8GB of VRAM for acceleration.
- ⚙️ Invest in an NVMe SSD for your OS and active project files.
- 🔧 Select a reliable motherboard and PSU for stability and future upgrades.
- 🧊 Ensure proper cooling to prevent thermal throttling.
- 🛠️ Optimize your software settings for smoother editing and faster exports.
- 💡 Follow best practices like using proxies, transcoding footage, and keeping your system updated.
By following this guide, you’ll be well on your way to assembling a powerful, cost-effective workstation tailored to your video editing needs. Whether you’re a beginner or a seasoned editor, a custom-built PC offers the flexibility, performance, and value you need to bring your creative vision to life.