Slow internet speeds can turn even the simplest online tasks into frustrating experiences. Whether you’re trying to stream your favorite show, attend a virtual meeting, or load a webpage, sluggish connectivity can disrupt productivity and entertainment alike. The good news is that there are several proven methods to diagnose and resolve these issues without needing to call your internet service provider (ISP) every time. This comprehensive guide will walk you through 10 actionable techniques to boost your internet speed, from tweaking your router settings to optimizing your device configurations. By the end, you’ll have the tools and knowledge to transform your online experience from frustratingly slow to blazingly fast.
🚀 Understanding the Root Causes of Slow Internet Speeds
Before diving into solutions, it’s essential to understand what might be causing your internet to crawl. Slow speeds can stem from a variety of sources, including network congestion, outdated hardware, interference from other devices, or even your ISP throttling your connection. Network congestion occurs when too many devices are using the same bandwidth simultaneously, leading to slower speeds for everyone on the network. Outdated routers or modems may struggle to handle modern internet demands, especially if they lack support for newer Wi-Fi standards like Wi-Fi 6. Interference from other electronic devices, such as microwaves or cordless phones, can also disrupt your Wi-Fi signal. Additionally, some ISPs may intentionally slow down your connection during peak hours or throttle specific types of traffic, such as streaming or gaming. Identifying the root cause is the first step toward resolving the issue.
📊 Identifying Common Symptoms of Slow Internet
- ✅ Webpages take forever to load — even simple sites like news portals or blogs.
- 🎯 Streaming services buffer constantly, ruining your binge-watching sessions.
- ⚠️ Online gaming experiences lag or disconnect frequently.
- 📞 Video calls drop or freeze during important conversations.
- 💾 File downloads crawl at a snail’s pace, making even small updates feel endless.
ping google.com to measure latency. On macOS, use the Network Utility tool. These tools provide a baseline to compare against after implementing fixes.🔹 The 10 Most Effective Methods to Speed Up Your Internet Connection
Now that you understand the underlying issues, let’s explore 10 proven methods to significantly improve your internet speed. These techniques range from quick fixes you can implement in minutes to more advanced adjustments that require a bit more effort. Implementing even a few of these strategies can yield noticeable improvements in your online experience.
⚡ Method 1: Switch to a Wired Ethernet Connection
One of the simplest yet most effective ways to boost your internet speed is by switching from Wi-Fi to a wired Ethernet connection. Wi-Fi signals can degrade over distance and through walls, while a wired connection provides a direct, stable link to your router. This method eliminates interference and reduces latency, resulting in faster and more reliable speeds. If your device supports Ethernet, connect it directly to your router using an Ethernet cable. For devices like laptops or tablets that lack an Ethernet port, consider using a USB-to-Ethernet adapter. While this method requires a physical connection, the performance benefits are well worth the minor inconvenience.
To determine whether a wired connection is right for you, test your current Wi-Fi speed and compare it to the speed you get when connected via Ethernet. You may be surprised by the difference. For tasks like online gaming, video editing, or large file downloads, a wired connection can make a world of difference in both speed and stability.
⚡ Method 2: Optimize Your Router’s Location and Settings
The placement of your router plays a crucial role in the quality of your Wi-Fi signal. Routers emit signals in all directions, so placing them in a central location can help ensure even coverage throughout your home. Avoid tucking your router inside a cabinet, behind furniture, or near large metal objects, as these can block or weaken the signal. Ideally, your router should be placed on a high shelf or mounted on a wall to maximize coverage. Additionally, elevating the router can help reduce interference from other devices on the same frequency band.
Beyond physical placement, adjusting your router’s settings can also improve performance. Log in to your router’s admin panel (usually accessed by typing 192.168.1.1 or 192.168.0.1 into your browser’s address bar) and explore the available options. Start by changing the Wi-Fi channel to one that’s less crowded. Many routers automatically select a channel, but this may not always be optimal. Use a tool like Wi-Fi Analyzer (available for both Android and iOS) to identify the least congested channel in your area. Other settings to consider include enabling Quality of Service (QoS), which prioritizes certain types of traffic (like video calls or gaming) over others, and adjusting the transmit power to a higher setting if your router allows it.
⚡ Method 3: Upgrade Your Router to a Modern Model
If your router is more than a few years old, it may be time for an upgrade. Older routers often lack support for newer Wi-Fi standards, such as Wi-Fi 6 (802.11ax), which offers faster speeds, better range, and improved performance in crowded networks. Upgrading to a modern router can significantly enhance your internet experience, especially if you have multiple devices connected simultaneously. When shopping for a new router, look for models that support Wi-Fi 6 or Wi-Fi 6E (which adds support for the 6 GHz band for even less interference). Additionally, consider routers with beamforming technology, which directs the Wi-Fi signal toward your devices rather than broadcasting it in all directions.
Another factor to consider is mesh networking. If you have a large home or areas with weak Wi-Fi signals, a mesh router system (like Google Nest Wi-Fi or Netgear Orbi) can provide seamless coverage throughout your space. Mesh systems use multiple nodes to create a single, unified network, eliminating dead zones where your Wi-Fi signal drops.
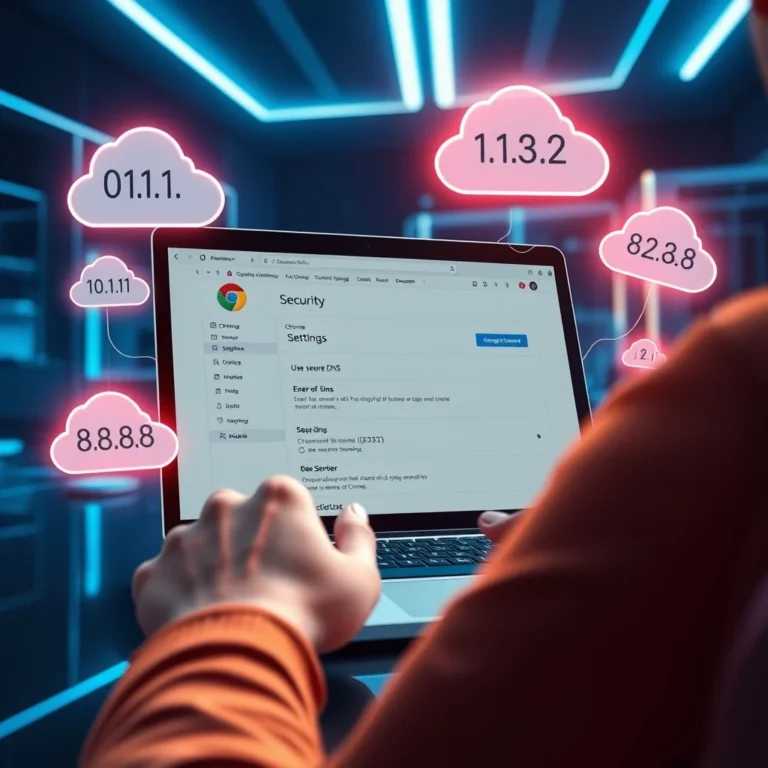
⚡ Method 4: Change Your DNS Server for Faster Lookups
Your Domain Name System (DNS) server is responsible for translating website names (like google.com) into IP addresses that your device can understand. By default, your ISP assigns you a DNS server, but these servers can sometimes be slow or unreliable. Switching to a third-party DNS provider like Google DNS (8.8.8.8 and 8.8.4.4) or Cloudflare DNS (1.1.1.1) can significantly improve the speed of your internet connection. These providers are optimized for speed and reliability, reducing the time it takes to resolve domain names.
Changing your DNS server is a straightforward process that can be done on most devices. On Windows, go to Control Panel > Network and Sharing Center > Change adapter settings, right-click your network connection, select Properties, and then change the DNS server addresses under the Internet Protocol Version 4 (TCP/IPv4) settings. On macOS, navigate to System Preferences > Network > Advanced > DNS and add your preferred DNS server addresses. Many routers also allow you to change the DNS server settings globally, which applies the change to all devices on your network.
ipconfig /flushdns. On macOS, use the Terminal and type sudo dscacheutil -flushcache followed by sudo killall -HUP mDNSResponder.⚡ Method 5: Limit Bandwidth-Hogging Applications
Some applications and processes on your device can consume a disproportionate amount of bandwidth, leaving little for other tasks. These bandwidth hogs often run in the background without your knowledge, slowing down your internet connection. Common culprits include automatic software updates, cloud sync services (like Dropbox or Google Drive), and streaming services (like Netflix or YouTube) that continue running even when you’re not actively using them. To identify and limit these applications, use your device’s built-in tools or third-party software.
On Windows, open Task Manager (Ctrl + Shift + Esc) and navigate to the Performance tab to monitor network usage. The App history tab in Settings > Network & Internet also provides insights into which apps are consuming the most data. On macOS, use the Activity Monitor (Applications > Utilities) to check network activity. Once you’ve identified the culprits, you can either close them manually or adjust their settings to limit their bandwidth usage. For example, you can pause automatic updates or set cloud sync services to only operate during off-peak hours.
⚡ Method 6: Enable IPv6 on Your Devices and Router
Internet Protocol version 6 (IPv6) is the latest version of the IP protocol, designed to replace the aging IPv4. One of the key benefits of IPv6 is its ability to provide more IP addresses, which helps reduce network congestion and improve routing efficiency. While many ISPs and devices support IPv6, it’s often not enabled by default. Enabling IPv6 can result in faster internet speeds and better connectivity, especially if your ISP offers IPv6 support.
To enable IPv6 on your router, log in to the admin panel and look for an option labeled IPv6 or Internet Protocol Version 6. Enable the feature and save your settings. If your ISP doesn’t support IPv6, enabling it on your devices won’t make a difference, so check with your ISP first. On Windows, you can enable IPv6 by going to Control Panel > Network and Sharing Center > Change adapter settings, right-clicking your network connection, selecting Properties, and checking the box for Internet Protocol Version 6 (TCP/IPv6). On macOS, navigate to System Preferences > Network > Advanced > TCP/IP and ensure IPv6 is set to Automatically.
⚡ Method 7: Use a Wi-Fi Extender or Mesh System for Better Coverage
If your router’s signal doesn’t reach certain areas of your home, a Wi-Fi extender or mesh system can help bridge the gap. Wi-Fi extenders, also known as repeaters, amplify your existing Wi-Fi signal to extend its range. However, they can sometimes create a separate network with a different name, which can be inconvenient. Mesh systems, on the other hand, use multiple nodes to create a single, seamless network with the same name throughout your home. This ensures that your devices automatically connect to the strongest signal as you move around, eliminating dropouts and slow speeds in dead zones.
When choosing a Wi-Fi extender or mesh system, consider factors like coverage area, speed capabilities, and ease of setup. Popular options include the TP-Link RE605X for extenders and the Google Nest Wi-Fi or Netgear Orbi for mesh systems. Setup is typically straightforward, with most devices offering step-by-step instructions via a mobile app. Once installed, test your Wi-Fi signal in the previously weak areas to ensure the extender or mesh system is providing the coverage you need.
⚡ Method 8: Update Your Network Drivers and Firmware
Outdated network drivers or firmware can significantly impact your internet speed and stability. Network drivers are software components that allow your operating system to communicate with your network hardware, such as your Wi-Fi adapter or Ethernet card. Firmware, on the other hand, is the software embedded in your router or modem that controls its operation. Both drivers and firmware receive regular updates to fix bugs, improve performance, and add new features. Failing to update them can leave your devices vulnerable to security risks and performance issues.
To update your network drivers on Windows, open Device Manager (right-click the Start button and select Device Manager), expand the Network adapters section, right-click your Wi-Fi or Ethernet adapter, and select Update driver. Follow the on-screen instructions to complete the update. On macOS, network drivers are typically updated automatically through system software updates. For your router or modem, check the manufacturer’s website for the latest firmware updates. Most routers allow you to update the firmware through the admin panel under a section labeled Firmware Update or Router Upgrade.
⚡ Method 9: Reduce Interference from Other Devices
Electronic devices in your home can interfere with your Wi-Fi signal, causing slow speeds or dropped connections. Common sources of interference include microwaves, cordless phones, baby monitors, and even other Wi-Fi networks in your neighborhood. To minimize interference, try to keep your router away from these devices. For example, avoid placing your router near a microwave, as the microwave’s electromagnetic waves can disrupt the Wi-Fi signal. Similarly, cordless phones that operate on the 2.4 GHz band can cause interference, so consider using a phone that operates on a different frequency or switch to a 5 GHz Wi-Fi network if your router supports it.
Another way to reduce interference is to change your router’s Wi-Fi channel. As mentioned earlier, using a tool like Wi-Fi Analyzer can help you identify the least congested channel in your area. Additionally, consider using a Wi-Fi 6 router, which operates on both the 2.4 GHz and 5 GHz bands and is less susceptible to interference due to its advanced technology. If interference from neighboring networks is a persistent issue, you may need to invest in a router with a higher transmit power or a mesh system that can provide better coverage.
⚡ Method 10: Contact Your ISP for a Plan Upgrade or Troubleshooting
If you’ve tried all the above methods and your internet speed is still unsatisfactory, it may be time to contact your ISP. Before doing so, gather evidence of the issue by running speed tests at different times of the day using tools like Speedtest.net, Fast.com, or Google’s speed test. These tools provide accurate measurements of your download and upload speeds, as well as latency. Share these results with your ISP to demonstrate the problem and request assistance.
Your ISP may offer a variety of solutions, including upgrading your internet plan to a higher speed tier, replacing outdated equipment, or sending a technician to inspect your connection. If your ISP is unresponsive or unwilling to help, consider switching to a different provider if one is available in your area. Many ISPs offer promotional rates for new customers, which can provide a significant speed boost at a lower cost. Additionally, check if your ISP is throttling your connection during peak hours. Some ISPs limit speeds for certain types of traffic, such as streaming or gaming, during high-traffic periods. If this is the case, upgrading to a higher-tier plan or switching providers may be the best solution.
🛠️ Step-by-Step Guide to Testing and Diagnosing Internet Speed Issues
Before implementing any of the methods above, it’s important to accurately diagnose the root cause of your slow internet. Testing your speed regularly can help you identify patterns, such as when speeds drop during peak hours or after certain activities. There are several tools and techniques you can use to measure your internet speed and pinpoint issues. Below is a step-by-step guide to testing and diagnosing your internet connection.
📊 Step 1: Run a Speed Test
The first step in diagnosing your internet speed is to run a speed test. This will give you a baseline measurement of your download and upload speeds, as well as latency. There are several reputable speed test tools available online, including:
- ✅ Speedtest.net by Ookla
- 🎯 Fast.com by Netflix
- ⚠️ Google’s speed test (simply search “speed test” on Google)
- 💾 Cloudflare’s speed test (speed.cloudflare.com)
To run a speed test, follow these steps:
- Close all unnecessary applications and devices connected to your network to ensure accurate results.
- Connect your device directly to your router via Ethernet if possible. This eliminates variables like Wi-Fi interference.
- Run the speed test by visiting one of the websites or tools listed above. Click the “Start Test” or “Go” button, and wait for the results to load.
- Record the results, including download speed, upload speed, and latency (ping).
📊 Step 2: Compare Results with Your ISP’s Promised Speeds
Once you have your speed test results, compare them with the speeds promised by your ISP. Most ISPs advertise their speeds in terms of download and upload rates, such as “up to 100 Mbps download and 20 Mbps upload.” If your actual speeds are significantly lower than the advertised speeds, there may be an issue with your connection or equipment.
Keep in mind that advertised speeds are typically the maximum speeds your ISP claims to provide, not the guaranteed speeds. Factors like network congestion, distance from the ISP’s server, and the quality of your equipment can all affect your actual speeds. However, if your speeds are consistently much lower than advertised, it’s worth investigating further or contacting your ISP.
📊 Step 3: Test at Different Times of the Day
Internet speeds can fluctuate throughout the day due to network congestion during peak hours. To identify patterns, run speed tests at different times, such as early morning, afternoon, and evening. Compare the results to see if speeds drop during certain hours. If they do, the issue may be related to your ISP’s network rather than your equipment or setup.
Additionally, test your speed on different days of the week. Weekends and evenings often see higher internet usage, which can lead to slower speeds. If your speeds are consistently slower during these times, your ISP may be throttling your connection during peak hours, or their infrastructure may be struggling to handle the load.
📊 Step 4: Test on Multiple Devices
If your internet speed is slow on one device but normal on another, the issue may be specific to that device. For example, an older laptop with a slow Wi-Fi adapter may struggle to achieve the same speeds as a newer device with a modern Wi-Fi 6 chipset. To diagnose this, run speed tests on multiple devices connected to the same network. If the speeds vary significantly between devices, the problem may lie with the device itself rather than your internet connection.
In such cases, consider updating the device’s network drivers, upgrading its Wi-Fi adapter (if possible), or connecting it via Ethernet for a more stable connection. If all devices are experiencing slow speeds, the issue is likely related to your router, modem, or ISP.
📊 Step 5: Check for ISP Outages or Throttling
If your speed tests consistently show lower-than-expected speeds, there may be an outage or throttling issue with your ISP. Many ISPs have online tools or apps that allow you to check for outages in your area. For example, Comcast Xfinity has an outage map on their website, while AT&T offers a similar tool. If an outage is reported in your area, you’ll need to wait for your ISP to resolve the issue.
If there are no outages, your ISP may be throttling your connection. Throttling occurs when an ISP intentionally slows down your internet speed, often during peak hours or for certain types of traffic like streaming or gaming. To check for throttling, run speed tests during and outside of peak hours. If your speeds are significantly slower during peak hours, throttling may be the culprit. In this case, consider upgrading your plan or switching to a different ISP that doesn’t engage in throttling practices.
📈 Performance Metrics: What Speeds Should You Expect?
| Internet Plan Type | Download Speed | Upload Speed | Best For | Typical Use Cases |
|---|---|---|---|---|
| Basic (DSL) | Up to 10 Mbps | Up to 1 Mbps | Light browsing, email | Checking emails, browsing websites |
| Standard (Cable) | Up to 100 Mbps | Up to 10 Mbps | Streaming HD, light gaming | Streaming Netflix in HD, casual gaming |
| High-Speed (Fiber) | Up to 1 Gbps | Up to 500 Mbps | 4K streaming, heavy gaming, multiple devices | 4K streaming on multiple devices, competitive gaming, large file downloads |
| Gigabit (Fiber) | Up to 1 Gbps or higher | Up to 1 Gbps | Ultra-HD streaming, VR, smart home devices | 8K streaming, VR gaming, smart home automation |
The table above outlines the typical speeds you can expect from different types of internet plans. However, it’s important to note that advertised speeds are often the maximum speeds, not the guaranteed speeds you’ll receive. Factors like network congestion, distance from the ISP’s server, and the quality of your equipment can all affect your actual speeds. For example, if you’re using a basic DSL plan and live far from your ISP’s central office, your actual speeds may be significantly lower than the advertised speeds.
To get a better idea of what speeds you should expect, consider running multiple speed tests throughout the day and averaging the results. This will give you a more accurate picture of your typical internet performance. If your average speeds are consistently much lower than advertised, it may be worth contacting your ISP to discuss an upgrade or troubleshooting the issue.
🆚 Common Mistakes to Avoid When Troubleshooting Internet Speed
When trying to improve your internet speed, it’s easy to make mistakes that can worsen the problem or lead to unnecessary expenses. Below are some common pitfalls to avoid when troubleshooting your internet connection.
❌ Mistake 1: Ignoring the ISP’s Equipment
Many people focus solely on their router or devices when troubleshooting internet speed, but the ISP’s equipment can also play a significant role. For example, if your ISP provides a modem-router combo unit that’s outdated, upgrading to a modern router may not yield the expected speed improvements. In such cases, request a modem upgrade from your ISP or consider purchasing a compatible modem to pair with your new router. Additionally, ensure your ISP’s equipment is properly configured and up to date.
❌ Mistake 2: Overlooking Interference Sources
As mentioned earlier, electronic devices and other Wi-Fi networks can interfere with your signal, causing slow speeds. Common sources of interference include microwaves, cordless phones, and neighboring Wi-Fi networks. To minimize interference, keep your router away from these devices and consider using a less crowded Wi-Fi channel. Ignoring interference sources can lead to persistent speed issues that are difficult to resolve.
❌ Mistake 3: Not Updating Firmware or Drivers
Outdated firmware or network drivers can cause performance issues and security vulnerabilities. Many users neglect to update their router’s firmware or their device’s network drivers, assuming that the default settings are sufficient. However, manufacturers regularly release updates to improve performance, fix bugs, and add new features. Failing to update these components can leave your devices vulnerable to security risks and limit their performance potential.
❌ Mistake 4: Using Too Many Wi-Fi Extenders
While Wi-Fi extenders can help improve coverage in dead zones, using too many of them can cause more harm than good. Extenders create separate networks with different names, which can lead to constant reconnection issues as you move around your home. Additionally, extenders can introduce latency and reduce overall network performance. If you need better coverage, consider investing in a mesh system, which creates a single, seamless network throughout your home.
❌ Mistake 5: Ignoring Background Processes
Some applications and processes run in the background and consume bandwidth without your knowledge. These can include automatic software updates, cloud sync services, and streaming services. To improve your internet speed, identify and limit these processes by pausing automatic updates or adjusting sync settings. Ignoring background processes can lead to unnecessary bandwidth consumption and slow speeds.
💡 Pro Tips for Maintaining Optimal Internet Speed
Once you’ve implemented the methods above to speed up your internet, it’s important to maintain optimal performance. Below are some pro tips to help you keep your internet running smoothly.
🎯 Best Settings for Maximum Performance
- ✅ Enable Quality of Service (QoS) on your router to prioritize critical traffic like video calls and gaming.
- 🎯 Use the 5 GHz Wi-Fi band for devices that are close to the router to reduce interference and improve speeds.
- ⚠️ Disable automatic updates for non-critical software to avoid bandwidth consumption during peak hours.
- 💾 Schedule cloud sync services to run during off-peak hours to minimize their impact on your internet speed.
- 🔒 Enable IPv6 on your devices and router if your ISP supports it to improve routing efficiency.
📌 Advanced Tricks Few Know
Beyond the basics, there are some advanced tricks that can further enhance your internet speed and stability. These techniques require a bit more effort but can yield significant improvements.
1. Use a Static IP Address
A static IP address ensures that your device always has the same IP address, which can improve network stability and reduce latency. This is particularly useful for online gaming or remote desktop applications. To set a static IP address on Windows, go to Control Panel > Network and Sharing Center > Change adapter settings, right-click your network connection, select Properties, and configure the static IP address under Internet Protocol Version 4 (TCP/IPv4).
2. Disable Nagle’s Algorithm
Nagle’s Algorithm is a networking technique used to improve the efficiency of data transmission by combining small packets of data into larger ones. However, this can introduce latency, particularly for real-time applications like online gaming or video calls. To disable Nagle’s Algorithm on Windows, open Command Prompt as Administrator and type the following commands:
reg add HKLMSYSTEMCurrentControlSetServicesTcpipParametersInterfaces{GUID} /v TcpAckFrequency /t REG_DWORD /d 1 /f
reg add HKLMSYSTEMCurrentControlSetServicesTcpipParametersInterfaces{GUID} /v TCPNoDelay /t REG_DWORD /d 1 /f
Replace {GUID} with the identifier for your network adapter, which you can find by running ipconfig /all in Command Prompt.
3. Use a Different DNS Server for Specific Websites
Some websites may be slow due to DNS resolution issues. To bypass this, you can manually configure your device to use a different DNS server for specific websites. For example, if a particular website is slow, you can add it to your hosts file with a custom DNS entry. On Windows, the hosts file is located at C:WindowsSystem32driversetchosts. Open the file with a text editor (like Notepad) and add a line like this:
1.1.1.1 example.com
Replace example.com with the website you want to speed up and 1.1.1.1 with the IP address of the website’s server. On macOS, the hosts file is located at /etc/hosts.
🏁 Final Verdict: Which Method is Best for You?
After exploring 10 proven methods to speed up your internet connection, it’s clear that the best approach depends on your specific situation. If you’re experiencing slow speeds due to an outdated router or modem, upgrading your equipment is likely the most effective solution. For those struggling with Wi-Fi dead zones, a mesh system or Wi-Fi extender can provide seamless coverage throughout your home. Meanwhile, simple tweaks like changing your DNS server or enabling IPv6 can yield noticeable improvements for many users.
The key to resolving slow internet speeds is to identify the root cause and then implement the most appropriate solutions. Start with the quickest and easiest fixes, such as switching to Ethernet or optimizing your router’s settings, before moving on to more advanced techniques like upgrading your router or changing your DNS server. If all else fails, don’t hesitate to contact your ISP for assistance or consider upgrading your internet plan.
Remember, a faster internet connection isn’t just about speed—it’s about improving your overall online experience. Whether you’re streaming your favorite shows, working remotely, or gaming with friends, a reliable and fast internet connection makes all the difference. By following the steps outlined in this guide, you’ll be well on your way to enjoying a smoother, faster internet connection.
So, what are you waiting for? Implement these proven methods today and experience the joy of a lightning-fast internet connection. Your future self—and your patience—will thank you!
❓ Frequently Asked Questions
- Why is my internet speed slower than what my ISP promised?
Your actual internet speed may be slower than advertised due to factors like network congestion, distance from the ISP’s server, outdated equipment, or interference from other devices. ISPs often advertise maximum speeds, not guaranteed speeds, so it’s important to run speed tests and compare them to the advertised rates. If your speeds are consistently much lower, contact your ISP to discuss an upgrade or troubleshooting.
- How can I test my internet speed accurately?
To test your internet speed accurately, close all unnecessary applications and devices connected to your network, then run a speed test using a reputable tool like Speedtest.net, Fast.com, or Google’s speed test. For the most accurate results, connect your device directly to your router via Ethernet and run the test multiple times throughout the day. Compare the results to identify patterns or issues.
- Is it better to use Wi-Fi or Ethernet for faster speeds?
Using a wired Ethernet connection is generally faster and more stable than Wi-Fi, as it eliminates interference and provides a direct link to your router. However, Ethernet requires a physical connection, which may not be practical for all devices. For devices that support Ethernet, such as gaming consoles or desktop computers, a wired connection is highly recommended for optimal performance.
- How do I change my DNS server, and will it speed up my internet?
Changing your DNS server can improve internet speed by using a faster, more reliable third-party provider like Google DNS or Cloudflare DNS. To change your DNS server, go to your device’s network settings and update the DNS server addresses under Internet Protocol Version 4 (TCP/IPv4). After making the change, clear your browser’s cache and DNS cache to ensure the new settings take effect. While changing your DNS server won’t always result in a massive speed boost, it can improve the speed of domain name lookups and overall connectivity.
- What should I do if my internet speed is slow only on certain devices?
If your internet speed is slow only on certain devices, the issue may be specific to those devices. Start by running speed tests on multiple devices connected to the same network. If the speeds vary significantly, the problem may lie with the device itself. Consider updating the device’s network drivers, upgrading its Wi-Fi adapter (if possible), or connecting it via Ethernet for a more stable connection. If all devices are experiencing slow speeds, the issue is likely related to your router, modem, or ISP.
- How can I reduce interference from other Wi-Fi networks in my area?
To reduce interference from other Wi-Fi networks, start by changing your router’s Wi-Fi channel to one that’s less crowded. Use a tool like Wi-Fi Analyzer to identify the least congested channel in your area. Additionally, consider using the 5 GHz band, which is less susceptible to interference than the 2.4 GHz band. If interference from neighboring networks is a persistent issue, invest in a router with a higher transmit power or a mesh system that can provide better coverage.
- What is the difference between Wi-Fi 5 and Wi-Fi 6, and should I upgrade?
Wi-Fi 5 (802.11ac) and Wi-Fi 6 (802.11ax) are different generations of Wi-Fi technology. Wi-Fi 6 offers faster speeds, better range, improved performance in crowded networks, and support for more devices simultaneously. If you have a large home, multiple devices connected simultaneously, or engage in activities like 4K streaming or competitive gaming, upgrading to a Wi-Fi 6 router can significantly enhance your internet experience. However, if your current router meets your needs, upgrading may not be necessary.
- Can my ISP throttle my internet speed, and how can I tell?
Yes, some ISPs throttle internet speeds, particularly during peak hours or for certain types of traffic like streaming or gaming. To check for throttling, run speed tests during and outside of peak hours. If your speeds are significantly slower during peak hours, throttling may be the culprit. Additionally, use a VPN to test your speeds. If your speeds improve when using a VPN, your ISP may be throttling your connection based on your traffic type.
- What is a mesh Wi-Fi system, and is it worth the investment?
A mesh Wi-Fi system uses multiple nodes to create a single, seamless network throughout your home, eliminating dead zones and providing consistent coverage. Mesh systems are ideal for large homes or areas with weak Wi-Fi signals. While they can be more expensive than traditional routers or extenders, the improved performance and ease of use often justify the investment. Popular mesh systems include Google Nest Wi-Fi, Netgear Orbi, and TP-Link Deco.
- How often should I update my router’s firmware?
You should update your router’s firmware whenever a new update is available from the manufacturer. Firmware updates often include performance improvements, bug fixes, and security patches. To check for updates, log in to your router’s admin panel and look for a Firmware Update or Router Upgrade section. Before updating, back up your current settings to ensure you can restore your configuration if something goes wrong.
🔐 Security and Privacy Considerations for Your Internet Connection
While speed is a critical aspect of your internet experience, it’s equally important to consider the security and privacy of your connection. Slow internet speeds can sometimes be a symptom of a more serious issue, such as malware or unauthorized access to your network. Below are some security and privacy tips to keep your internet connection safe and secure.
🔒 Security Level of Your Network
Securing your home network is essential to protect your personal data and prevent unauthorized access. Start by changing the default admin username and password on your router to something strong and unique. Many routers come with default credentials that are easily guessable, making them prime targets for hackers. Additionally, enable Wi-Fi Protected Access 3 (WPA3) encryption on your router to secure your Wi-Fi signal. WPA3 is the latest and most secure encryption standard, providing better protection against brute-force attacks.
Another important security measure is to disable Remote Management on your router. Remote Management allows you to access your router’s settings from outside your network, but it also creates a potential security risk. If you need to manage your router remotely, use a Virtual Private Network (VPN) to encrypt your connection and protect your data.
🛑 Potential Risks and How to Protect Against Them
- ⚠️ Malware and viruses can slow down your internet connection by consuming bandwidth and resources. Install reputable antivirus software on all your devices and keep it updated to protect against threats.
- 🔓 Unauthorized access to your network can lead to slow speeds, data theft, or even illegal activities conducted from your connection. Secure your Wi-Fi with a strong password and enable WPA3 encryption to prevent unauthorized access.
- 📡 Eavesdropping on unsecured networks can expose your personal data to hackers. Avoid using public Wi-Fi networks for sensitive activities like online banking or shopping. If you must use public Wi-Fi, connect to a VPN to encrypt your traffic and protect your privacy.
- 🔄 Firmware vulnerabilities in outdated routers or devices can be exploited by hackers to gain access to your network. Regularly update your router’s firmware and device drivers to patch security holes and protect against threats.
🎯 Real-World Scenarios: When to Use Each Method
To help you determine which method is best for your specific situation, below are some real-world scenarios and the recommended solutions for each.
🏠 Scenario 1: You Live in a Large Home with Weak Wi-Fi Signals in Certain Areas
If your home is large or has thick walls, your Wi-Fi signal may struggle to reach certain areas, resulting in dead zones. In this case, consider investing in a mesh Wi-Fi system like Google Nest Wi-Fi or Netgear Orbi. Mesh systems use multiple nodes to create a single, seamless network throughout your home, ensuring consistent coverage and eliminating dead zones. Alternatively, a Wi-Fi extender can amplify your existing signal to reach farther areas, though it may create a separate network with a different name.
💻 Scenario 2: You’re Experiencing Slow Speeds Only on Your Smartphone or Tablet
If your smartphone or tablet is consistently slower than other devices on your network, the issue may be specific to that device. Start by running speed tests on multiple devices to confirm. If the speeds are slower on your smartphone, try moving closer to the router or connecting via Ethernet if possible. Additionally, check if your device’s Wi-Fi adapter is outdated or incompatible with your router’s Wi-Fi standard. Upgrading to a device with a modern Wi-Fi 6 chipset can significantly improve performance.
🎮 Scenario 3: Your Internet Speeds Drop Dramatically During Peak Hours
If your internet speeds are noticeably slower during evenings or weekends, the issue may be due to network congestion during peak hours. In this case, consider upgrading your internet plan to a higher speed tier or switching to a fiber-optic provider, which is less prone to congestion. Alternatively, use a VPN to mask your traffic and prevent your ISP from throttling specific types of content like streaming or gaming.
📡 Scenario 4: Your Router is More Than 5 Years Old
Older routers may lack support for newer Wi-Fi standards like Wi-Fi 6, resulting in slower speeds and poorer performance. If your router is more than 5 years old, it’s likely time for an upgrade. Look for a modern router that supports Wi-Fi 6 or Wi-Fi 6E, as these standards offer faster speeds, better range, and improved performance in crowded networks. Additionally, consider a router with beamforming technology, which directs the Wi-Fi signal toward your devices for better coverage.
🔌 Scenario 5: You’re Using a Wireless Connection for a Desktop Computer
Desktop computers are often stationary and can benefit greatly from a wired Ethernet connection. If your desktop is connected via Wi-Fi, consider switching to Ethernet for a more stable and faster connection. Ethernet eliminates interference and provides a direct link to your router, resulting in lower latency and faster speeds. If your desktop lacks an Ethernet port, use a USB-to-Ethernet adapter to enable a wired connection.
📚 Additional Resources and Tools to Monitor and Improve Your Internet Speed
To further assist you in monitoring and improving your internet speed, below are some additional resources and tools you can use.
🛠️ Speed Test Tools
- ✅ Speedtest.net (https://www.speedtest.net) — A comprehensive speed test tool by Ookla that measures download and upload speeds, as well as latency.
- 🎯 Fast.com (https://fast.com) — A simple speed test tool by Netflix that focuses on download speeds.
- ⚠️ Google’s speed test — Simply search “speed test” on Google to run a quick speed test.
- 💾 Cloudflare’s speed test (https://speed.cloudflare.com) — A detailed speed test tool that measures download, upload, and latency, as well as provides insights into your connection.
- 🔍 PingPlotter (https://www.pingplotter.com) — A network diagnostic tool that helps identify latency issues and network path problems.
📶 Wi-Fi Analyzers
- ✅ Wi-Fi Analyzer (Android) (https://play.google.com/store/apps/details?id=com.farproc.wifi.analyzer) — A free app that helps you find the least congested Wi-Fi channel in your area.
- 🎯 WiFi Analyzer (iOS) (https://apps.apple.com/us/app/wifi-analyzer/id509998731) — A free app for iOS that provides insights into your Wi-Fi network and helps optimize performance.
- ⚠️ NetSpot (https://www.netspotapp.com) — A professional-grade Wi-Fi analyzer for macOS and Windows that maps your Wi-Fi network and identifies dead zones.
🔧 Network Diagnostic Tools
- ✅ Wireshark (https://www.wireshark.org) — A powerful network protocol analyzer that helps troubleshoot network issues and monitor traffic.
- 🎯 Fiddler (https://www.telerik.com/fiddler) — A web debugging tool that allows you to inspect and analyze HTTP/HTTPS traffic.
- ⚠️ GlassWire (https://www.glasswire.com) — A network monitoring tool that provides real-time insights into your internet usage and identifies bandwidth-hogging applications.
- 💾 NetLimiter (https://www.netlimiter.com) — A bandwidth monitoring and control tool that helps manage and limit network usage on your devices.