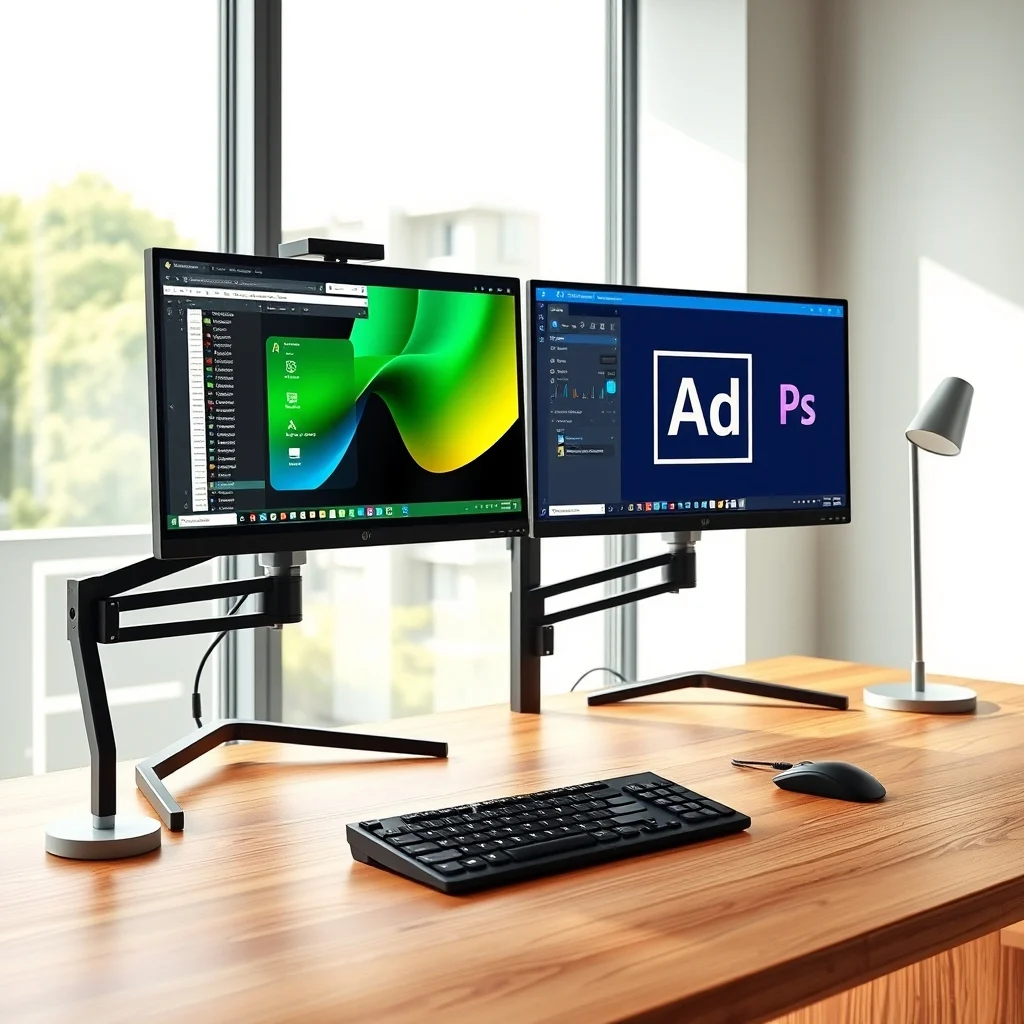

A dual-monitor workstation is no longer a luxury reserved for graphic designers or gamers. Today, anyone from office professionals to content creators can benefit from the increased screen real estate, enhanced multitasking capabilities, and improved workflow efficiency. Whether you’re juggling spreadsheets, managing emails, or editing videos, a second monitor can transform your productivity. But setting up a dual-monitor system isn’t as simple as plugging in a second display. There are critical steps to consider, from selecting the right cables and adapters to configuring display settings for optimal performance. In this comprehensive guide, we’ll walk you through every stage of the setup process, including hardware selection, software configuration, and troubleshooting common issues, so you can unleash the full potential of your dual-monitor workstation.
📐 Why a Dual-Monitor Workstation Boosts Your Productivity
In a world where digital tasks dominate both professional and personal spheres, multitasking has become a necessity. However, relying on a single monitor often leads to constant window switching, reduced focus, and wasted time navigating between applications. A dual-monitor setup addresses these challenges by providing a broader workspace that allows you to keep multiple applications open simultaneously without overlapping or minimizing windows. For example, you can dedicate one screen to your email client while keeping your main project or document open on the other. This separation minimizes distractions and improves workflow continuity.
Research has shown that users with dual monitors can complete tasks up to 42% faster than those using a single display. This efficiency gain is particularly noticeable in fields like programming, graphic design, video editing, and finance, where comparing data, referencing documents, and managing tools side-by-side is essential. Beyond speed, dual monitors also reduce eye strain by allowing you to position screens at optimal distances and angles, reducing the need for constant head movement. Additionally, they support better ergonomics by enabling a more natural arrangement of workspaces, which can lead to improved posture and reduced fatigue during long working sessions.
🔍 Understanding Your Hardware Requirements
The foundation of a high-performance dual-monitor setup lies in selecting the right hardware. This includes not only the monitors themselves but also the cables, adapters, and ports required to connect them to your computer. Modern computers, whether they run Windows or macOS, support multiple displays through various interfaces such as HDMI, DisplayPort, and USB-C. Each of these interfaces has its own advantages and limitations, and choosing the wrong one can result in poor performance, such as lag, flickering, or unsupported resolutions.
Before purchasing any equipment, it’s essential to check your computer’s specifications. For instance, older laptops or desktops may only have HDMI ports, while newer models often include USB-C or Thunderbolt ports capable of supporting high-resolution displays. Additionally, the GPU (Graphics Processing Unit) in your system plays a crucial role. Integrated graphics may struggle to handle two high-resolution monitors simultaneously, leading to performance drops or unsupported resolutions. Dedicated GPUs, on the other hand, are designed to manage multiple displays efficiently, making them ideal for demanding tasks like gaming, 3D rendering, or video editing.
Another critical factor is the type of monitors you choose. The market offers a wide range of options, from budget-friendly 1080p displays to premium 4K or even 8K screens. Your choice should align with your specific needs. For general office work, a pair of 24-inch 1080p monitors will suffice. However, for professionals in fields like graphic design or video editing, 27-inch 4K monitors provide the clarity and detail required for precise work. Additionally, consider the aspect ratio. Ultra-wide monitors (21:9) can simulate a dual-monitor setup in a single display, offering a seamless experience without the need for multiple screens. However, they may not be ideal for all users due to their limited vertical screen space.
📌 What to Look for in a Monitor
A dual-monitor setup is only as good as the monitors themselves. When selecting displays, prioritize the following features to ensure a smooth and productive experience:
- ✅ Resolution: Aim for at least 1920×1080 (1080p) for standard office work. For creative professionals, 2560×1440 (1440p) or 3840×2160 (4K) is recommended.
- 🎯 Refresh Rate: A higher refresh rate (e.g., 75Hz or 120Hz) reduces motion blur and improves smoothness, which is beneficial for gaming or fast-paced video editing.
- ⚠️ Response Time: Look for a response time of 5ms or lower to minimize ghosting and motion blur, especially if you work with fast-moving content like videos or animations.
- 🛡️ Connectivity: Ensure the monitor has the necessary ports (HDMI, DisplayPort, USB-C) to match your computer’s outputs. Some monitors also include USB hubs or built-in KVM switches for added convenience.
- 🔊 Audio Support: If you rely on multimedia, choose monitors with built-in speakers or audio outputs to avoid cluttering your workspace with additional cables.
🔌 Choosing the Right Cables and Adapters
The type of cable you use to connect your monitors to your computer can significantly impact performance and compatibility. Here’s a breakdown of the most common interfaces and their pros and cons:
- HDMI: The most widely used interface, HDMI is compatible with most monitors and computers. However, older versions (HDMI 1.4) may not support 4K at 60Hz. HDMI 2.0 and above can handle 4K at 60Hz, making it a solid choice for most users. HDMI cables are also affordable and easy to find.
- DisplayPort: DisplayPort is the preferred interface for high-performance setups. It supports higher resolutions and refresh rates than HDMI and is backward compatible. DisplayPort 1.4 can handle 8K at 60Hz or two 4K displays at 60Hz. It’s ideal for gamers and professionals who demand the best performance.
- USB-C: USB-C is becoming increasingly popular, especially in modern laptops and MacBooks. It combines power delivery, data transfer, and video output into a single cable. USB-C supports 4K resolution at 60Hz and can even charge your laptop while transmitting video. However, you may need an adapter if your computer doesn’t have USB-C ports.
- DVI: DVI is an older interface that’s gradually being phased out. It supports high resolutions but lacks audio support and is not ideal for modern setups.
When selecting cables, always opt for high-quality, certified cables to avoid issues like signal degradation or flickering. For example, a cheap HDMI cable may work for a while, but it can cause problems when you try to push higher resolutions or refresh rates. Investing in certified cables ensures reliability and longevity.
🛠️ Step-by-Step Guide to Setting Up Dual Monitors
Now that you’ve selected your hardware, it’s time to connect your monitors and configure your system. This process varies slightly depending on whether you’re using Windows or macOS, so we’ll cover both platforms in detail. Follow these steps carefully to ensure a smooth setup.
🧩 Connecting Your Monitors
Step 1: Power Off Your Computer and Monitors
Before connecting anything, turn off your computer and monitors. This prevents any potential electrical damage and ensures a clean connection.
Step 2: Identify Your Ports
Locate the video output ports on your computer. These are typically found on the back or side of the system. Common ports include HDMI, DisplayPort, and USB-C. If you’re using an adapter (e.g., HDMI to DisplayPort), connect the adapter to your computer first.
Step 3: Connect the First Monitor
Choose your primary monitor and connect it to your computer using the appropriate cable. This monitor will serve as your main display. Ensure the cable is securely plugged in to avoid signal loss.
Step 4: Connect the Second Monitor
Connect your second monitor to the remaining available port on your computer. If you’re using a laptop with limited ports, you may need a USB-C to HDMI/DisplayPort adapter or a docking station to expand your connectivity options.
Step 5: Power On Your Devices
Turn on your computer and monitors. Your system should automatically detect the new displays. If not, proceed to the next section to configure your settings manually.
🖥️ Configuring Display Settings in Windows
Once your monitors are connected, you’ll need to configure Windows to recognize and arrange them properly. Here’s how to do it:
Step 1: Open Display Settings
Right-click on your desktop and select Display settings from the context menu. Alternatively, you can go to Settings > System > Display.
Step 2: Identate Your Monitors
In the Display settings window, you’ll see a visual representation of your monitors. Click and drag the icons to match the physical arrangement of your screens. For example, if your second monitor is to the right of your primary monitor, drag its icon to the right of the primary screen’s icon.
Step 3: Set the Primary Monitor
Click on the monitor you want to set as primary (usually the one with the highest resolution or the one you want as your main workspace) and check the box that says Make this my main display.
Step 4: Adjust Resolution and Scaling
Under the Scale and layout section, select the desired resolution for each monitor. For best results, choose the native resolution of each display. If text appears too small or too large, adjust the Scale setting. Windows 11 offers more granular scaling options, allowing you to set different scaling factors for each monitor.
Step 5: Configure Multiple Displays
In the Multiple displays section, you can choose how your displays are used. Options include:
- Extend: This is the most common setting, which allows you to use both monitors as a single extended desktop.
- Duplicate: This mirrors your primary monitor to the second display, useful for presentations or sharing your screen.
- Show only on 1/2: This turns off one of the monitors, displaying content only on the selected screen.
For productivity, select Extend to maximize your workspace.
Step 6: Apply and Save Changes
Click Apply to save your settings. Windows will prompt you to confirm the changes. If everything looks correct, click Keep changes. If not, click Revert to undo the changes.
🍎 Configuring Display Settings in macOS
Mac users can also set up dual monitors, though the process differs slightly from Windows. Here’s how to configure your displays in macOS:
Step 1: Open System Preferences
Click on the Apple logo in the top-left corner of your screen and select System Preferences. Then, choose Displays.
Step 2: Arrange Your Monitors
In the Displays settings, click on the Arrangement tab. Here, you’ll see a visual representation of your monitors. Drag the white menu bar to the monitor you want to set as primary. This determines which screen will display the macOS menu bar and Dock by default.
Step 3: Adjust Resolution and Scaling
Under the Display tab, select the desired resolution for each monitor. For best results, choose the Default for display option, which uses the monitor’s native resolution. If you need to adjust text size, use the Scaled option to select a comfortable size.
Step 4: Configure Display Modes
In the Display tab, you can choose between Mirror Displays (to duplicate your screen) or Extended Desktop (to use both monitors independently). For productivity, select Extended Desktop.
Step 5: Adjust Night Shift and True Tone
If you’re using Apple’s built-in displays (like the Pro Display XDR or Studio Display), you can enable True Tone to automatically adjust the color temperature based on ambient light. For all monitors, Night Shift can reduce blue light emissions in the evening to improve sleep quality.
Step 6: Apply and Save Changes
Your changes will apply automatically. If you encounter any issues, try unplugging and replugging the monitors or restarting your Mac.
🎯 Optimizing Your Dual-Monitor Setup for Maximum Efficiency
Once your monitors are connected and configured, the next step is to optimize their arrangement and settings for maximum productivity. This involves fine-tuning display alignment, adjusting scaling for readability, and customizing window management to suit your workflow. A well-optimized setup can save you hours of frustration and significantly boost your efficiency.
📊 Arranging Your Monitors for Seamless Workflow
The physical arrangement of your monitors plays a crucial role in how comfortably and efficiently you can work. A poorly arranged setup can lead to neck strain, eye fatigue, and reduced productivity. Here are some tips to optimize your monitor placement:
- Align the Top Edges: Ensure the top edges of both monitors are level. This prevents the need to constantly adjust your gaze up or down, reducing neck strain.
- Minimize Gaps: If possible, position your monitors as close together as possible. Large gaps between screens can disrupt your workflow and make it harder to drag windows between displays.
- Consider Ergonomics: Place your primary monitor directly in front of you at eye level, about an arm’s length away. The secondary monitor should be positioned to the side, angled slightly toward you to reduce head movement.
- Test Different Arrangements: Experiment with different layouts to find what works best for you. For example, some users prefer a straight line, while others arrange their monitors in an L-shape or angled setup.
📏 Adjusting Resolution and Scaling for Clarity
Resolution and scaling settings determine how text and images appear on your screen. Incorrect settings can lead to blurry text, tiny icons, or misaligned windows. Here’s how to get it right:
Resolution: Always use the native resolution of your monitor. This ensures the sharpest image and best performance. For example, a 24-inch 1080p monitor has a native resolution of 1920×1080, while a 27-inch 4K monitor has a native resolution of 3840×2160. Using a lower resolution can result in pixelation, while a higher resolution may make text too small to read.
Scaling: Scaling adjusts the size of text and UI elements without changing the resolution. This is particularly useful for high-DPI (dots per inch) monitors, where native resolution can make text too small. In Windows, you can adjust scaling in Settings > System > Display. In macOS, go to System Preferences > Displays and select the Scaled option. For best results, aim for a scaling factor between 100% and 150%, depending on your preference and monitor size.
Multi-Monitor Scaling: If your monitors have different resolutions, Windows and macOS allow you to set different scaling factors for each display. For example, you can set your 4K monitor to 200% scaling while keeping your 1080p monitor at 100%. This ensures readability across all screens.
⚙️ Customizing Window Management for Multitasking
A dual-monitor setup is only as powerful as your ability to manage windows efficiently. Here are some strategies to maximize your multitasking capabilities:
- Use Keyboard Shortcuts: Windows and macOS offer keyboard shortcuts for moving windows between monitors. For example, in Windows, press Win + Shift + Left/Right Arrow to move a window to the adjacent monitor. In macOS, use Cmd + F1 to toggle between extended and mirroring modes, and Cmd + Tab to switch between applications.
- Leverage Snap Assist (Windows): Windows 10 and 11 include a feature called Snap Assist, which allows you to quickly resize and arrange windows. Drag a window to the edge of your screen to snap it into place, and Windows will suggest other open windows to fill the remaining space. You can also use keyboard shortcuts like Win + Left Arrow to snap a window to the left half of the screen.
- Use Third-Party Tools: Applications like DisplayFusion, UltraMon, or Rectangle (macOS) can enhance window management by adding features like window tiling, multi-monitor taskbars, and custom shortcuts. These tools are particularly useful for users who frequently switch between complex workflows.
- Organize by Workflow: Assign specific tasks to each monitor based on your workflow. For example, keep your email client and communication tools on one screen while dedicating the other to your main project or document. This separation minimizes distractions and improves focus.
⚠️ Troubleshooting Common Dual-Monitor Issues
Even with careful planning, dual-monitor setups can encounter issues like flickering, resolution mismatches, or connectivity problems. Fortunately, most of these issues have straightforward solutions. Below, we’ll cover the most common problems and how to fix them.
🔄 Monitor Not Detected
Symptoms: Your second monitor isn’t showing up in display settings, or Windows/macOS isn’t recognizing it.
Possible Causes:
- Loose or faulty cable connection.
- Incorrect input source selected on the monitor.
- Outdated or missing graphics drivers.
- Hardware limitations (e.g., integrated graphics struggling with dual monitors).
Solutions:
- Check Connections: Ensure the cable is securely plugged into both the computer and the monitor. Try a different cable or port if possible.
- Verify Input Source: On your monitor, use the input/source button to select the correct port (e.g., HDMI 1, DisplayPort 2).
- Update Graphics Drivers: In Windows, go to Device Manager > Display adapters, right-click your GPU, and select Update driver. In macOS, updates are handled through System Preferences > Software Update.
- Test on Another Device: If possible, connect the monitor to another computer to rule out a hardware issue.
🔄 Screen Flickering or Glitching
Symptoms: The screen flickers, displays artifacts, or shows distorted colors.
Possible Causes:
- Faulty or low-quality cable.
- Incompatible resolution or refresh rate.
- Graphics driver issues.
- Electrical interference from nearby devices.
Solutions:
- Replace the Cable: Use a high-quality, certified cable that supports the resolution and refresh rate of your monitor.
- Adjust Resolution and Refresh Rate: In display settings, try lowering the resolution or refresh rate to see if the issue persists. For example, switch from 4K at 60Hz to 1440p at 60Hz.
- Update Graphics Drivers: As mentioned earlier, outdated drivers can cause display issues. Update your GPU drivers to the latest version.
- Check for Interference: Move electronic devices like routers or wireless chargers away from your monitors and computer. If possible, plug your computer into a different power outlet.
🔄 Incorrect Resolution or Aspect Ratio
Symptoms: The monitor displays content in the wrong resolution, resulting in stretched or squished images, or black bars on the sides.
Possible Causes:
- Monitor set to the wrong input resolution.
- Computer outputting an unsupported resolution.
- Incorrect scaling settings.
Solutions:
- Select the Correct Resolution: In display settings, choose the native resolution of your monitor. For example, a 24-inch 1080p monitor should use 1920×1080.
- Adjust Aspect Ratio: If your monitor supports multiple aspect ratios (e.g., 16:9, 16:10, 21:9), select the correct one in the monitor’s settings menu.
- Check Scaling Settings: If text or icons appear too small or too large, adjust the scaling factor in your operating system’s display settings.
🔄 Mouse or Cursor Stuck Between Monitors
Symptoms: The mouse cursor gets stuck at the edge of the screen when trying to move between monitors.
Possible Causes:
- Monitors are not aligned correctly in display settings.
- Physical gap between monitors is too wide.
- Graphics driver issues.
Solutions:
- Align Monitors in Settings: In display settings, drag the monitor icons to match their physical arrangement. Ensure there’s no gap between them.
- Reduce Physical Gap: If possible, move your monitors closer together to create a seamless transition for the mouse cursor.
- Update Graphics Drivers: As always, outdated drivers can cause cursor issues. Update your GPU drivers to the latest version.
✨ Advanced Tips for Power Users
Once you’ve mastered the basics of dual-monitor setup, you can take your productivity to the next level with these advanced tips and tricks. Whether you’re a developer, designer, or power user, these techniques will help you optimize your workflow even further.
🎮 Gaming or Video Editing with Dual Monitors
Gamers and video editors can benefit immensely from a dual-monitor setup, but they require specific configurations to maximize performance. Here’s how to set up your monitors for these demanding tasks:
- Primary Monitor for Gaming/Editing: Use your main monitor for the game or editing software, and dedicate the secondary monitor to tools like Discord, chat clients, or reference materials.
- Optimize Refresh Rate: For gaming, prioritize a high refresh rate (e.g., 144Hz or 240Hz) on your primary monitor. Secondary monitors can run at lower refresh rates (e.g., 60Hz) since they’re less critical for performance.
- Use NVIDIA Surround or AMD Eyefinity: These technologies allow you to span a single game or application across multiple monitors. For example, NVIDIA Surround lets you create a 3×1 or 3×2 display setup for an immersive gaming experience.
- Enable G-Sync or FreeSync: If your monitors support adaptive sync technologies, enable them to reduce screen tearing and stuttering during fast-paced scenes.
🖥️ Using a Single GPU for Dual 4K Monitors
Running two 4K monitors on a single GPU is possible, but it requires careful configuration to avoid performance drops or unsupported resolutions. Here’s how to do it:
- Check GPU Bandwidth: Your GPU must support enough bandwidth to handle two 4K displays at 60Hz. Most modern GPUs (e.g., NVIDIA RTX 30 series, AMD RX 6000 series) can handle this, but older models may struggle.
- Use DisplayPort 1.4: DisplayPort 1.4 supports 4K at 60Hz over a single cable, making it ideal for dual 4K setups. HDMI 2.0 can also support 4K at 60Hz, but only one monitor can use HDMI at a time in most cases.
- Enable DSC (Display Stream Compression): Some GPUs support DSC, which compresses the video signal without losing quality. This can help reduce bandwidth usage and improve performance.
- Lower Refresh Rate if Needed: If you experience performance issues, try lowering the refresh rate to 30Hz for one or both monitors. This reduces bandwidth usage and can improve smoothness.
📡 Wireless Dual-Monitor Setups
Wireless display technologies like Miracast, Chromecast, and Apple’s AirPlay allow you to mirror or extend your screen without cables. However, wireless setups come with trade-offs in terms of latency, resolution, and reliability. Here’s what you need to know:
- Miracast (Windows): Miracast is built into Windows 10 and 11, allowing you to wirelessly extend your display to a compatible monitor or TV. However, Miracast has limitations, such as lower resolution (typically 1080p) and higher latency, making it unsuitable for gaming or video editing.
- Chromecast (Google): Chromecast allows you to cast your screen to a TV or monitor, but it’s primarily designed for mirroring rather than extending. Latency is also a concern for interactive tasks.
- AirPlay (macOS): AirPlay lets you wirelessly mirror or extend your Mac’s display to an Apple TV or compatible monitor. However, like Miracast, it has limitations in resolution and latency.
- Wireless Docking Stations: For a more reliable wireless setup, consider a wireless docking station like the Dell WD19TB or CalDigit TS4. These devices connect to your computer via USB-C or Thunderbolt and support dual 4K displays with minimal latency.
🆚 Dual Monitors vs. Ultra-Wide Monitors
While dual monitors are the traditional choice for multitasking, ultra-wide monitors (21:9 aspect ratio) offer an alternative that simulates a dual-monitor setup in a single display. Both options have their pros and cons, and the best choice depends on your specific needs and workflow.
| Feature | Dual Monitors | Ultra-Wide Monitor |
|---|---|---|
| Screen Real Estate | Provides more total screen space, ideal for multitasking. | Simulates dual monitors in a single display, reducing bezels and gaps. |
| Ergonomics | Can be less ergonomic if monitors are poorly arranged. | Single screen reduces neck and head movement. |
| Application Support | Many applications (e.g., Adobe Suite, Microsoft Office) support dual-monitor workflows natively. | Some applications may not handle ultra-wide resolutions well, leading to stretched or misaligned windows. |
| Cost | Requires purchasing two monitors, which can be expensive for high-end models. | Single monitor purchase, but premium ultra-wides (e.g., LG 40WP95C-W) can be costly. |
| Setup Complexity | Requires managing two displays, cables, and configurations. | Simpler setup with a single cable and no alignment issues. |
For most users, dual monitors offer better flexibility and multitasking capabilities. However, ultra-wide monitors provide a cleaner, more seamless experience with no gaps or bezels. If you work with applications that support ultra-wide resolutions (e.g., video editing, coding), an ultra-wide monitor may be the better choice. For general office work or creative tasks, dual monitors are often more practical.
💡 Frequently Asked Questions
- Can I use any two monitors for a dual-monitor setup?
- Do I need a powerful GPU to run dual monitors?
- Why is my second monitor showing a black screen?
- How do I fix mismatched resolutions between monitors?
- Can I use a USB hub to connect a second monitor?
- What’s the best way to arrange monitors for coding?
- How do I prevent my monitors from flickering?
- Can I run dual monitors on a laptop?
- What’s the difference between extending and duplicating displays?
- How do I use dual monitors with macOS?
While you can technically use any two monitors, they should ideally have similar resolutions and refresh rates to avoid scaling issues or performance discrepancies. Mixing a 4K monitor with a 1080p monitor can result in text size mismatches or awkward window arrangements.
Most modern integrated graphics (e.g., Intel UHD Graphics, AMD Radeon Vega) can handle dual 1080p monitors without issues. However, for dual 4K monitors or demanding tasks like gaming and video editing, a dedicated GPU is recommended.
A black screen usually indicates a connection issue. Check your cables, ensure the correct input source is selected on the monitor, and verify that the monitor is powered on. If the issue persists, try updating your graphics drivers or testing the monitor on another device.
In your operating system’s display settings, adjust the resolution of each monitor to its native resolution. For example, a 24-inch 1080p monitor should use 1920×1080, while a 27-inch 4K monitor should use 3840×2160. If text appears too small on one monitor, adjust the scaling factor for that display.
Yes, but the performance will depend on the hub’s capabilities. USB 3.0 hubs can support basic 1080p monitors, but for 4K or high-refresh-rate displays, you’ll need a USB-C hub or docking station with DisplayLink technology. Note that DisplayLink adds latency, making it unsuitable for gaming or video editing.
For coding, arrange your monitors side by side with the primary monitor directly in front of you. Use the secondary monitor for documentation, terminals, or reference materials. Consider using a dark theme in your IDE to reduce eye strain.
Flickering is often caused by faulty cables, incompatible resolutions, or outdated drivers. Use high-quality, certified cables, ensure your resolution and refresh rate are supported by your monitor and GPU, and update your graphics drivers to the latest version.
Yes, most modern laptops support dual monitors via HDMI, DisplayPort, or USB-C. If your laptop has limited ports, use a USB-C hub or docking station to expand connectivity. Check your laptop’s specifications to confirm supported resolutions and refresh rates.
Extending your display combines both monitors into a single workspace, allowing you to drag windows between screens. Duplicating mirrors your primary monitor to the secondary display, which is useful for presentations or sharing your screen with others.
macOS supports dual monitors natively. Connect your monitors using HDMI, DisplayPort, or USB-C, then go to System Preferences > Displays to configure their arrangement, resolution, and scaling. Use the Arrangement tab to set the primary monitor and align the screens.
🏁 Final Verdict: Is a Dual-Monitor Setup Right for You?
A dual-monitor workstation is a game-changer for anyone who juggles multiple tasks throughout the day. Whether you’re a programmer, writer, designer, or office worker, the increased screen real estate can significantly boost your productivity, reduce distractions, and improve your workflow. However, setting up a dual-monitor system isn’t as simple as plugging in a second display. It requires careful consideration of hardware, cable selection, display configuration, and ergonomics to ensure a smooth and efficient experience.
For most users, the benefits of a dual-monitor setup far outweigh the challenges. The ability to keep multiple applications open without overlapping, compare documents side-by-side, and streamline workflows makes it a worthwhile investment. If you frequently switch between tasks or work with complex applications, a dual-monitor setup is almost certainly worth the effort. However, if you’re on a tight budget or work with applications that don’t support multi-monitor workflows, an ultra-wide monitor may be a better alternative.
Before purchasing any equipment, assess your needs, check your computer’s specifications, and invest in high-quality cables and adapters. Take the time to configure your displays properly, experiment with different arrangements, and optimize your settings for readability and comfort. With the right setup, a dual-monitor workstation can transform the way you work, making you more efficient, organized, and less stressed.
Ready to upgrade your workspace? Start by selecting the right monitors and cables, then follow our step-by-step guide to configure your system. Whether you’re using Windows or macOS, the process is straightforward once you know what to do. Embrace the power of dual monitors and unlock a new level of productivity today!