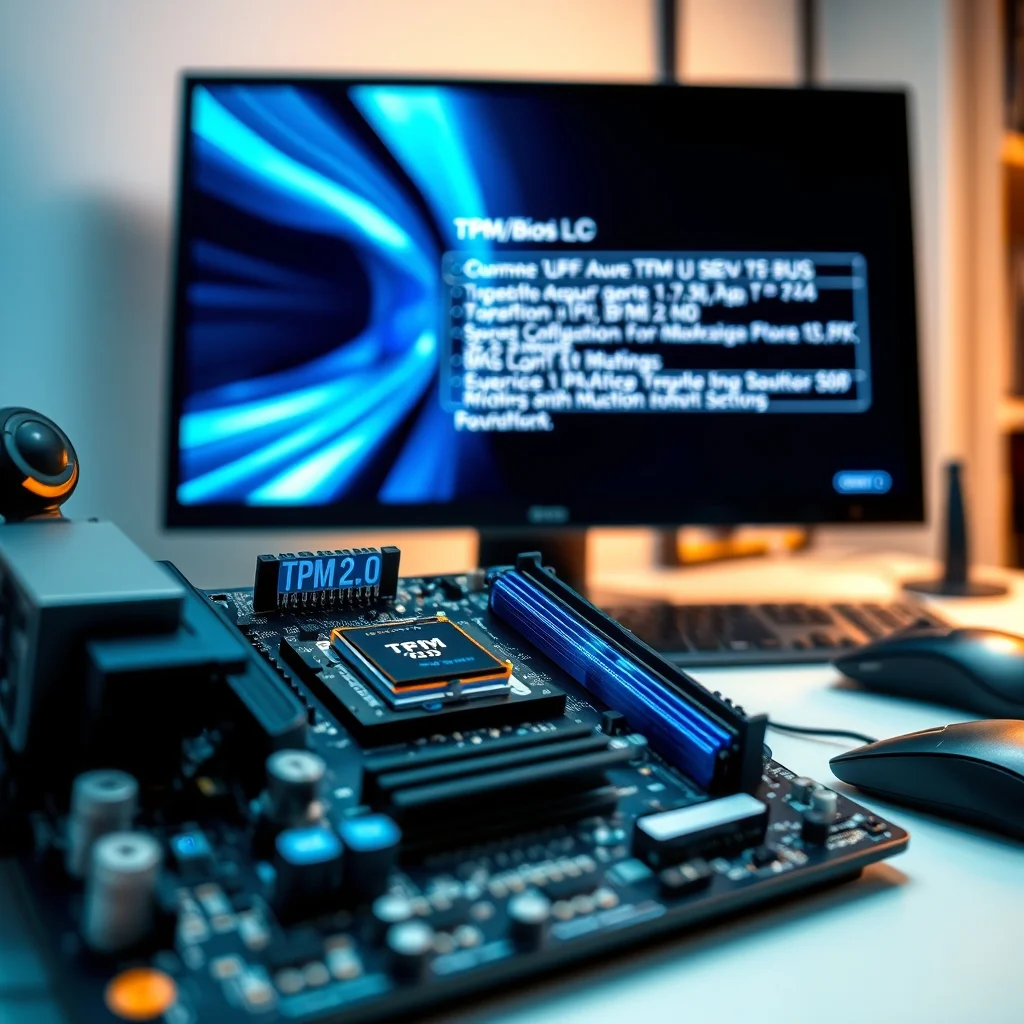
Upgrading to Windows 11 requires Trusted Platform Module (TPM) 2.0 as a mandatory security and compatibility checkpoint. This module ensures your system can support advanced encryption, secure boot, and other critical security features that Windows 11 relies on. If you’ve encountered the error “This PC can’t run Windows 11” or “TPM 2.0 is required”, it means your system either lacks TPM 2.0 support or it’s disabled in BIOS/UEFI. This comprehensive guide walks you through every step required to enable and configure TPM 2.0 on your motherboard, regardless of brand—whether you’re using ASUS, MSI, Gigabyte, ASRock, or any other manufacturer.
📰 Why TPM 2.0 is Crucial for Windows 11
Windows 11 represents a significant leap in security architecture compared to Windows 10. At the heart of this evolution lies Trusted Platform Module (TPM) 2.0, a dedicated microchip embedded in your motherboard or integrated into your CPU. Its primary role is to provide hardware-based security functions. When enabled, TPM 2.0 performs several critical tasks:
- Secure Boot: Ensures only authenticated operating systems can load during startup, preventing malware from hijacking the boot process.
- BitLocker Encryption: Enables full-disk encryption with keys stored in TPM, making data inaccessible if the hard drive is removed or stolen.
- Windows Hello: Enhances biometric authentication (facial recognition, fingerprint) by securely storing biometric data on the TPM chip.
- Device Encryption: Automatically encrypts system drives, protecting sensitive data from unauthorized access.
- Virtualization-Based Security (VBS): Uses hardware virtualization to isolate operating system components, protecting against kernel-level exploits.
Without TPM 2.0, Windows 11 will refuse to install, even if your CPU technically supports it. Microsoft made this requirement non-negotiable to combat rising cyber threats and ensure a baseline level of security for all users. Older systems that shipped with TPM 1.2 can often be upgraded to TPM 2.0 via firmware updates, while newer systems may have it integrated directly into the CPU.
🔍 Determining Your TPM Status: A Quick Check
Before diving into BIOS settings, you should verify whether your system already has TPM enabled and whether it meets the 2.0 requirement. This takes less than a minute and can save you from unnecessary configuration steps.
📊 Checking TPM Status in Windows
You can check your TPM status directly from Windows without rebooting into BIOS:
- Press Windows + R to open the Run dialog.
- Type tpm.msc and press Enter.
- This opens the Trusted Platform Module (TPM) Management console.
- Look for the TPM Manufacturer Information section.
- Check the Specification Version. It should read 2.0.
- If it shows 1.2, you may need to update your firmware or enable TPM 2.0.
Additionally, open Command Prompt as Administrator and run:
Get-TpmThis PowerShell command outputs detailed TPM information, including its version and readiness status. If the TpmPresent field returns True, TPM is physically present. The TpmReady field should also be True for Windows 11 compatibility.
🖥️ Checking TPM in BIOS/UEFI
If you cannot access Windows or prefer to check directly in BIOS:
- Restart your computer.
- Press the BIOS/UEFI key (commonly Del, F2, F12, F10, or Esc, depending on your manufacturer).
- Navigate to the Security or Advanced tab.
- Look for Trusted Platform Module (TPM) or TPM State.
- Confirm the version and whether it’s enabled (Enabled or Active).
If TPM appears as Disabled or the version is below 2.0, you’ll need to enable or update it through firmware settings or a BIOS update.
🛠️ Step-by-Step: Enabling TPM 2.0 in BIOS/UEFI
Each motherboard brand has a slightly different BIOS interface, but the core steps remain consistent. Below, we walk through enabling TPM on the most popular motherboard manufacturers: ASUS, MSI, Gigabyte, and ASRock. If you’re using a different brand, the process will be similar—look for “TPM”, “PTT” (Intel Platform Trust Technology), or “AMD fTPM”.
🔧 Enabling TPM on ASUS Motherboards
ASUS motherboards often label TPM settings under Advanced > Trusted Computing or Security > TPM Configuration.
- Enter BIOS: Restart your PC and press Del or F2 during startup.
- Navigate to Advanced: Use arrow keys to go to the Advanced tab.
- Access Trusted Computing: Look for Trusted Computing or TPM Configuration.
- Enable TPM 2.0:
- Set TPM State to Enabled.
- Change TPM Version to 2.0.
- Save and Exit: Press F10, confirm changes, and reboot.
Some ASUS boards label Intel TPM as PTT or AMD TPM as AMD fTPM. Enable the appropriate version based on your CPU.
🔧 Enabling TPM on MSI Motherboards
MSI motherboards typically group TPM settings under Settings > Advanced > Trusted Computing.
- Access BIOS: Restart and press Del during POST.
- Go to Settings: Navigate to the Settings tab.
- Advanced Settings: Select Advanced.
- Trusted Computing: Find Trusted Computing or TPM Device Selection.
- Set TPM Device to Firmware TPM (fTPM).
- Set TPM State to Enabled.
- Set TPM Version: Under TPM Version, select 2.0.
- Save and Reboot: Press F10, confirm, and restart.
MSI boards often support both fTPM (firmware-based) and PTT (Intel-based). Choose based on your CPU architecture.
🔧 Enabling TPM on Gigabyte Motherboards
Gigabyte motherboards organize TPM settings under BIOS Features > Trusted Computing or Security > TPM Configuration.
- Boot into BIOS: Press Del upon startup.
- BIOS Features Tab: Navigate to BIOS Features.
- Trusted Computing: Select Trusted Computing.
- Enable Security Device Support.
- Set TPM Device to Firmware TPM.
- TPM Version: Choose 2.0 under TPM Version.
- Save and Exit: Press F10, confirm, and reboot.
Gigabyte boards often use “Security Device Support” to enable TPM. Ensure this is set to Enabled.
🔧 Enabling TPM on ASRock Motherboards
ASRock boards typically place TPM settings under Advanced > CPU Configuration or Security > TPM Configuration.
- Enter BIOS: Press F2 or Del during boot.
- Advanced Tab: Go to Advanced.
- CPU Configuration: Select CPU Configuration.
- Look for AMD fTPM switch or Intel PTT.
- Enable the appropriate option.
- Security Tab: Go to Security > TPM Configuration.
- Set TPM State to Enabled.
- Choose TPM Version 2.0.
- Save and Reboot: Press F10, confirm, and restart.
ASRock boards often embed TPM in the CPU firmware. Make sure both the CPU fTPM and BIOS TPM are enabled.
💾 Updating BIOS to Enable TPM 2.0 on Older Systems
If your BIOS doesn’t show TPM 2.0 as an option, your motherboard might need a firmware update. Older motherboards (pre-2018) often shipped with TPM 1.2 and only gained TPM 2.0 support through BIOS updates. This is especially common with Intel 6th and 7th generation CPUs.
🔄 Checking for BIOS Updates
Before updating, verify your motherboard model and current BIOS version:
- Press Windows + R, type msinfo32, and press Enter.
- Look for BaseBoard Manufacturer and BaseBoard Product.
- Go to the manufacturer’s website (ASUS.com, MSI.com, etc.).
- Search for your motherboard model and check the Support > BIOS section.
- Download the latest BIOS version (usually labeled with the model and version, e.g., “B660M-A D4 BIOS 2026”).
Ensure you download the correct BIOS file for your exact motherboard model and revision.
🛠️ Updating BIOS Safely
- Prepare: Charge your laptop or connect your desktop to an uninterruptible power supply (UPS).
- Extract BIOS: Unzip the downloaded BIOS file (usually a .CAP or .ROM file).
- Use Manufacturer Tool:
- ASUS: Use ASUS BIOS Flashback (requires a USB drive and specific button).
- MSI: Use MSI Live Update or BIOS Flash utility.
- Gigabyte: Use @BIOS or Q-Flash.
- ASRock: Use Instant Flash within BIOS.
- Update via BIOS: Enter BIOS, select the update tool (e.g., Q-Flash), and load the BIOS file from a USB drive formatted as FAT32.
- Confirm the update and wait. Do not turn off the system.
- Verify Update: After reboot, re-enter BIOS and confirm the new version is installed.
- Check for TPM 2.0 support in the updated BIOS.
After updating, re-enable TPM 2.0 as previously described. Some updates automatically enable TPM; others require manual activation.
🔥 Enabling Virtualization (VT-x/AMD-V) for Additional Security
Windows 11 requires not only TPM 2.0 but also hardware virtualization (VT-x for Intel CPUs or AMD-V for AMD CPUs) to be enabled. This feature is essential for Virtualization-Based Security (VBS) and Hyper-V, which isolate critical system processes. Without it, Windows 11 may still block installation or disable security features.
🖥️ Checking Virtualization Status
You can check if virtualization is enabled in Windows using the following steps:
- Press Ctrl + Shift + Esc to open Task Manager.
- Go to the Performance tab.
- Look for Virtualization. If it says Enabled, you’re good. If it says Disabled, you need to enable it in BIOS.
- For Intel CPUs, look for Intel Virtualization Technology (VT-x).
- For AMD CPUs, look for AMD-V or SVM Mode.
If virtualization is disabled, proceed to BIOS to enable it.
🔧 Enabling Virtualization in BIOS
The location varies slightly by brand, but it’s usually under Advanced > CPU Configuration or Advanced > CPU Features.
- Restart and Enter BIOS (Del/F2/F12).
- Navigate to Advanced or CPU Configuration.
- Find Virtualization Setting:
- Intel Systems: Look for Intel VT-x or Intel Virtualization Technology.
- AMD Systems: Look for AMD-V, SVM Mode, or AMD-Vi.
- Enable the Setting: Set to Enabled.
- Save and Exit (F10).
After enabling, reboot and check Task Manager again to confirm virtualization is active.
🛡️ Troubleshooting Common TPM 2.0 Errors
Even after enabling TPM 2.0, you might encounter errors during Windows 11 setup. Below are the most common issues and their solutions.
❌ “TPM 2.0 is not detected”
Possible Causes: TPM is disabled, not physically present, or the CPU doesn’t support firmware TPM.
Solutions:
- ✅ Ensure TPM is enabled in BIOS and set to version 2.0.
- ✅ Update BIOS to the latest version.
- ✅ Check if your CPU supports Intel PTT or AMD fTPM (most CPUs from 2018 onward do).
- ✅ If using a discrete TPM module, ensure it’s properly seated on the motherboard header.
- ✅ For laptops, some manufacturers disable TPM by default. Check your vendor’s support site for firmware updates.
❌ “Secure Boot is not supported”
Possible Causes: Secure Boot is disabled or not supported by your BIOS version.
Solutions:
- ✅ Enable Secure Boot in BIOS under Boot > Secure Boot.
- ✅ Set Secure Boot to Standard or Custom, not Setup Mode.
- ✅ If Secure Boot options are missing, update BIOS.
- ✅ For dual-boot systems, ensure your bootloader supports Secure Boot (most Linux distros do with UEFI).
❌ “Your processor isn’t supported” (even with TPM enabled)
Possible Causes: CPU is older than Intel 8th Gen or AMD Ryzen 2000 series.
Solutions:
- ✅ Check Microsoft’s official Windows 11 supported CPU list.
- ✅ Use the Registry bypass trick only as a last resort (not recommended for security reasons).
- Open Registry Editor (regedit).
- Navigate to: Computer[HKEY_LOCAL_MACHINESOFTWAREMicrosoftWindows NTCurrentVersionAppCompatFlagsLayers
- Create a new String Value named after your setup executable (e.g., C:$WINDOWS.~BTSourcesSetupHost.exe).
- Set the value to ~ RUNTIMEPLATFORM.
- ⚠️ Note: This bypasses compatibility checks but does not guarantee system stability or future updates.
❌ TPM disappears after BIOS update
Possible Causes: BIOS reset or incorrect update.
Solutions:
- ✅ Re-enter BIOS and re-enable TPM 2.0.
- ✅ Reset BIOS to default settings and reconfigure TPM.
- In BIOS, load Default Settings or Optimized Defaults.
- Then re-enable TPM.
- ✅ Check if the update removed TPM support (rare; contact manufacturer support).
📈 Performance Impact: Does TPM 2.0 Affect Speed?
Many users wonder whether enabling TPM 2.0 will slow down their system. The answer is nuanced: TPM 2.0 has minimal performance impact on daily use, but it does introduce a slight overhead during boot and encryption operations. Here’s what to expect:
⚙️ Encryption Overhead
When BitLocker is enabled and stores its encryption key in TPM 2.0:
- ✅ Boot time increases by 1-3 seconds due to key validation.
- ✅ CPU usage during encryption/decryption is negligible on modern CPUs.
- ✅ Disk performance remains nearly identical with hardware acceleration.
TPM 2.0 uses dedicated hardware for cryptographic operations, so it doesn’t burden the main CPU significantly. In fact, it often improves security without measurable performance loss.
🔐 Security vs. Performance Trade-off
While TPM 2.0 adds a small overhead, the benefits far outweigh the cost:
- ✅ Protection against cold-boot attacks.
- ✅ Secure storage of biometric data.
- ✅ Prevention of unauthorized OS boot.
- ✅ Compliance with enterprise and government security standards.
For gamers or power users, the impact is negligible. For business users handling sensitive data, TPM 2.0 is essential.
🔐 Security Deep Dive: How TPM 2.0 Protects Your System
TPM 2.0 is not just a checkbox for Windows 11—it’s a robust security platform that creates a chain of trust from hardware to operating system.
🔐 Chain of Trust in Secure Boot
During boot, the following sequence occurs when Secure Boot is enabled with TPM 2.0:
- UEFI Firmware: Verifies the bootloader using cryptographic signatures.
- Bootloader: Loads Windows 11 only if its signature is valid and stored in the TPM’s Secure Boot database.
- Windows Kernel: Uses TPM to validate system integrity before loading drivers.
- TPM Measurement: Records each boot component in the TPM’s Platform Configuration Registers (PCRs).
If any component is altered (e.g., by malware), the PCR values change, and Windows detects a tampering attempt. This prevents rootkits and bootkits from loading.
🔐 BitLocker and TPM: A Match Made in Security
BitLocker uses TPM 2.0 in one of three modes:
| Mode | TPM Role | Recovery Key | Use Case |
|---|---|---|---|
| TPM Only | Stores encryption key | Not required at startup | Home users with low theft risk |
| TPM + PIN | Stores key; requires PIN | Not required unless PIN wrong | Personal devices with moderate risk |
| TPM + USB Key | Stores key; requires USB | Not required unless USB missing | Business laptops |
| TPM + PIN + USB | Stores key; requires both | Required only if both lost | High-security environments |
This multi-factor approach ensures that even if a thief steals your device, they cannot access your data without the recovery key, PIN, or USB.
🔐 Windows Hello and Biometric Security
Windows Hello uses TPM 2.0 to store:
- ✅ Facial recognition templates.
- ✅ Fingerprint data.
- ✅ PIN hashes.
These data are encrypted and sealed to the TPM. This prevents attackers from extracting biometric data even if they gain access to the hard drive. Additionally, Windows Hello requires the TPM to generate and store Elliptic Curve Cryptography (ECC) keys, which are more secure than traditional RSA keys.
💻 System Requirements Checklist for Windows 11
To ensure full compatibility, your system must meet the following minimum and recommended specifications, including TPM 2.0 and virtualization.
✅ Minimum Requirements
These are the absolute minimum specifications set by Microsoft for Windows 11:
| Component | Minimum Specification | TPM/Requirement Status |
|---|---|---|
| Processor | 1 GHz or faster with 2 or more cores on a 64-bit processor | Must support PAE, NX, and SSE2; Intel 8th Gen or AMD Ryzen 2000+ recommended |
| RAM | 4 GB | No TPM requirement, but recommended for performance |
| Storage | 64 GB | No direct TPM requirement |
| System Firmware | UEFI, Secure Boot capable | TPM 2.0 required for Secure Boot |
| TPM | TPM 2.0 | Mandatory |
| Graphics Card | DirectX 12 compatible with WDDM 2.0 driver | No TPM requirement |
| Display | 9” or larger, 720p | No TPM requirement |
Meeting only the minimum requirements may result in poor performance, especially on older hardware. For a smooth experience, aim for the recommended specifications.
⚡ Recommended Specifications for Optimal Performance
These specifications ensure Windows 11 runs smoothly with all security features enabled:
| Component | Recommended | Why It Matters |
|---|---|---|
| Processor | Intel Core i5-8500 / AMD Ryzen 5 2600 or newer | Supports VT-x/AMD-V and TPM 2.0 firmware |
| RAM | 8 GB or more | Supports multiple apps, virtualization, and background processes |
| Storage | 256 GB SSD or larger | Faster boot, better app performance; NVMe recommended |
| TPM | TPM 2.0 enabled in BIOS | Required for Secure Boot, BitLocker, Windows Hello |
| Graphics | Intel UHD Graphics 620 / AMD Radeon Vega 8 or better | Supports modern UI and DirectX 12 |
| Display | Full HD (1080p) or higher | Better readability and app compatibility |
CPU Impact: Modern CPUs (Intel 10th Gen+, AMD Ryzen 3000+) include dedicated security engines that offload TPM operations, improving performance and battery life on laptops.
RAM Impact: With 4 GB, Windows 11 can run but may struggle with multiple apps. 8 GB is ideal for multitasking and virtualization.
Storage Impact: An SSD is mandatory for acceptable performance. NVMe SSDs reduce boot time and improve app launch speeds significantly.
🔄 Transitioning from Windows 10 to Windows 11: Step-by-Step Guide
Once TPM 2.0 and virtualization are enabled, you’re ready to upgrade. Here’s a step-by-step process to transition safely from Windows 10 to Windows 11.
🧩 Before You Start
Ensure you meet all prerequisites:
- ✅ TPM 2.0 enabled and verified in BIOS/Windows.
- ✅ Virtualization (VT-x/AMD-V) enabled.
- ✅ Secure Boot enabled.
- ✅ At least 64 GB free space on your system drive.
- ✅ Backup all important data (recommended regardless).
- ✅ Windows 10 updated to the latest version (22H2).
📥 Download Windows 11 Installation Media
You can upgrade directly from Windows Update or use the Media Creation Tool:
- Go to https://www.microsoft.com/software-download/windows11
- Click Download now under Create Windows 11 installation media.
- Run the Media Creation Tool.
- Select Upgrade this PC now and follow the prompts.
🛠️ Running the Upgrade Assistant
The Windows 11 Setup Assistant will automatically check for TPM 2.0, Secure Boot, and CPU compatibility. If all checks pass, it will begin the upgrade process:
- Launch the setup file (usually Windows11InstallationAssistant.exe).
- Accept the license terms.
- Wait for the assistant to verify compatibility.
- If all checks pass, click Download and install.
- Your system will restart multiple times during the process.
- After installation, sign in and configure Windows 11.
🔄 Clean Install Using USB (Optional)
For a fresh start, create a bootable USB drive and perform a clean install:
- Use the Media Creation Tool to create a bootable USB (at least 8 GB).
- Restart your PC and boot from USB (select USB in boot menu).
- Follow the on-screen prompts.
- When asked for a product key, select I don’t have a product key (Windows 11 will activate automatically if previously activated on this hardware).
- Choose Custom: Install Windows only.
- Delete existing partitions if needed and install on the unallocated space.
- Complete setup and restore data from backup.
This method wipes your system drive, so ensure you’ve backed up everything.
🔍 Frequently Asked Questions About TPM 2.0
- Can I enable TPM 2.0 on a laptop?
Yes. Most modern laptops from 2018 onward include TPM 2.0 embedded in the CPU (Intel PTT or AMD fTPM). You may need to enable it in BIOS or through the manufacturer’s firmware utility (e.g., Lenovo Vantage, Dell SupportAssist).
- What if my motherboard doesn’t have a TPM header?
If your motherboard lacks a physical TPM header (common on micro-ATX and mini-ITX boards), check if your CPU supports firmware TPM (PTT for Intel, fTPM for AMD). If yes, enable it in BIOS. If not, you cannot enable TPM 2.0 without a CPU upgrade.
- Is TPM 2.0 the same as PTT or fTPM?
Yes. PTT (Platform Trust Technology) is Intel’s implementation of firmware-based TPM 2.0. fTPM (Firmware TPM) is AMD’s equivalent. Both provide the same security benefits and are detected as TPM 2.0 by Windows.
- Will enabling TPM 2.0 affect gaming performance?
No. TPM 2.0 operates in the background and has negligible impact on gaming. The only overhead is during boot and when BitLocker is active, which is minimal on modern CPUs.
- Can I disable TPM 2.0 after upgrading to Windows 11?
No. Windows 11 requires TPM 2.0 to be enabled at all times. Disabling it may cause system instability, failed updates, or even prevent booting.
- How do I check if my TPM 2.0 is working correctly?
Open tpm.msc and look for Status: Ready and TPM Manufacturer: your manufacturer. Alternatively, run Get-Tpm in PowerShell. If it returns TpmReady: True, your TPM is functioning.
- What should I do if my BIOS doesn’t show TPM options?
Update your BIOS to the latest version. If the option still doesn’t appear, your CPU or motherboard may not support TPM 2.0. Check with the manufacturer or consider upgrading your hardware.
- Can I use TPM 1.2 with Windows 11?
No. Windows 11 requires TPM 2.0 specifically. TPM 1.2 lacks the cryptographic capabilities required for Secure Boot and BitLocker in Windows 11.
- Is TPM 2.0 mandatory for Windows 10?
No. Windows 10 can run with TPM 1.2 or even without TPM. However, enabling TPM 2.0 improves security and prepares your system for Windows 11.
- What is the difference between TPM 2.0 and TPM 1.2?
TPM 2.0 supports modern cryptographic algorithms (like SHA-256 and ECC), more PCR registers, and improved key hierarchy. TPM 1.2 uses outdated algorithms (SHA-1) and has limited functionality. TPM 2.0 is required for Secure Boot in UEFI mode and modern encryption standards.
🏁 Final Thoughts: Should You Enable TPM 2.0?
Enabling TPM 2.0 is not just a requirement for Windows 11—it’s a critical security upgrade that protects your system from modern threats. Whether you’re upgrading an old PC, building a new one, or simply preparing for the future, TPM 2.0 should be a priority.
By following this guide, you’ve learned how to:
- ✅ Check and verify TPM 2.0 status.
- ✅ Enable TPM 2.0 in BIOS across all major motherboard brands.
- ✅ Update BIOS to gain TPM 2.0 support on older systems.
- ✅ Enable virtualization for full compatibility.
- ✅ Troubleshoot common TPM errors.
- ✅ Understand the security benefits of TPM 2.0.
- ✅ Prepare your system for a smooth Windows 11 upgrade.
Once enabled, TPM 2.0 works silently in the background, enhancing your security without affecting performance. It’s a small step that yields significant dividends in protection against data theft, malware, and unauthorized access.
Don’t wait until you’re forced to upgrade. Take control of your system’s security today by enabling TPM 2.0. Your data—and your peace of mind—will thank you.
Ready to make the jump to Windows 11? Start by checking your TPM status right now. If everything checks out, you’re one step closer to a more secure, modern computing experience.