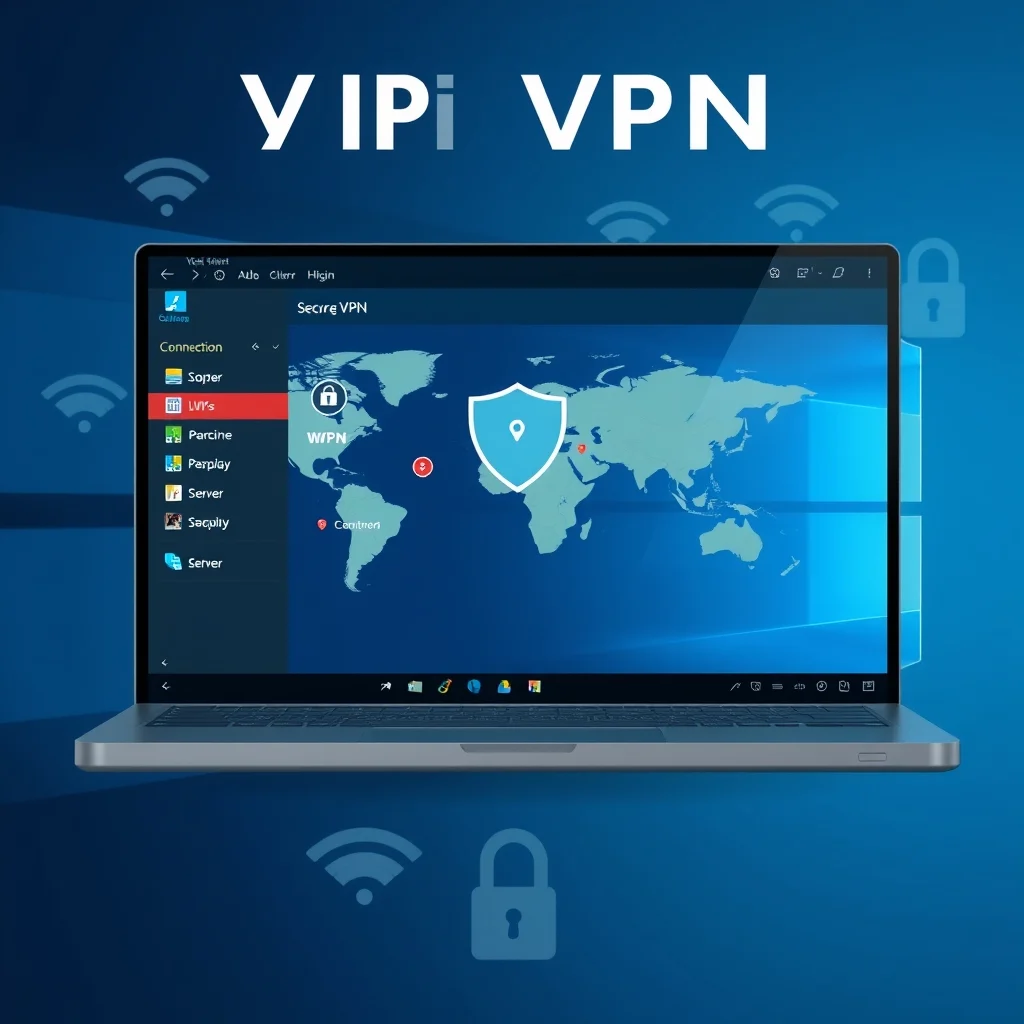

In today’s digital age, online privacy and security have become paramount concerns for users worldwide. With cyber threats, data breaches, and invasive tracking on the rise, safeguarding your internet activity is no longer optional—it’s a necessity. Windows 11, Microsoft’s latest operating system, offers robust features to enhance your online safety, and one of the most effective tools for this purpose is a Virtual Private Network (VPN). A VPN encrypts your internet connection, masks your IP address, and ensures your data remains private even on unsecured networks.
Whether you’re working remotely, accessing public Wi-Fi, or simply browsing the web, configuring a VPN on Windows 11 can provide an additional layer of security and anonymity. This comprehensive guide will walk you through the entire process—from selecting the right VPN provider to configuring it on your Windows 11 device for optimal performance. By the end of this tutorial, you’ll be able to set up a VPN confidently, troubleshoot common issues, and maximize its benefits for secure browsing.
📌 Why Use a VPN on Windows 11?
A VPN serves multiple critical functions that enhance your online experience. First and foremost, it encrypts your internet traffic, making it nearly impossible for hackers, ISPs, or government agencies to monitor your activities. This encryption ensures that sensitive information such as passwords, credit card details, and personal messages remain secure from prying eyes.
Additionally, a VPN allows you to bypass geographical restrictions and access content that may be blocked in your region. Whether you want to stream your favorite shows on a platform only available in another country or access company resources while traveling, a VPN can help you connect to servers in different locations, effectively changing your virtual location.
Another significant advantage of using a VPN is anonymity. When you connect to a VPN server, your real IP address is masked, and you are assigned a temporary IP address from the VPN provider’s server location. This makes it difficult for websites, advertisers, or third parties to track your online behavior or build a profile about you based on your browsing habits.
Lastly, using a VPN on public Wi-Fi networks, such as those in coffee shops, airports, or hotels, is crucial. Public networks are often unsecured, making them prime targets for cybercriminals looking to intercept data. A VPN encrypts your connection, protecting you from potential attacks such as man-in-the-middle exploits or Wi-Fi spoofing.
🔍 How VPNs Work: A Technical Overview
To fully appreciate the benefits of a VPN, it’s essential to understand how it operates at a technical level. At its core, a VPN creates a secure tunnel between your device and a remote server operated by the VPN provider. This tunnel uses advanced encryption protocols to scramble your data, rendering it unreadable to anyone who might intercept it.
The process begins when you initiate a connection to a VPN server. Your device first authenticates with the server using cryptographic keys, ensuring only authorized users can access the network. Once authenticated, your device and the VPN server establish an encrypted connection using protocols such as OpenVPN, WireGuard, IKEv2/IPsec, or L2TP/IPsec. These protocols differ in speed, security, and compatibility, and the choice often depends on your specific needs and device capabilities.
After the encrypted tunnel is established, all your internet traffic is routed through this secure channel. This means that even if someone intercepts the data packets traveling between your device and the VPN server, they will only see encrypted gibberish rather than your actual online activities. The VPN server then decrypts your traffic and forwards it to its intended destination on the internet. When the response is sent back, it travels through the VPN tunnel again before reaching your device, ensuring end-to-end encryption.
In addition to encryption, VPNs also use tunneling protocols to encapsulate and transmit data securely. For example, OpenVPN uses SSL/TLS protocols to provide both encryption and authentication, while WireGuard employs state-of-the-art cryptography for faster and more efficient connections. Understanding these technical aspects can help you choose the right VPN protocol for your needs, balancing between security, speed, and compatibility.
📌 Types of VPNs
- ✅ Remote Access VPN: This type allows individual users to connect to a private network securely over the internet. It’s the most common type for personal use and is what we will focus on in this guide.
- 🔄 Site-to-Site VPN: Used primarily by organizations to connect entire networks, such as linking multiple office locations.
- 🌐 Mobile VPN: Designed for mobile devices, ensuring secure connections even when switching between networks.
📌 Common VPN Protocols and Their Uses
| Protocol | Security Level | Speed | Compatibility | Best For |
|---|---|---|---|---|
| OpenVPN | High | Moderate | Wide (Windows, macOS, Linux, mobile) | Balanced security and speed |
| WireGuard | Very High | Very Fast | Modern systems (Windows 10/11, Linux, macOS) | Gaming, streaming, high-speed needs |
| IKEv2/IPsec | High | Fast | Windows, macOS, iOS, Android | Mobile users, quick reconnections |
| L2TP/IPsec | Moderate | Moderate | All major platforms | Legacy systems, basic security |
Selecting the right protocol depends on your priorities. If maximum speed and modern security are your goals, WireGuard is an excellent choice. For broader compatibility and robust security, OpenVPN remains a reliable option. IKEv2/IPsec is ideal for mobile users due to its ability to quickly reconnect when switching networks, such as moving from Wi-Fi to mobile data.
🛠️ Choosing the Right VPN Provider
Selecting a VPN provider is a critical step in ensuring your online privacy and security. Not all VPN services are created equal, and choosing the wrong one can lead to poor performance, security vulnerabilities, or even data leaks. Here’s a detailed guide to help you evaluate and select the best VPN provider for your Windows 11 device.
📌 Key Factors to Consider
- ✅ Privacy Policy: Look for a strict no-logs policy. This means the VPN provider does not store records of your browsing history, IP addresses, or connection timestamps. Providers like ProtonVPN and Mullvad are renowned for their commitment to privacy.
- 🔒 Encryption Standards: Ensure the VPN uses strong encryption protocols such as AES-256, which is considered military-grade encryption. Additionally, check if the provider supports modern protocols like WireGuard or OpenVPN.
- 🌍 Server Locations: A good VPN provider offers servers in multiple countries to help you bypass geo-restrictions and access content from different regions. More server locations generally mean better performance and more options for location spoofing.
- 📡 Connection Speed: VPNs can slow down your internet speed due to the encryption process. Look for providers that offer high-speed servers and have minimal impact on your bandwidth. Speed tests and user reviews can provide insights into a provider’s performance.
- 📱 Device Compatibility: Ensure the VPN provider supports Windows 11 and offers dedicated apps for your devices. Some providers also offer browser extensions, which can be useful for quick and easy access.
- 💰 Pricing and Plans: Compare the pricing plans of different providers. While free VPNs might seem attractive, they often come with limitations such as data caps, slower speeds, or fewer server options. Paid VPNs typically offer better performance, more features, and stronger privacy guarantees.
- 🔄 Kill Switch: A kill switch automatically disconnects your internet if the VPN connection drops, preventing your data from being exposed. This feature is crucial for maintaining privacy, especially when using public Wi-Fi.
- 🌐 DNS Leak Protection: DNS leaks can expose your browsing activity even when using a VPN. Choose a provider that offers built-in DNS leak protection to ensure your DNS requests are routed through the VPN tunnel.
📌 Top VPN Providers for Windows 11
| Provider | Best For | Key Features | Pricing |
|---|---|---|---|
| NordVPN | Privacy and security | Double VPN, Onion over VPN, CyberSec | From $3.79/month |
| ExpressVPN | Speed and streaming | Lightway protocol, 3000+ servers, 24/7 support | From $8.32/month |
| Surfshark | Budget-friendly | Unlimited devices, CleanWeb, Whitelister | From $2.49/month |
| ProtonVPN | Privacy-focused | Swiss-based, no-logs policy, Secure Core servers | Free plan available, from $4.99/month |
| Private Internet Access (PIA) | Customization | Open-source apps, port forwarding, MACE ad-blocker | From $2.03/month |
Each of these providers has its strengths, and the best choice depends on your specific needs. For example, if you prioritize speed and streaming, ExpressVPN might be the ideal option due to its proprietary Lightway protocol and vast server network. On the other hand, if privacy and anonymity are your top concerns, providers like ProtonVPN or Mullvad offer strong guarantees and no-logs policies.
📌 Free vs. Paid VPNs
Free VPNs can be tempting, especially for users on a budget. However, they come with several significant drawbacks that can compromise your security and privacy. Many free VPNs:
- ⚠️ Log and sell user data to third parties, defeating the purpose of using a VPN for privacy.
- ⚠️ Have limited server options, which can result in slower speeds and fewer options for bypassing geo-restrictions.
- ⚠️ Impose data caps, restricting the amount of data you can use each month.
- ⚠️ Contain ads or malware that can compromise your device’s security.
While paid VPNs require a financial investment, they provide better security, privacy, and performance. Investing in a reputable VPN provider ensures that your data remains protected and that you receive reliable customer support when needed.
🔧 Step-by-Step Guide to Installing a VPN on Windows 11
Once you’ve selected a VPN provider, the next step is to install and configure the VPN client on your Windows 11 device. The process is straightforward, but following each step carefully ensures a smooth setup. Below, we’ll use NordVPN as an example, but the steps are similar for most VPN providers.
📌 Step 1: Download the VPN Client
-
Open your web browser and navigate to the official website of your chosen VPN provider. For this example, we’ll use NordVPN.
-
Locate the Download section on the website. Most providers offer dedicated download links for Windows 11.
-
Click on the Download for Windows button to start downloading the installer file. The file will typically be named something like NordVPNSetup.exe.
-
Once the download is complete, locate the file in your Downloads folder or the location where your browser saves downloaded files.
📌 Step 2: Install the VPN Client
-
Double-click the downloaded installer file to begin the installation process. You may see a security prompt asking for permission to run the installer. Click Yes to proceed.
-
The installer will launch, and you’ll be prompted to accept the End User License Agreement (EULA). Read the agreement carefully, then click I Agree or Accept to continue.
-
Choose the installation location or leave it as the default. Click Next to proceed.
-
Select any additional options, such as creating a desktop shortcut or launching the app after installation. Click Install to start the installation process.
-
Wait for the installation to complete. This may take a few minutes, depending on your system’s speed.
-
Once the installation is finished, you’ll see a confirmation message. Click Finish to exit the installer.
📌 Step 3: Log In to Your VPN Account
-
After installation, the VPN client will launch automatically. If it doesn’t, locate the VPN app on your desktop or in the Start menu and double-click it to open.
-
You’ll be prompted to log in to your VPN account. Enter the email address and password associated with your VPN subscription. If you haven’t created an account yet, click Sign Up to register for a new account.
-
Once logged in, the VPN app will display the home screen, which typically shows your connection status, available servers, and quick-connect options.
📌 Step 4: Connect to a VPN Server
-
On the home screen of the VPN app, you’ll see a map or a list of available servers. Choose a server location by clicking on it. For example, if you want to appear as if you’re browsing from the United States, select a server located in the US.
-
Alternatively, many VPN apps offer a Quick Connect button, which automatically selects the best server for your location and needs.
-
Click the Connect button to establish a connection to the selected server. The app will display a notification or change the connection status to Connected once the VPN tunnel is active.
-
To verify that your VPN is working, visit a website like WhatIsMyIPAddress.com. Your IP address should now reflect the location of the VPN server you connected to, not your actual location.
📌 Step 5: Configure VPN Settings for Optimal Performance
While the default settings of most VPN clients are sufficient for basic use, optimizing them can enhance your experience, especially for gaming, streaming, or torrenting. Below are some key settings to consider:
- 🌐 Protocol Selection: Navigate to the Settings or Preferences section of your VPN app. Look for an option to change the VPN protocol. As discussed earlier, WireGuard offers the best balance of speed and security for most users, while OpenVPN provides broader compatibility.
- 🛡️ Kill Switch: Enable the kill switch feature to ensure your internet connection is automatically cut off if the VPN disconnects unexpectedly. This prevents your data from being exposed.
- 🌍 Auto-Connect: Enable auto-connect to automatically establish a VPN connection when you start your device or when you connect to an unsecured network, such as public Wi-Fi.
- 🔄 Split Tunneling: This feature allows you to choose which apps or websites use the VPN connection and which bypass it. It’s useful if you want to use the VPN for sensitive activities while keeping other traffic local for better speed.
- 📡 DNS Settings: Ensure DNS leak protection is enabled to prevent your DNS requests from being exposed. Some VPN apps allow you to customize DNS servers for added security.
🔄 Advanced VPN Configuration on Windows 11
While most users will find the VPN client app sufficient for their needs, advanced users may want to configure the VPN manually using Windows 11’s built-in VPN settings. This approach provides more control over the connection and can be useful for troubleshooting or custom setups.
📌 Setting Up a VPN Manually
🔹 Using Windows 11 Built-in VPN Settings
-
Open the Settings app on your Windows 11 device. You can do this by clicking the Start button and selecting the gear icon, or by pressing Windows + I on your keyboard.
-
In the Settings menu, click on Network & Internet.
-
Select the VPN tab from the left-hand menu.
-
Click on the Add VPN button to begin setting up a new VPN connection.
-
You’ll be prompted to enter the following details:
- VPN Provider: Select Windows (built-in) from the dropdown menu.
- Connection Name: Enter a name for your VPN connection, such as “My NordVPN” or “Work VPN.”
- Server Name or Address: Enter the IP address or domain name of the VPN server provided by your VPN service. For example, NordVPN users can find server addresses in their account dashboard.
- VPN Type: Select the VPN protocol used by your provider, such as OpenVPN, WireGuard, or IKEv2.
- Type of Sign-in Info: Choose the authentication method. Most providers use Username and Password, but some may require certificates or pre-shared keys.
- Username and Password: Enter the credentials provided by your VPN service. You can usually find these in your account dashboard or the welcome email from the provider.
-
After entering the details, click Save to store the VPN connection settings.
-
To connect to the VPN, return to the VPN settings in the Settings app, select your VPN connection from the list, and click Connect.
🔹 Using OpenVPN Configuration Files
Some VPN providers offer OpenVPN configuration files, which can be used to set up the VPN manually in Windows 11. This method is particularly useful for users who want to avoid using the provider’s app or need to configure a VPN on a device where the app is not available.
-
Download the OpenVPN configuration files from your VPN provider’s website. These files typically have a .ovpn extension.
-
Install the OpenVPN client for Windows from the official OpenVPN website (https://openvpn.net). Follow the installation steps similar to those for a VPN provider’s app.
-
Copy the downloaded .ovpn configuration files to the OpenVPN configuration directory, typically located at C:Program FilesOpenVPNconfig.
-
Launch the OpenVPN GUI application from the Start menu. You’ll see an icon in the system tray.
-
Right-click the OpenVPN icon and select the configuration file you want to use. Click Connect to establish the VPN connection.
📌 Configuring Split Tunneling in Windows 11
Split tunneling allows you to route specific apps or websites through the VPN while letting other traffic bypass it. This can be useful for optimizing performance or accessing local network resources while still protecting sensitive activities.
-
Open the Settings app and navigate to Network & Internet > VPN.
-
Select your VPN connection from the list and click Advanced Options.
-
Look for an option related to split tunneling, such as Allow VPN to access local network or Split Tunneling. If the option is available, enable it.
-
Some VPN apps may offer more granular control over split tunneling. For example, NordVPN allows you to select specific apps to route through the VPN or bypass it entirely. Check your VPN provider’s documentation for details on configuring split tunneling.
🛡️ Troubleshooting Common VPN Issues on Windows 11
Even with a well-configured VPN, you may encounter issues such as connectivity problems, slow speeds, or connection drops. Below are some common VPN issues and their solutions to help you troubleshoot and resolve them effectively.
📌 VPN Connection Fails to Establish
- 🔹 Check Your Internet Connection: Ensure your device is connected to the internet. A stable connection is required to establish a VPN tunnel.
- 🔹 Verify VPN Credentials: Double-check that you’ve entered the correct username and password. If you’re unsure, try resetting your password or contacting your VPN provider for assistance.
- 🔹 Restart the VPN Client: Close the VPN app completely and reopen it. Sometimes, simply restarting the application can resolve connection issues.
- 🔹 Check VPN Server Status: Visit your VPN provider’s website or check their status page to ensure the server you’re trying to connect to is operational. Servers may occasionally go offline for maintenance.
- 🔹 Disable Firewall Temporarily: Your firewall might be blocking the VPN connection. Temporarily disable your firewall and attempt to connect again. If the VPN works, adjust your firewall settings to allow VPN traffic.
📌 Slow VPN Speeds
- 🔹 Switch Servers: Try connecting to a different server, preferably one closer to your physical location. Servers farther away can result in slower speeds due to increased latency.
- 🔹 Change VPN Protocol: Some protocols are faster than others. For example, WireGuard is known for its speed, while OpenVPN offers better security. Experiment with different protocols to see which works best for you.
- 🔹 Close Background Applications: Other applications running on your device may be consuming bandwidth. Close unnecessary programs to free up resources for your VPN connection.
- 🔹 Restart Your Router: Sometimes, router issues can affect VPN performance. Restarting your router can help resolve connectivity problems.
- 🔹 Check for ISP Throttling: Some ISPs throttle VPN traffic, resulting in slower speeds. Contact your ISP to inquire about VPN throttling policies or consider switching to a provider that offers obfuscated servers to bypass throttling.
📌 VPN Keeps Disconnecting
- 🔹 Enable Kill Switch: Ensure the kill switch feature is enabled in your VPN app. This will automatically disconnect your internet if the VPN connection drops, preventing data leaks.
- 🔹 Check for Network Instability: Unstable network connections can cause frequent VPN disconnections. Try connecting to a different network, such as a wired Ethernet connection instead of Wi-Fi.
- 🔹 Update VPN Software: Outdated VPN software may have bugs that cause disconnections. Ensure your VPN app is up to date by checking for updates in the app’s settings or on the provider’s website.
- 🔹 Disable Power Saving Features: Some devices have power-saving features that may interfere with VPN connections. Disable these features for your network adapter in the Device Manager.
📌 DNS Leaks Detected
- 🔹 Enable DNS Leak Protection: Ensure your VPN app has DNS leak protection enabled. This feature routes your DNS requests through the VPN tunnel, preventing them from being exposed.
- 🔹 Use Third-Party Tools: Tools like DNS Leak Test (https://www.dnsleaktest.com) can help you verify if your VPN is leaking DNS requests. If a leak is detected, contact your VPN provider for support.
- 🔹 Manually Configure DNS: Some VPN apps allow you to manually configure DNS servers. Use a reputable DNS provider like Cloudflare (1.1.1.1) or Google DNS (8.8.8.8) for added security.
🌍 Performance Optimization for VPN on Windows 11
Using a VPN can sometimes impact your internet speed and overall performance, especially if the VPN server is far from your location or if the encryption process consumes significant resources. However, with the right optimizations, you can minimize these effects and enjoy a smooth browsing experience. Below are some tips to optimize your VPN performance on Windows 11.
📌 Choosing the Right Server Location
The physical distance between your device and the VPN server plays a significant role in connection speed. Generally, the closer the server is to your location, the faster your connection will be. Most VPN providers offer servers in multiple countries, so choose one that balances speed and your need for location spoofing.
For example, if you’re located in Europe and want to access a US-based streaming service, connect to a server in the eastern United States. Avoid connecting to servers on the opposite side of the globe unless necessary, as this will introduce significant latency.
📌 Using the Best VPN Protocol for Your Needs
As mentioned earlier, different VPN protocols offer varying levels of speed and security. Experiment with different protocols to find the one that works best for your specific use case:
- ✅ WireGuard: Best for gaming, streaming, and high-speed needs. It offers excellent performance and modern encryption.
- ✅ OpenVPN: Provides a good balance between speed and security. It’s widely compatible and suitable for most users.
- ✅ IKEv2/IPsec: Ideal for mobile users due to its ability to quickly reconnect when switching networks.
- ✅ L2TP/IPsec: Older protocol with moderate speed and security. Use it only if other protocols are not supported.
📌 Enabling Split Tunneling
Split tunneling allows you to route only specific traffic through the VPN while letting other traffic bypass it. This can significantly improve performance for non-sensitive activities. For example, you can route your web browsing and streaming through the VPN while keeping your gaming traffic local to reduce latency.
To enable split tunneling in your VPN app, navigate to the settings and look for an option labeled Split Tunneling or Excluded Apps. Add the apps or websites you want to exclude from the VPN tunnel. Keep in mind that split tunneling may reduce your security, so use it judiciously.
📌 Adjusting MTU Settings
The Maximum Transmission Unit (MTU) is the largest size of a packet that can be transmitted over your network. If the MTU is too large, packets may become fragmented, leading to slower speeds and connection issues. Adjusting the MTU setting can help optimize VPN performance.
-
Open the Command Prompt as an administrator. You can do this by searching for Command Prompt in the Start menu, right-clicking it, and selecting Run as administrator.
-
Type the following command and press Enter:
netsh interface ipv4 show subinterfaces -
Note the MTU value for your network interface. The default value is usually 1500.
-
To test a lower MTU value, use the following command:
ping -f -l [MTU value] [website address]
For example:
ping -f -l 1472 google.com -
If the ping is successful, reduce the MTU value by 10 (e.g., 1472) and test again. Repeat this process until you find the largest MTU value that works without fragmentation. This is your optimal MTU setting for VPN performance.
📌 Disabling IPv6
IPv6 is the latest version of the Internet Protocol, but not all VPN providers or networks fully support it. If your VPN connection is unstable or slow, disabling IPv6 may help improve performance.
-
Open the Settings app and navigate to Network & Internet > Wi-Fi or Ethernet, depending on your connection type.
-
Click on the name of your network connection to open its properties.
-
Scroll down to the IP Settings section and toggle off the IPv6 setting.
-
Restart your device and reconnect to the VPN to see if the performance has improved.
🔐 Security and Privacy Best Practices with VPN
While a VPN provides a significant boost to your online security and privacy, it’s essential to follow best practices to maximize its effectiveness. Below are some key security and privacy tips to keep in mind when using a VPN on Windows 11.
📌 Use Strong, Unique Passwords
Your VPN account password is the first line of defense against unauthorized access. Ensure your password is strong, unique, and not used for any other online accounts. A strong password should be at least 12 characters long and include a mix of uppercase and lowercase letters, numbers, and special characters.
Consider using a password manager like Bitwarden or 1Password to generate and store complex passwords securely. This way, you can maintain strong security practices without the hassle of remembering multiple passwords.
📌 Enable Two-Factor Authentication (2FA)
Two-factor authentication adds an extra layer of security to your VPN account by requiring a second form of verification, such as a code sent to your mobile device or generated by an authenticator app. Enabling 2FA makes it much harder for attackers to gain access to your account, even if they obtain your password.
To enable 2FA, log in to your VPN provider’s account dashboard and navigate to the Security or Two-Factor Authentication section. Follow the instructions to set up 2FA using an app like Google Authenticator or Authy.
📌 Regularly Update Your VPN Software
VPN providers regularly release updates to fix bugs, patch security vulnerabilities, and improve performance. Keeping your VPN software up to date ensures you benefit from the latest enhancements and protections. Most VPN apps offer automatic updates, but it’s a good idea to check for updates manually occasionally.
To update your VPN app on Windows 11, open the app and look for an Update or Check for Updates option in the settings. If an update is available, download and install it immediately.
📌 Avoid Free Wi-Fi Without a VPN
Public Wi-Fi networks, such as those in cafes, airports, or hotels, are notorious for security risks. Hackers can intercept data transmitted over these networks, including passwords, credit card details, and personal messages. Always use a VPN when connecting to public Wi-Fi to encrypt your traffic and protect your data.
If you frequently travel or work remotely, consider using a mobile hotspot instead of public Wi-Fi when possible. Mobile hotspots provide a more secure connection, especially when paired with a VPN.
📌 Be Cautious with Browser Extensions
Some VPN providers offer browser extensions for Chrome, Firefox, or Edge. While these extensions can provide convenient access to VPN features, they may also introduce security risks if not properly vetted. Only use VPN browser extensions from reputable providers, and be cautious about granting permissions to extensions.
Additionally, browser extensions can sometimes conflict with other security tools or settings, leading to unexpected behavior. If you experience issues after installing a VPN browser extension, try disabling it to see if the problem resolves.
📌 Monitor for VPN Leaks
Even with a VPN enabled, it’s possible for your real IP address or DNS requests to leak, exposing your online activities. Regularly test your VPN for leaks using tools like ipleak.net or dnsleaktest.com. If a leak is detected, contact your VPN provider for support or consider switching to a more reliable provider.
💡 Pro Tips for Maximizing VPN Benefits
Beyond the basic setup and configuration, there are several advanced tips and tricks that can help you get the most out of your VPN on Windows 11. These tips can enhance your security, improve performance, and unlock additional features offered by your VPN provider.
📌 Use Obfuscated Servers for Bypassing Censorship
In countries with strict internet censorship, such as China or Iran, standard VPN connections may be blocked by ISPs or government firewalls. Obfuscated servers disguise VPN traffic as regular HTTPS traffic, making it harder to detect and block. Many VPN providers, including NordVPN and ExpressVPN, offer obfuscated servers specifically for this purpose.
To use obfuscated servers, connect to a server labeled as obfuscated or stealth in your VPN app. These servers are slightly slower due to the additional encryption, but they provide a reliable way to bypass censorship and access the open internet.
📌 Enable Multi-Hop VPN for Enhanced Privacy
A multi-hop VPN routes your traffic through multiple servers in different locations before reaching its final destination. This adds an extra layer of security and anonymity, as your data is encrypted and re-encrypted multiple times. While multi-hop VPNs can slightly reduce speed, they are ideal for users who prioritize privacy above all else.
For example, NordVPN offers a feature called Double VPN, which routes your traffic through two servers. To enable this, select a server with Double VPN or Multi-Hop enabled in your VPN app.
📌 Use Onion Over VPN for Maximum Anonymity
The Onion Router (Tor) is a network that provides anonymity by routing internet traffic through multiple volunteer-operated servers. Combining Tor with a VPN offers an additional layer of privacy and security. Some VPN providers, like NordVPN, offer an Onion Over VPN feature that routes your traffic through the Tor network before reaching the internet.
To use Onion Over VPN, select a server labeled Onion Over VPN in your VPN app. This feature is particularly useful for users who need to access the dark web or want to ensure complete anonymity while browsing.
📌 Set Up Port Forwarding for Specific Use Cases
Port forwarding allows external devices to access services running on your local network by forwarding specific ports through the VPN tunnel. This feature is useful for users who want to host game servers, file-sharing services, or remote desktop applications securely.
Port forwarding is typically configured through your VPN provider’s account dashboard or by contacting their customer support. Keep in mind that enabling port forwarding may reduce your security, so only use it when necessary and configure your firewall and router settings accordingly.
📌 Use VPN for Streaming Region-Locked Content
One of the most popular uses for VPNs is accessing region-locked content on streaming platforms like Netflix, Hulu, or BBC iPlayer. By connecting to a server in the desired country, you can bypass geo-restrictions and enjoy your favorite shows and movies.
However, streaming platforms are increasingly cracking down on VPN users. To avoid detection, use a VPN provider with a large server network and regularly update your IP address. Additionally, clear your browser cache and cookies after connecting to a VPN server to prevent the platform from identifying your real location.
❓ Frequently Asked Questions (FAQ)
- Is using a VPN legal?
Using a VPN is legal in most countries, including the United States, Canada, and most of Europe. However, some countries, such as China, Iran, and North Korea, restrict or ban the use of VPNs. Always check the local laws and regulations regarding VPN usage in your country before setting up a VPN.
- Does a VPN slow down my internet connection?
A VPN can impact your internet speed due to the encryption process and the additional distance your data travels to reach the VPN server. However, the impact varies depending on the VPN provider, server location, and protocol used. Modern VPNs like WireGuard offer minimal speed reduction, while older protocols like PPTP can significantly slow down your connection.
- Can I use a free VPN?
While free VPNs are available, they often come with significant drawbacks, such as data caps, slower speeds, fewer server options, and potential security risks. Many free VPNs log and sell user data to third parties, defeating the purpose of using a VPN for privacy. For reliable and secure browsing, it’s recommended to invest in a reputable paid VPN provider.
- How do I know if my VPN is working?
To verify that your VPN is working correctly, visit a website like WhatIsMyIPAddress.com or ipleak.net. These sites will display your IP address and check for leaks. If your IP address matches the location of your VPN server and no leaks are detected, your VPN is functioning properly.
- Can I use a VPN on all my devices?
Most VPN providers offer apps for multiple platforms, including Windows, macOS, Linux, Android, and iOS. Some providers also offer browser extensions for Chrome, Firefox, and Edge. Check your VPN provider’s website to see which devices and platforms are supported.
- What is a kill switch, and do I need one?
A kill switch is a feature that automatically disconnects your internet if the VPN connection drops unexpectedly. This prevents your data from being exposed to your ISP or potential hackers. A kill switch is highly recommended, especially when using public Wi-Fi or accessing sensitive information.
- Can a VPN be hacked?
While no system is entirely immune to hacking, reputable VPN providers use strong encryption and security protocols to protect their servers and user data. The risk of a VPN being hacked is minimal, especially if you choose a provider with a no-logs policy and a proven track record of security. However, always ensure your VPN software is up to date to benefit from the latest security patches.
- Do I need a VPN if I have antivirus software?
Yes, a VPN and antivirus software serve different purposes. Antivirus software protects your device from malware and viruses, while a VPN encrypts your internet traffic and masks your IP address. Using both together provides comprehensive protection against a wider range of threats.
- Can I use a VPN for torrenting?
Yes, a VPN is highly recommended for torrenting to protect your privacy and avoid legal issues. When torrenting, your IP address is visible to other users in the swarm, which can expose you to copyright trolls or law enforcement. A VPN hides your real IP address and encrypts your traffic, making it much harder to trace your activities back to you.
- What should I do if my VPN stops working?
If your VPN stops working, start by checking your internet connection and ensuring the VPN software is up to date. Try connecting to a different server or restarting the VPN app. If the issue persists, check for known outages on your VPN provider’s status page or contact their customer support for assistance. You can also try switching to a different VPN protocol or temporarily disabling your firewall to see if that resolves the issue.
🏁 Final Verdict: Should You Use a VPN on Windows 11?
In an era where online privacy and security are constantly under threat, using a VPN on Windows 11 is not just a luxury—it’s a necessity. Whether you’re browsing the web, accessing public Wi-Fi, streaming content, or conducting sensitive work, a VPN provides an essential layer of protection that safeguards your data from prying eyes.
Throughout this guide, we’ve explored the technical aspects of VPNs, including how they work, the different protocols available, and the factors to consider when choosing a provider. We’ve also walked through the step-by-step process of installing and configuring a VPN on Windows 11, from selecting the right provider to optimizing performance and troubleshooting common issues.
For most users, the benefits of using a VPN far outweigh the minor inconveniences, such as slightly slower speeds or occasional connection drops. The peace of mind that comes from knowing your online activities are private and secure is invaluable. Additionally, VPNs offer practical advantages like accessing geo-restricted content, bypassing censorship, and protecting against cyber threats.
However, not all VPNs are created equal. It’s crucial to choose a reputable provider with a strong privacy policy, robust encryption, and reliable performance. Avoid free VPNs due to their inherent risks, and opt for a paid service that aligns with your needs and budget. With the right VPN, you can enjoy a safer, more private, and unrestricted internet experience on Windows 11.
If you haven’t already, now is the time to take control of your online privacy. Follow the steps outlined in this guide to set up a VPN on your Windows 11 device and start browsing with confidence. Whether you’re a casual user, a remote worker, or a privacy-conscious individual, a VPN is an indispensable tool for navigating the digital world securely.
Take action today: Choose a VPN provider, install the client, connect to a server, and experience the difference a VPN can make in your online life. Your digital safety and privacy are worth the investment.