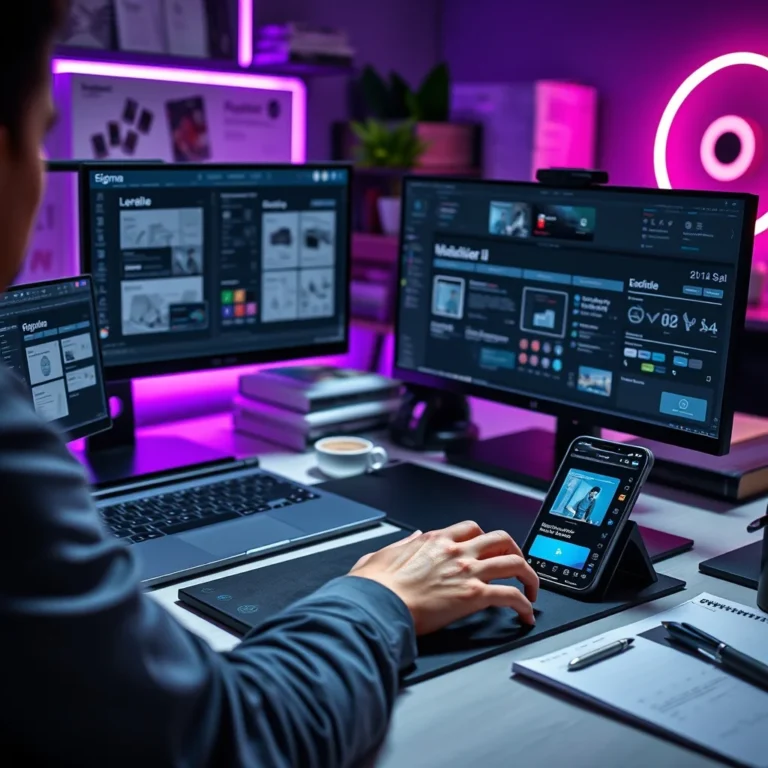
Photo editing is no longer the exclusive domain of professionals with expensive software like Adobe Photoshop. Thanks to free, browser-based tools like Pixlr, anyone can elevate their images to near-professional quality with just a few clicks. Whether you’re a graphic designer, social media manager, or a hobbyist photographer, Pixlr offers a robust suite of tools that rival paid software in both functionality and user experience.
In this comprehensive guide, we’ll walk you through Pixlr’s advanced features, including layers, masks, filters, retouching techniques, and color correction. You’ll learn how to transform ordinary photos into stunning visuals without needing a high-end computer or expensive subscriptions. By the end, you’ll have the skills to edit like a pro, all while saving time and money.
📰 Why Choose Pixlr Over Photoshop?
Adobe Photoshop is the gold standard in photo editing, but it comes with a steep learning curve and a hefty price tag. Pixlr, on the other hand, offers a compelling alternative for users who want professional-grade results without the complexity or cost. Here’s why Pixlr stands out:
💡 Pixlr is completely free to use in its web-based version, with an optional premium subscription for advanced features. Unlike Photoshop, there’s no need to download bulky software or worry about system requirements.
- ✅ User-friendly interface that mimics Photoshop, making it easy for beginners to transition.
- 🎯 No installation required – access Pixlr directly from your browser on any device.
- ⚠️ Faster performance since it runs on cloud servers rather than your computer.
Pixlr is ideal for quick edits, batch processing, and creative projects where time and budget are constraints. Whether you’re editing photos for a blog, social media, or personal use, Pixlr provides the tools you need without overwhelming you with unnecessary complexity.
📊 Key Features That Make Pixlr a Powerhouse
Pixlr isn’t just a simplified version of Photoshop—it’s a feature-rich editor with tools designed for both beginners and seasoned professionals. Here are the standout features that set it apart:
- Layer-based editing: Work with multiple layers to create complex compositions and non-destructive adjustments.
- Advanced selection tools: Use the lasso, magic wand, and quick selection tools to isolate and edit specific areas of your image.
- Real-time filters and effects: Apply artistic filters, blur effects, and distortions with just a few clicks.
- Color correction tools: Adjust brightness, contrast, saturation, and hues to achieve the perfect look.
- Retouching tools: Remove blemishes, whiten teeth, and smooth skin with the clone stamp, healing brush, and dodge/burn tools.
- Text and vector tools: Add custom text, shapes, and vector graphics to your designs.
- Batch processing: Edit multiple images at once, saving hours of repetitive work.
The versatility of Pixlr makes it suitable for a wide range of projects, from photo retouching and digital art to graphic design and social media content creation. Whether you’re a freelancer, small business owner, or creative enthusiast, Pixlr provides the tools you need to bring your vision to life.
🔹 Getting Started with Pixlr: A Step-by-Step Overview
Before diving into advanced techniques, it’s essential to understand how to navigate Pixlr’s interface and access its core features. This section will guide you through setting up your workspace, importing images, and familiarizing yourself with the essential tools.
🛠️ Setting Up Your Pixlr Workspace
Pixlr offers two main versions: Pixlr X (a simplified, AI-assisted editor) and Pixlr E (a full-featured editor similar to Photoshop). For professional photo editing, we recommend using Pixlr E, as it provides the most comprehensive toolset. Here’s how to get started:
💡 Pixlr E vs. Pixlr X: Pixlr E is the advanced editor with layers, masks, and extensive tool options. Pixlr X is designed for quick edits and beginners. For this guide, we’ll focus on Pixlr E.
📌 Step 1: Accessing Pixlr E
Pixlr E is accessible directly from your browser. Follow these steps to launch it:
- Open your preferred browser (Chrome, Firefox, Edge, or Safari).
- Navigate to the Pixlr website: Go to pixlr.com.
- Select Pixlr E: Click on the “Pixlr E” option from the homepage to launch the advanced editor.
- Choose your project type: You can start a new project, open an existing image from your device, or import from cloud storage (Google Drive, Dropbox).
Pixlr E will load in a new tab, presenting you with a clean, Photoshop-like interface. The toolbar on the left contains essential tools, while the top menu bar offers access to layers, adjustments, filters, and more.
📌 Step 2: Importing and Managing Images
Once Pixlr E is open, you can import images in several ways:
- Upload from device: Click “File” > “Open Image” and select the file from your computer.
- Import from cloud storage: Click “File” > “Open from Cloud” and choose Google Drive or Dropbox.
- Paste an image: If you’ve copied an image to your clipboard, Pixlr E allows you to paste it directly into the editor.
After importing, Pixlr E will display the image in the main workspace. You can zoom in/out using the scroll wheel or the zoom tool in the toolbar. To move around the image, click and drag the canvas or use the hand tool.
📌 Step 3: Understanding the Pixlr E Interface
The Pixlr E interface is designed to be intuitive, with tools organized into logical groups. Here’s a breakdown of the key components:
- Toolbar (Left Side): Contains tools for selection, painting, retouching, and navigation. Hover over any tool to see a tooltip explaining its function.
- Menu Bar (Top): Provides access to file operations, layers, adjustments, filters, and more. The “Image,” “Layer,” and “Adjustment” menus are essential for professional editing.
- Layers Panel (Right Side): Displays all layers in your project. You can add, delete, duplicate, and rearrange layers here.
- Properties Panel (Right Side): Shows settings for the currently selected tool or layer, such as brush size, color, and opacity.
- History Panel (Right Side): Tracks your actions, allowing you to undo or redo changes.
Familiarizing yourself with these panels will significantly improve your workflow and make editing more efficient.
🎯 Mastering Layers and Masks in Pixlr
Layers and masks are the backbone of professional photo editing. They allow you to work non-destructively, meaning you can make changes without permanently altering your original image. This section will teach you how to use layers and masks to create complex edits with precision.
📌 What Are Layers in Pixlr?
Layers in Pixlr function similarly to transparent sheets stacked on top of each other. Each layer can contain different elements of your image, such as the background, text, or adjustments. Working with layers gives you the flexibility to edit specific parts of your image without affecting the rest.
For example, if you want to add text to a photo, you can place the text on a separate layer above the image. This way, you can easily move, resize, or delete the text without touching the underlying photo.
💡 Non-destructive editing: Layers allow you to experiment with different effects and adjustments without permanently altering your original image. This is especially useful when trying out new styles or techniques.
📌 Creating and Managing Layers
Pixlr makes it easy to create and manage layers. Here’s how to work with them:
🛠️ Step-by-Step: Adding and Organizing Layers
- Open an image in Pixlr E.
- Add a new layer: Click the “Layer” menu > “New Layer” or press Ctrl+Shift+N (Windows) or Cmd+Shift+N (Mac).
- Choose a layer type: Select from options like “Normal,” “Background,” “Text,” or “Adjustment.”
- Name your layer: In the Layers panel, click on the layer name to rename it. This helps keep your project organized.
- Reorder layers: Drag layers up or down in the Layers panel to change their stacking order. The top layer appears in front of lower layers.
- Delete a layer: Select the layer and click the trash can icon in the Layers panel.
Pro tip: Use the opacity slider in the Layers panel to adjust the transparency of a layer. This is useful for blending effects or creating subtle overlays.
📌 What Are Layer Masks?
A layer mask is a grayscale image that controls the visibility of a layer. White areas on the mask reveal the layer, while black areas hide it. Gray areas create a semi-transparent effect. Layer masks are incredibly powerful for selective editing, allowing you to apply effects to specific parts of your image without permanently altering the pixels.
For example, if you want to brighten a subject’s face while keeping the background unchanged, you can use a layer mask to limit the brightness adjustment to the face only.
📌 Creating and Using Layer Masks
Pixlr makes it straightforward to create and edit layer masks. Here’s how to do it:
🛠️ Step-by-Step: Applying a Layer Mask
- Select the layer you want to apply the mask to in the Layers panel.
- Add a layer mask: Click the “Layer” menu > “Add Layer Mask” > “Reveal All.” This creates a white mask, meaning the entire layer is visible.
- Select the brush tool: In the toolbar, choose the brush tool (shortcut: B).
- Set your brush color: Black hides the layer, white reveals it, and gray creates a semi-transparent effect.
- Paint on the mask: Use the brush to paint over the areas you want to hide or reveal. For example, paint black over the background to hide it while keeping the foreground visible.
- Adjust the mask: If you make a mistake, switch the brush color to white to reveal the hidden areas again.
Layer masks are a game-changer for precision editing. They allow you to fine-tune your edits without the limitations of selection tools, making them indispensable for professional work.
🎨 Advanced Editing Techniques: Retouching and Color Correction
Professional photo editing often involves retouching imperfections and adjusting colors to create a polished final image. Pixlr offers a suite of tools to help you achieve this, from removing blemishes to correcting color casts. In this section, we’ll explore the most powerful retouching and color correction techniques.
📌 The Art of Photo Retouching in Pixlr
Retouching is the process of enhancing or altering an image to improve its appearance. Whether you’re editing portraits, product photos, or landscapes, retouching can help you achieve a more polished and professional look. Pixlr provides several tools for retouching, including the clone stamp, healing brush, and spot healing.
📌 Using the Clone Stamp Tool
The clone stamp tool allows you to copy pixels from one part of an image to another, making it ideal for removing small imperfections like dust spots or sensor noise. Here’s how to use it:
🛠️ Step-by-Step: Removing Imperfections with the Clone Stamp
- Select the clone stamp tool from the toolbar (shortcut: S).
- Set the brush size: Adjust the brush size in the Properties panel to match the area you’re editing. For fine details, use a smaller brush; for larger areas, use a bigger brush.
- Set the hardness: A lower hardness value (around 50%) creates a softer edge, blending the copied pixels more naturally.
- Choose a source point: Hold the Alt key (Windows) or Option key (Mac) and click on the area you want to clone from. This sets the source point.
- Paint over the imperfection: Click and drag the brush over the area you want to fix. The pixels from the source point will be copied to the target area.
- Adjust as needed: If the cloned pixels don’t blend well, try a different source point or adjust the brush settings.
Pro tip: For best results, clone from an area that closely matches the texture and color of the imperfection you’re removing.
📌 Healing and Spot Healing Tools
Pixlr’s healing tools are designed to remove blemishes and imperfections more intelligently than the clone stamp. The healing brush and spot healing tools analyze the surrounding pixels and blend the corrections seamlessly.
🛠️ Step-by-Step: Using the Healing Brush
- Select the healing brush from the toolbar (shortcut: J).
- Set the brush size and hardness in the Properties panel.
- Choose a source point: Hold the Alt key (Windows) or Option key (Mac) and click on a clean area near the imperfection to set the source.
- Paint over the blemish: Click and drag the brush over the area you want to fix. Pixlr will blend the pixels from the source point to match the surrounding area.
- Fine-tune the result: If the healing isn’t perfect, adjust the brush size or source point and try again.
The spot healing tool works similarly but automatically selects the source point based on the surrounding pixels. It’s perfect for quick fixes on small imperfections like dust spots or minor skin blemishes.
📌 Whitening Teeth and Smoothing Skin
Portrait retouching often involves enhancing the subject’s features, such as whitening teeth or smoothing skin. Pixlr’s dodge and burn tools, along with the blur tool, can help you achieve a natural-looking enhancement.
🛠️ Step-by-Step: Whitening Teeth
- Add a new adjustment layer: Click the “Adjustment” menu > “Hue/Saturation” or “Color Balance.”
- Select the target adjustment tool: In the Properties panel, click the target adjustment icon (a hand with a slider).
- Click on the teeth: This will isolate the color range of the teeth.
- Adjust the saturation slider: Move the saturation slider to the left to desaturate the yellow tones in the teeth.
- Adjust the lightness slider: Move the lightness slider to the right to brighten the teeth.
- Apply a layer mask: If the effect is too strong, use a layer mask to limit the adjustment to the teeth only.
🛠️ Step-by-Step: Smoothing Skin
- Duplicate the background layer: Right-click the background layer in the Layers panel and select “Duplicate Layer.”
- Apply a slight blur: Go to “Filter” > “Blur” > “Gaussian Blur” and apply a subtle blur (radius: 1-3 pixels).
- Add a layer mask: Click the “Layer” menu > “Add Layer Mask” > “Reveal All.”
- Select the brush tool: Set the brush color to black and reduce the hardness to around 50%.
- Paint over the skin: Carefully paint over the skin areas you want to smooth. Avoid painting over edges like hair or clothing.
- Adjust the opacity: Reduce the opacity of the blurred layer in the Layers panel to blend the effect naturally.
Pro tip: Always keep your edits subtle. Over-retouching can make skin look unnatural and plastic-like.
🎨 Color Correction: Balancing and Enhancing Photos
Color correction is the process of adjusting the colors in an image to achieve a desired look or to correct issues like color casts or white balance problems. Pixlr provides several tools for color correction, including levels, curves, hue/saturation, and color balance.
📌 Understanding Color Correction Basics
Before diving into the tools, it’s essential to understand the basics of color correction:
- White balance: Adjusts the overall color temperature of an image to make whites appear truly white. This is crucial for correcting color casts caused by different lighting conditions.
- Exposure: Controls the brightness of the image. Overexposed images lose detail in highlights, while underexposed images appear too dark.
- Contrast: Adjusts the difference between the lightest and darkest areas of the image. Higher contrast makes an image more dramatic, while lower contrast creates a flatter, softer look.
- Saturation: Controls the intensity of colors in the image. Increasing saturation makes colors more vibrant, while decreasing saturation makes them more muted.
Pixlr’s color correction tools allow you to adjust these elements with precision, helping you achieve the perfect look for your image.
📌 Using Levels for Basic Color Correction
The levels tool is one of the most powerful and straightforward ways to adjust the tonal range of an image. It allows you to control the shadows, midtones, and highlights separately, giving you fine-tuned control over the overall contrast and brightness.
🛠️ Step-by-Step: Correcting Colors with Levels
- Open the levels tool: Go to “Adjustment” > “Levels” or press Ctrl+L (Windows) or Cmd+L (Mac).
- Analyze the histogram: The histogram in the levels dialog shows the distribution of tones in your image. If the histogram is skewed to the left, the image is too dark; if it’s skewed to the right, the image is too bright.
- Adjust the input levels: Drag the black point (left slider) to the edge of the histogram’s darkest tones to set the black point. Drag the white point (right slider) to the edge of the histogram’s brightest tones to set the white point. The middle slider adjusts the midtones.
- Preview the changes: Check the “Preview” box to see the adjustments in real-time.
- Apply the changes: Click “OK” to apply the levels adjustment.
Pro tip: Use the eyedropper tools in the levels dialog to set the black, white, and gray points. Click on a neutral gray area in the image to set the gray point for accurate white balance.
📌 Advanced Color Correction with Curves
The curves tool offers even more control than levels, allowing you to adjust the tonal range in specific areas of the image. It’s ideal for fine-tuning contrast and color balance with precision.
🛠️ Step-by-Step: Using Curves for Precise Adjustments
- Open the curves tool: Go to “Adjustment” > “Curves” or press Ctrl+M (Windows) or Cmd+M (Mac).
- Analyze the curve: The curve graph shows the relationship between the input tones (x-axis) and output tones (y-axis). A straight diagonal line indicates no adjustment; deviations from the line represent changes in brightness.
- Add control points: Click on the curve to add a control point. Drag the point up to brighten those tones or down to darken them.
- Create an S-curve: A subtle S-curve increases contrast by darkening the shadows and brightening the highlights while leaving the midtones unchanged.
- Use color channels: In the curves dialog, switch between the RGB channels to adjust individual color channels for white balance or color grading.
- Apply the changes: Click “OK” to apply the curves adjustment.
The curves tool is a favorite among professional editors because it allows for highly targeted adjustments that can transform an image’s mood and tone.
🎨 Creating Digital Art with Pixlr
Pixlr isn’t just for photo editing—it’s also a powerful tool for creating digital art. Whether you’re designing social media graphics, digital illustrations, or abstract compositions, Pixlr’s tools can help you bring your creative vision to life. In this section, we’ll explore how to use Pixlr for digital art creation, from sketching to advanced compositions.
📌 Digital Art Tools in Pixlr
Pixlr provides a range of tools for digital artists, including:
- Brush tools: Customizable brushes for sketching, painting, and texturing.
- Vector tools: Create shapes, lines, and custom paths with precision.
- Text tools: Add and style text for typography-based designs.
- Filters and effects: Apply artistic filters, distortions, and overlays to enhance your artwork.
📌 Sketching and Doodling
Pixlr’s brush tools are perfect for sketching and doodling. Whether you’re creating a rough concept or a detailed illustration, the brush settings allow you to customize the stroke, opacity, and flow to match your style.
🛠️ Step-by-Step: Sketching in Pixlr
- Create a new layer: Click “Layer” > “New Layer” to start sketching on a blank canvas.
- Select the brush tool: Choose a brush from the toolbar (shortcut: B).
- Adjust brush settings: In the Properties panel, set the brush size, hardness, opacity, and flow. For sketching, a soft brush with low opacity works best.
- Start sketching: Use the brush to draw your initial lines. Don’t worry about perfection—sketching is about exploring ideas.
- Refine your sketch: Add details, darken lines, and erase mistakes as you go.
Pro tip: Use a graphics tablet for a more natural drawing experience. Pixlr supports pressure sensitivity, allowing you to control brush opacity and size dynamically.
📌 Painting and Texturing
Pixlr’s brush tools are also excellent for painting and texturing. You can create digital paintings from scratch or add textures to existing images. The key is to experiment with different brushes and settings to achieve the desired effect.
🛠️ Step-by-Step: Painting in Pixlr
- Create a new layer: Start with a blank layer for painting.
- Select a brush: Choose a brush style from the toolbar. Pixlr offers a variety of brushes, including soft round brushes, textured brushes, and watercolor brushes.
- Adjust brush settings: Set the brush size, hardness, opacity, and flow. For painting, a medium-sized brush with moderate opacity works well.
- Choose your colors: Select colors from the color picker in the toolbar. Use the eyedropper tool to sample colors from your image or reference.
- Start painting: Use the brush to apply colors to your canvas. Build up layers of color to create depth and texture.
- Blend and refine: Use blending modes and layer masks to blend colors smoothly and refine your painting.
Pro tip: Use layers to separate different elements of your painting, such as base colors, shadows, and highlights. This makes it easier to edit and refine your artwork.
🚀 Performance Tips for Faster Editing in Pixlr
Pixlr is a powerful tool, but like any software, it performs best when optimized. Whether you’re working on a slow internet connection or a high-resolution image, these performance tips will help you edit faster and more efficiently in Pixlr.
📌 Optimizing Pixlr for Speed
- Use Pixlr E for complex edits: Pixlr E is designed for advanced editing and offers better performance for layered projects. Save Pixlr X for quick, simple edits.
- Close unnecessary tabs and applications: Pixlr runs in your browser, so closing other tabs and applications can free up system resources and improve performance.
- Use a wired internet connection: If you’re working with large files or multiple layers, a wired connection can provide a more stable and faster upload/download speed than Wi-Fi.
- Optimize your browser settings: Disable browser extensions that may slow down performance, such as ad blockers or video streaming tools.
📌 Working with Large Files
High-resolution images and complex compositions can slow down Pixlr, especially if you’re working on a low-powered device. Here’s how to optimize your workflow for large files:
🛠️ Step-by-Step: Optimizing Large Files in Pixlr
- Resize your image: Before uploading, resize large images to the dimensions you need. Pixlr offers a “Resize Image” option in the “Image” menu.
- Use lower resolution for drafts: Work on a lower-resolution version of your image to speed up the editing process. You can always upscale the final result after completing your edits.
- Limit the number of layers: Each layer adds to the file size and slows down performance. Combine layers where possible and use layer masks instead of creating new layers for every adjustment.
- Use adjustment layers: Adjustment layers (like levels or curves) are non-destructive and use less memory than editing pixels directly.
- Save frequently: Use the “Save As” option to create a backup of your project regularly. Pixlr’s auto-save feature may not always work reliably with large files.
Pro tip: If Pixlr becomes too slow, consider using a desktop photo editor like GIMP or Krita for complex projects. These programs offer better performance for local editing.
🔍 Common Mistakes to Avoid in Pixlr
Even experienced editors can make mistakes in Pixlr. Understanding these common pitfalls and how to avoid them will save you time and frustration. Here are some of the most frequent mistakes and how to steer clear of them:
📌 Over-Editing and Losing Original Quality
One of the biggest mistakes in photo editing is over-editing, which can lead to unnatural results and loss of original quality. Here’s how to avoid it:
- Work non-destructively: Use layers, masks, and adjustment layers instead of directly editing pixels. This allows you to tweak your edits without permanently altering the original image.
- Keep edits subtle: Small adjustments often have a more significant impact than drastic changes. For example, a slight increase in contrast can enhance an image more than aggressive adjustments.
- Compare before and after: Use the “Before/After” view in Pixlr to compare your edits with the original. This helps you identify when you’ve gone too far.
⚠️ Warning: Avoid using extreme settings in filters or effects. For example, applying a heavy blur or overly saturated colors can make an image look artificial and unprofessional.
📌 Ignoring Color Profiles and Print Settings
If you’re editing images for print, ignoring color profiles and print settings can lead to disappointing results. Colors on a screen often appear different when printed, especially if your monitor isn’t calibrated.
💡 Pro tip: Always convert your images to the appropriate color profile (such as CMYK for print) before finalizing. Pixlr doesn’t natively support CMYK, but you can use a tool like GIMP to convert the file before printing.
📌 Not Saving in the Right Format
Choosing the wrong file format can degrade your image quality or limit its usability. Here’s what you need to know:
- PNG: Ideal for graphics with text or transparent backgrounds. It supports lossless compression, making it perfect for preserving quality.
- JPEG: Best for photographs and images with complex colors. JPEG uses lossy compression, which can reduce file size but may degrade quality if over-compressed.
- TIFF: A lossless format ideal for professional printing and archival purposes. However, TIFF files are large and not suitable for web use.
- WebP: A modern format that offers better compression than JPEG or PNG. Pixlr supports WebP, making it a great choice for web use.
⚠️ Warning: Avoid saving your edits as JPEG until the final version. JPEG compression can degrade quality with each save, so use PNG or TIFF for intermediate saves.
📊 Frequently Asked Questions About Pixlr
-
Is Pixlr really free, or are there hidden costs?
Pixlr offers a free, web-based version (Pixlr X and Pixlr E) with no hidden costs. However, there’s an optional premium subscription called Pixlr Pro, which unlocks additional features like advanced retouching tools, AI-powered effects, and cloud storage. The free version is fully functional for most editing needs, making it an excellent choice for budget-conscious users.
-
Can I use Pixlr offline?
Pixlr’s web-based versions (Pixlr X and Pixlr E) require an internet connection to function. However, Pixlr also offers a downloadable app called Pixlr Editor for desktop users, which can be used offline. The desktop app is available for Windows and macOS and provides a more stable and faster editing experience. You can download it from Pixlr’s official website.
-
Does Pixlr work on mobile devices?
Yes, Pixlr is accessible on mobile devices through a web browser. However, the editing experience may be limited compared to desktop due to smaller screen sizes and touch-based input. Pixlr also has mobile apps (Pixlr Express and Pixlr Remove) for iOS and Android, which are optimized for quick edits and social media content creation. For professional work, a desktop or laptop is recommended.
-
How does Pixlr compare to Photoshop in terms of features?
Pixlr E is designed to mimic Photoshop’s interface and functionality, making it a strong alternative for users who don’t want to invest in Adobe’s software. While Photoshop offers more advanced tools (like advanced 3D editing, video editing, and AI-powered features), Pixlr covers the essentials of photo editing, retouching, and digital art. Pixlr is ideal for users who need a lightweight, accessible, and free tool for everyday editing tasks.
-
Can I edit RAW files in Pixlr?
Pixlr does not natively support RAW file editing. RAW files are high-quality, unprocessed images that require specialized software like Adobe Lightroom or Capture One. If you need to edit RAW files, you’ll need to convert them to a compatible format (like JPEG or PNG) before uploading them to Pixlr. Alternatively, use Pixlr in conjunction with a RAW editor for a complete workflow.
-
How do I remove backgrounds in Pixlr?
Pixlr offers several tools for background removal, including the magic wand, lasso, and eraser tools. For more precise edits, use the “Select Subject” feature (available in Pixlr X) or the “Refine Edge” tool in Pixlr E. You can also use the “Background Eraser” tool to remove backgrounds while preserving edges. Once the background is removed, add a new layer or apply a layer mask to isolate the subject.
-
Can I use Pixlr for commercial projects?
Yes, Pixlr can be used for commercial projects, including social media content, marketing materials, and digital products. However, always check Pixlr’s terms of service to ensure compliance with licensing agreements. Pixlr’s free version is suitable for most commercial uses, but the premium version (Pixlr Pro) offers additional tools and resources for advanced projects.
-
How do I save my edits in Pixlr?
Pixlr allows you to save your edits in several formats, including JPEG, PNG, WebP, and TIFF. To save your work:
1. Click “File” > “Save” or “Save As.”
2. Choose your desired format and quality settings.
3. Select a save location on your device or cloud storage.For layered projects, save a copy in Pixlr’s native format (PXD) to preserve layers and adjustments. This allows you to reopen and edit the file later without losing any work.
-
Why does my image look pixelated in Pixlr?
Pixelation occurs when an image is enlarged beyond its resolution or when a low-quality image is edited at high dimensions. To avoid pixelation:
1. Always work with high-resolution images.
2. Avoid excessive zooming in on pixel-level details.
3. Use sharpening tools sparingly to enhance clarity without introducing noise.If your image is already pixelated, try resizing it to a smaller dimension or using a tool like Topaz Gigapixel AI to enhance resolution.
-
Can I collaborate with others on a Pixlr project?
Pixlr does not natively support real-time collaboration like Google Docs or Figma. However, you can share your project file (PXD) with others for offline editing. Alternatively, export your project as a layered file (like a PSD) and share it with collaborators who have access to Photoshop or a similar editor. For cloud-based collaboration, upload your project to a shared folder in Google Drive or Dropbox and invite others to edit.
🏁 Final Thoughts: Is Pixlr the Right Tool for You?
Pixlr is a versatile, accessible, and powerful photo editing tool that brings professional-grade capabilities to your fingertips—completely free of charge. Whether you’re a beginner looking to enhance your photos or a seasoned professional seeking a lightweight alternative to Photoshop, Pixlr offers the tools and features you need to achieve stunning results. Its intuitive interface, robust toolset, and non-destructive editing capabilities make it a standout choice in the world of online photo editors.
By mastering Pixlr’s advanced features—such as layers, masks, retouching tools, and color correction—you can transform ordinary images into extraordinary works of art. The ability to work non-destructively ensures that you can experiment and refine your edits without fear of losing the original quality. Whether you’re creating digital art, retouching portraits, or designing social media content, Pixlr empowers you to bring your creative vision to life.
While Pixlr may not replace the full suite of tools offered by Photoshop or other high-end editors, it is more than capable of handling the majority of photo editing tasks with ease. Its compatibility across devices and operating systems further enhances its appeal, making it a go-to solution for users worldwide. The optional premium subscription (Pixlr Pro) unlocks additional features for those who need even more advanced capabilities, but the free version remains a powerhouse in its own right.
If you’re ready to elevate your photo editing skills without breaking the bank, Pixlr is the perfect tool for you. Start exploring its features today, and unlock a world of creative possibilities. Whether you’re a hobbyist, freelancer, or small business owner, Pixlr provides the tools you need to create stunning visuals that captivate and inspire. Don’t let a lack of expensive software hold you back—begin your Pixlr journey now and discover how easy it is to edit like a pro!