
In today’s digital age, data security is not just a necessity but a critical responsibility. Whether you’re a professional handling sensitive business documents, a creative safeguarding personal projects, or simply a user concerned about privacy, protecting your data from unauthorized access is paramount. One of the most robust and user-friendly tools available for this purpose is Windows BitLocker. Developed by Microsoft, BitLocker is a full-disk encryption feature that provides seamless protection for your hard drives, ensuring that even if your device falls into the wrong hands, your data remains inaccessible without proper authentication.
This comprehensive guide will walk you through every aspect of using BitLocker, from understanding its core functionality to troubleshooting common issues. You’ll learn how to enable BitLocker, manage encryption keys, choose the right encryption settings, and optimize performance. Additionally, we’ll cover advanced topics such as TPM requirements, recovery key management, and comparing encryption algorithms like AES-128 and AES-256. By the end of this article, you’ll be equipped with the knowledge and confidence to fully secure your data using BitLocker.
📰 Why Data Encryption Matters in 2026
Data breaches and cyber threats are on the rise, with hackers constantly devising new methods to infiltrate systems and steal sensitive information. In 2026, the stakes are higher than ever as remote work continues to dominate and personal devices store increasingly valuable data. According to cybersecurity reports, over 70% of data breaches in recent years involved unencrypted data, highlighting the critical importance of encryption technologies like BitLocker. Whether you’re using a laptop for business or a home PC, encryption acts as your first line of defense against unauthorized access, ransomware attacks, and data theft.
Beyond security, encryption also ensures compliance with data protection regulations such as GDPR and HIPAA. Many industries require encrypted storage for sensitive information, and failing to comply can result in severe penalties. BitLocker simplifies this process by integrating directly into Windows, providing enterprise-grade security without the complexity. Whether you’re an IT professional managing a fleet of devices or an individual user protecting personal files, BitLocker offers a scalable solution that adapts to your needs.
🔹 Understanding BitLocker: Core Concepts and Functionality
📊 What is BitLocker and How Does It Work?
BitLocker is a full-disk encryption tool built into Windows Pro, Enterprise, and Education editions. Unlike file-level encryption, which only secures individual files or folders, BitLocker encrypts the entire drive, including the operating system, system files, and user data. This ensures that even if someone removes the hard drive from your computer and attempts to access it from another device, they won’t be able to read the data without the correct encryption key or password.
The encryption process uses the Advanced Encryption Standard (AES) algorithm, which is widely recognized as one of the most secure encryption methods available. BitLocker supports both AES-128 and AES-256, allowing users to choose between a balance of performance and security. The encryption key, known as the Full Volume Encryption Key (FVEK), is itself encrypted with another key stored either in the Trusted Platform Module (TPM) or on a USB drive. This multi-layered approach ensures that even if the FVEK is compromised, the data remains protected by the secondary encryption key.
- ✅ Full-disk encryption: Secures the entire drive, not just individual files.
- 🔐 Multi-factor authentication: Uses TPM, PIN, password, or USB key for access.
- 🚀 Seamless integration: Works directly with Windows without requiring third-party software.
- 🛡️ Transparency: Runs in the background with minimal performance impact.
🔧 TPM and BitLocker: The Foundation of Security
The Trusted Platform Module (TPM) is a specialized microchip embedded in most modern computers. It serves as a secure repository for encryption keys and performs cryptographic operations, ensuring that keys are never exposed to the operating system or software. BitLocker relies on the TPM to store the encryption key, providing an additional layer of security against attacks that attempt to extract keys from the system memory or storage.
To use BitLocker, your device must have a TPM chip. Most Windows 10 and 11 systems come equipped with TPM 2.0, which is the recommended version for BitLocker. If your device lacks a TPM, you can still use BitLocker in a legacy mode, where the encryption key is stored on a USB drive instead. However, this method is less secure because the USB drive can be lost or stolen, potentially granting unauthorized access to your data.
To check if your device has a TPM and its version, follow these steps:
- Press Win + R to open the Run dialog.
- Type tpm.msc and press Enter.
- In the TPM Management Console, check the Specification Version field.
🛠️ Step-by-Step Guide to Enabling BitLocker
📌 Prerequisites and System Requirements
Before enabling BitLocker, ensure that your system meets the following requirements:
| Requirement | Minimum | Recommended |
|---|---|---|
| Windows Edition | Windows Pro, Enterprise, or Education | Same as minimum |
| TPM Version | TPM 1.2 or higher | TPM 2.0 or higher |
| Disk Format | NTFS | NTFS |
| Free Disk Space | 1.5 GB | 2 GB or more |
| Administrator Access | Required | Required |
Additionally, ensure that your system drive is running Windows 10 or 11, as BitLocker is not supported on older versions of Windows. If you’re using an external drive, BitLocker To Go can be used to encrypt removable storage devices.
🔐 Enabling BitLocker on Your System Drive
Enabling BitLocker is a straightforward process, but it’s important to back up your data before proceeding, as the encryption process may take several hours depending on your drive size and system performance.
-
Open the Start menu and type BitLocker in the search bar. Select Manage BitLocker from the results.
-
In the BitLocker Drive Encryption window, locate your system drive (usually labeled C:) and click Turn on BitLocker.
-
Windows will prompt you to choose how to unlock your drive. The recommended option is to use a TPM, which provides automatic unlocking when the system boots. Alternatively, you can choose to use a PIN, password, or USB flash drive.
-
If you choose a PIN or password, ensure it is strong and memorable. Avoid using easily guessable information like birthdays or common words.
-
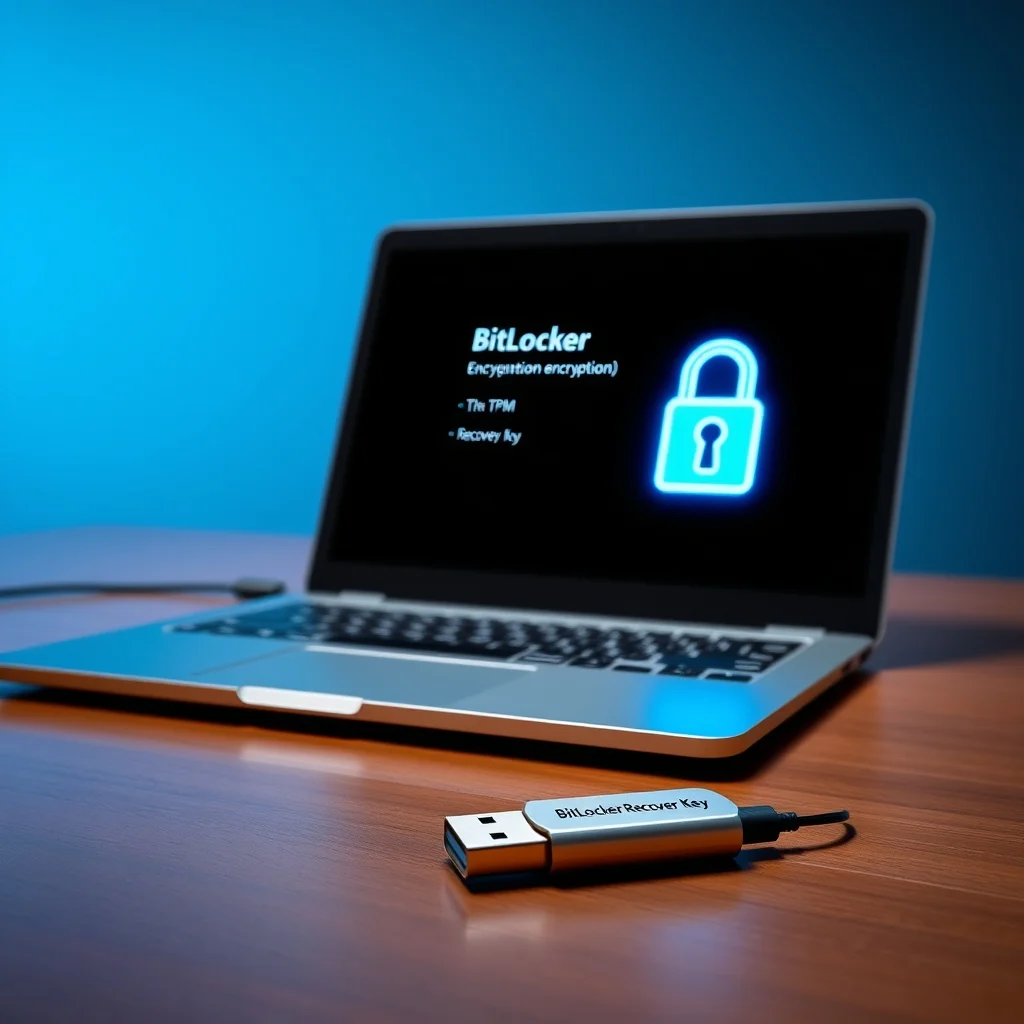
Next, Windows will generate a recovery key, which is essential for accessing your data if you forget your PIN, password, or lose your TPM. Save this key to a secure location, such as a printed copy stored in a safe or a digital file encrypted with another password.
-
After saving the recovery key, choose whether to encrypt the entire drive or only the used space. Encrypting the entire drive is recommended for security, but it will take longer. If you choose to encrypt used space only, the remaining space will be encrypted automatically as new data is written.
-
Select the encryption mode. For modern devices with TPM 2.0, choose New encryption mode. For older devices or external drives, select Compatible mode.
-
Finally, click Start Encrypting to begin the process. The encryption may take several minutes to hours, depending on your drive size and system performance. Do not interrupt the process, as it may cause data corruption.
🔄 Managing Encryption and Recovery Keys
Once BitLocker is enabled, you can manage your encryption settings and recovery keys at any time using the BitLocker Drive Encryption control panel. To access these options:
- Open the Start menu and type BitLocker in the search bar. Select Manage BitLocker.
- In the BitLocker Drive Encryption window, select the drive you want to manage and click Back up your recovery key.
- Choose how you want to save the recovery key. Options include saving it to a file, printing it, or storing it in your Microsoft account.
- To change your unlock method, click Change how you unlock your drive and follow the prompts.
It’s crucial to keep your recovery key in a secure location, as it is the only way to access your data if your primary unlock method fails. If you lose the recovery key, you will permanently lose access to your encrypted data.
🎯 Choosing the Right Encryption Settings
🔐 AES-128 vs. AES-256: Which Should You Use?
BitLocker offers two encryption algorithms: AES-128 and AES-256. Both are secure, but they differ in performance impact and security level. AES-128 is faster and consumes fewer system resources, making it ideal for older hardware or systems where performance is a priority. AES-256, on the other hand, offers a higher level of security at the cost of slightly increased computational overhead. For most users, AES-256 is the recommended choice due to its superior security.
To change the encryption algorithm in BitLocker:
- Open the Start menu and type Command Prompt. Right-click and select Run as administrator.
- Type the following command and press Enter:
manage-bde -encryptionmethod aes256 C:
Replace C: with the drive letter if necessary.
- Enter your administrator password if prompted.
- Restart your computer for the changes to take effect.
📊 Encryption Modes: New vs. Compatible
BitLocker offers two encryption modes: New encryption mode and Compatible mode. New encryption mode is optimized for modern hardware and provides enhanced security features, including support for hardware encryption and faster encryption speeds. Compatible mode, on the other hand, is designed for older hardware and external drives, ensuring compatibility with systems that may not support newer encryption standards.
To determine which mode is best for your system:
- ✅ New encryption mode is recommended for:
- Systems with TPM 2.0 or higher
- Modern SSDs and processors with hardware acceleration
- Users prioritizing security and performance
- 🔄 Compatible mode is recommended for:
- External drives and USB flash drives
- Older systems with TPM 1.2
- Users needing backward compatibility
To check which mode is currently enabled on your drive, open Command Prompt as administrator and type:
manage-bde -status C:
Look for the Conversion Status and Encryption Method fields in the output.
🚀 Troubleshooting Common BitLocker Issues
🛑 Fixing TPM Errors and Warnings
TPM errors are among the most common issues users encounter when enabling BitLocker. These errors can range from a missing TPM chip to an outdated firmware version. Here are some of the most frequent TPM-related issues and how to resolve them:
- ⚠️ TPM not detected
- Cause: The system does not have a TPM chip, or the TPM is disabled in the BIOS/UEFI.
- Solution: Access your BIOS/UEFI settings (usually by pressing F2, F12, DEL, or ESC during startup) and enable the TPM chip. If your system lacks a TPM, you can use BitLocker in legacy mode with a USB key.
- ⚠️ TPM not ready
- Cause: The TPM chip requires initialization or a firmware update.
- Solution: Open the TPM Management Console (tpm.msc), clear the TPM, and initialize it. Follow the on-screen instructions to complete the process.
- ⚠️ TPM ownership issues
- Cause: The TPM chip is owned by another user or organization (common in enterprise environments).
- Solution: Contact your IT administrator to reset the TPM ownership. If you’re the administrator, you can reset the TPM via the BIOS/UEFI settings.
🔓 Accessing Encrypted Drives: Recovery and PIN Issues
If you forget your BitLocker PIN, password, or lose your USB key, you can still access your encrypted drive using the recovery key. The recovery key is a 48-digit code generated during BitLocker setup. To use the recovery key:
- On the BitLocker recovery screen, click Enter recovery key.
- Enter the 48-digit recovery key exactly as it appears (include hyphens if present).
- Click Next to unlock your drive.
If you don’t have your recovery key, you will not be able to access your data. This is why it’s crucial to store the recovery key in a secure location. If you’ve lost the recovery key, your only option is to format the drive and reinstall Windows, which will result in permanent data loss.
In enterprise environments, administrators can configure BitLocker recovery policies to store recovery keys in Active Directory or Microsoft Azure AD. This ensures that IT teams can assist users without risking data loss.
⚡ Performance Impact: Minimizing Slowdowns
One of the most common concerns about BitLocker is its impact on system performance. While encryption does introduce some overhead, modern hardware and optimized encryption algorithms minimize this impact. Here are some tips to reduce performance slowdowns:
- ✅ Use hardware-accelerated encryption: Ensure your CPU supports AES-NI (Intel) or AES (AMD) for faster encryption and decryption.
- 🔄 Enable automatic unlocking: Use the TPM for automatic unlocking to avoid manual PIN entry during startup.
- 🚀 Optimize your SSD: SSDs perform better with BitLocker than HDDs. If you’re using an HDD, consider upgrading to an SSD for improved performance.
- 🛠️ Disable unnecessary background processes: Reduce system resource usage by closing unused applications and disabling startup programs.
To check if your CPU supports hardware-accelerated encryption, open Command Prompt and type:
manage-bde -status C:
Look for the Hardware Encryption field in the output. If it displays Yes, your CPU supports hardware acceleration.
💻 Advanced BitLocker Features and Best Practices
🔐 BitLocker To Go: Encrypting External Drives
BitLocker To Go extends BitLocker’s encryption capabilities to external drives, including USB flash drives and external HDDs/SSDs. This feature is particularly useful for users who frequently transfer sensitive data between devices. To encrypt an external drive with BitLocker To Go:
- Connect the external drive to your computer.
- Open File Explorer and right-click on the drive. Select Turn on BitLocker.
- Choose how to unlock the drive. Options include a password, smart card, or automatic unlocking on the current computer.
- Save the recovery key to a secure location.
- Select the encryption method and mode, then click Start Encrypting.
Once encrypted, the external drive will only be accessible on computers with BitLocker enabled. If you plug the drive into a non-Windows device, such as a Mac or Linux PC, you won’t be able to access the data without the correct unlock method.
🛡️ BitLocker Network Unlock: Enterprise-Grade Security
BitLocker Network Unlock is an advanced feature designed for enterprise environments where devices are booted remotely over a network. This feature allows IT administrators to unlock encrypted drives without requiring physical access to the device, streamlining the deployment and management of BitLocker in large organizations.
To configure BitLocker Network Unlock, you’ll need a Windows Deployment Services (WDS) server and a DHCP server that supports Pre-Boot Execution Environment (PXE). The process involves:
- Setting up a WDS server and configuring it to support BitLocker Network Unlock.
- Configuring the DHCP server to include the necessary options for PXE booting.
- Enabling BitLocker Network Unlock in the Group Policy Editor (gpedit.msc).
- Deploying the Network Unlock certificate to client devices.
While BitLocker Network Unlock is primarily used in enterprise settings, it demonstrates the flexibility and scalability of BitLocker for various use cases.
🔄 Migrating BitLocker to a New Computer
If you’re upgrading to a new computer and want to transfer your BitLocker-encrypted drive, you can do so without decrypting the drive first. Follow these steps to migrate BitLocker to a new device:
-
Ensure the new computer has a compatible TPM chip or supports BitLocker in legacy mode.
-
Connect the BitLocker-encrypted drive to the new computer.
-
Boot the new computer and enter the BitLocker recovery key if prompted.
-
Once the drive is unlocked, BitLocker will automatically re-encrypt it on the new system.
-
If the drive is not automatically recognized, open the BitLocker Drive Encryption control panel and select Turn on BitLocker again.
Migrating BitLocker to a new computer is seamless, but it’s important to back up your recovery key before making the switch. Additionally, ensure that the new computer meets the system requirements for BitLocker.
📊 Comparing BitLocker with Alternative Encryption Tools
While BitLocker is a powerful and convenient encryption tool, it’s not the only option available. Here’s a comparison of BitLocker with other popular encryption tools:
| Feature | BitLocker | VeraCrypt | FileVault 2 |
|---|---|---|---|
| Platform | Windows (Pro/Enterprise/Education) | Windows, macOS, Linux | macOS |
| Encryption Algorithm | AES-128, AES-256 | AES-256, Serpent, Twofish | AES-XTS |
| Full-Disk Encryption | Yes | Yes | Yes |
| TPM Support | Yes | No | Yes |
| Open Source | No | Yes | No |
| Performance Impact | Low (with hardware acceleration) | Moderate (CPU-bound) | Low (with Apple hardware) |
| Ease of Use | Very Easy | Moderate (requires setup) | Easy |
BitLocker stands out for its seamless integration with Windows and minimal performance impact, making it the ideal choice for most users. VeraCrypt, while open-source and cross-platform, requires more setup and has a higher performance impact due to its reliance on CPU-based encryption. FileVault 2 is a strong alternative for macOS users, offering similar features to BitLocker with the added benefit of Apple’s hardware acceleration.
💡 Pro Tips for Maximizing BitLocker Security and Performance
🎯 Best Settings for Maximum Performance
To get the most out of BitLocker while maintaining optimal performance, consider the following settings and configurations:
- ✅ Enable hardware acceleration: Ensure your CPU supports AES-NI or equivalent. This significantly reduces the performance impact of encryption.
- 🔐 Use AES-256 encryption: While AES-128 is faster, AES-256 offers better security with minimal performance trade-off on modern hardware.
- 🚀 Choose New encryption mode: This mode is optimized for modern SSDs and hardware encryption, providing better performance and security.
- 🛡️ Store recovery keys securely: Avoid storing recovery keys in plain text or easily accessible locations. Use a password manager or physical safe.
- 🔄 Regularly update your system: Ensure Windows and your TPM firmware are up to date to benefit from the latest security patches and performance improvements.
📌 Advanced Tricks Few Know
Here are some lesser-known tips and tricks to enhance your BitLocker experience:
- Use BitLocker with a virtual machine: If you’re running a virtual machine (VM) on your system drive, enable BitLocker on both the host and the VM. This ensures that your VM files are encrypted alongside your host system.
- Encrypt non-system drives separately: If you have multiple drives (e.g., D:, E:), consider encrypting them individually with different unlock methods for added security.
- Use BitLocker with Windows Hello: If your device supports Windows Hello (e.g., facial recognition or fingerprint), you can configure BitLocker to use these biometric methods for unlocking your drive.
- Schedule regular backups of your recovery key: Store recovery keys in a cloud service like OneDrive or a password manager with encrypted backup capabilities. This ensures you always have access to your keys, even if your primary storage fails.
- Use BitLocker with a PIN and TPM: Combining a PIN with TPM provides an extra layer of security. The PIN is required to unlock the TPM, making it harder for attackers to bypass the encryption.
🏁 Final Verdict: Should You Use BitLocker?
BitLocker is one of the most effective and user-friendly full-disk encryption tools available, especially for Windows users. Its seamless integration, minimal performance impact, and robust security features make it an ideal choice for both personal and professional use. Whether you’re protecting sensitive business data, personal files, or simply ensuring privacy, BitLocker provides a reliable solution without the complexity of third-party tools.
That said, BitLocker does have some limitations. It’s only available on Windows Pro, Enterprise, and Education editions, which means users on Windows Home cannot access this feature natively. Additionally, BitLocker’s reliance on TPM can be a drawback for users with older hardware or those who prefer not to use TPM-based unlocking methods. In such cases, alternatives like VeraCrypt may be more suitable.
If you’re using a modern Windows system with TPM 2.0 or higher, BitLocker is an excellent choice. It offers a balance of security, performance, and ease of use, making it the go-to solution for full-disk encryption. By following the steps outlined in this guide, you can confidently enable and manage BitLocker to protect your data from unauthorized access.
We strongly recommend enabling BitLocker today if you haven’t already. The peace of mind that comes with knowing your data is secure is invaluable, and BitLocker makes it easier than ever to achieve that security. Start with a backup, follow the steps carefully, and enjoy the robust protection that BitLocker provides.
❓ Frequently Asked Questions
-
Can I use BitLocker on Windows Home Edition?
No, BitLocker is only available on Windows Pro, Enterprise, and Education editions. If you’re using Windows Home, you’ll need to upgrade to a supported edition or use a third-party encryption tool like VeraCrypt.
-
What happens if my TPM fails or is damaged?
If your TPM fails, you can still access your encrypted drive using the BitLocker recovery key. However, you’ll need to replace the TPM chip or reconfigure BitLocker to use an alternative unlock method (e.g., PIN or password).
-
Can I disable BitLocker temporarily?
Yes, you can pause BitLocker encryption temporarily without decrypting the drive. To do this, open the BitLocker Drive Encryption control panel, select the drive, and click Pause protection. The encryption will resume automatically after a system restart.
-
How do I move a BitLocker-encrypted drive to another computer?
You can transfer a BitLocker-encrypted drive to another computer without decrypting it first. Connect the drive to the new computer, boot the system, and enter the BitLocker recovery key when prompted. BitLocker will automatically re-encrypt the drive on the new system.
-
Is BitLocker secure against all types of attacks?
BitLocker is highly secure and uses industry-standard encryption algorithms. However, no encryption method is 100% foolproof. Physical attacks, such as cold boot attacks or hardware keyloggers, can potentially bypass BitLocker. For maximum security, combine BitLocker with other security measures like strong passwords, biometric authentication, and physical security.
-
Can I encrypt an external SSD with BitLocker?
Yes, BitLocker To Go allows you to encrypt external SSDs and HDDs. The process is similar to encrypting an internal drive, and you can choose between AES-128 and AES-256 encryption.
-
How can I check if my SSD supports hardware-accelerated encryption?
Open Command Prompt as administrator and type manage-bde -status C:. Look for the Hardware Encryption field in the output. If it displays Yes, your SSD supports hardware acceleration.
-
What should I do if BitLocker fails to start after enabling encryption?
If BitLocker fails to start, check the following:
- Ensure your TPM is enabled and up to date.
- Verify that your system drive is formatted as NTFS.
- Check if your Windows edition supports BitLocker.
- Run the BitLocker troubleshooter in Windows Settings.
If the issue persists, contact Microsoft Support or your device manufacturer for assistance.
-
Can I use BitLocker with a RAID configuration?
Yes, BitLocker supports RAID configurations, including RAID 0, 1, 5, and 10. However, you may need to configure BitLocker manually using the command line, as the BitLocker control panel may not recognize RAID volumes automatically.
-
How do I recover data from a BitLocker-encrypted drive if I forget the recovery key?
If you forget the BitLocker recovery key, you cannot recover your data. The recovery key is the only way to unlock the drive. To prevent this, always store the recovery key in a secure location and consider using a password manager for digital backups.