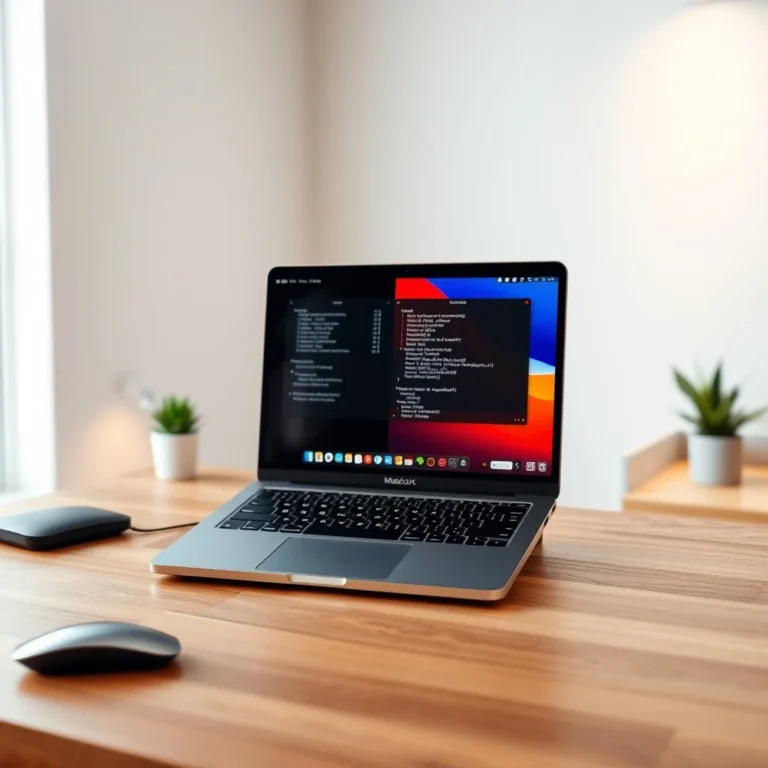
The frustration of a slow laptop booting up is all too familiar. Whether it’s the endless spinning wheel of the loading screen or the painfully long wait to access your files, a sluggish startup can feel like a digital anchor dragging you down. But what if you could slash those boot times in half and breathe new life into your aging laptop? The solution might be simpler—and more affordable—than you think: upgrading your laptop’s solid-state drive (SSD).
An SSD replacement or upgrade is one of the most effective ways to boost your laptop’s performance without breaking the bank. Unlike traditional hard disk drives (HDDs), SSDs use flash memory to store data, which means they can read and write information at lightning speeds. This translates to almost instantaneous boot times, faster app launches, and smoother multitasking. The best part? The process is entirely within your reach, even if you’re not a tech expert.
In this comprehensive guide, we’ll walk you through every step of upgrading your laptop’s SSD. From selecting the right drive to cloning your existing data and installing the new SSD, we’ll cover it all. You’ll also learn how to troubleshoot common issues like the BIOS not detecting your new drive and discover the best tools for data migration. By the end of this article, you’ll have a faster, more responsive laptop that feels like new.
📰 Why Upgrade Your Laptop’s SSD?
Before diving into the technical steps, it’s important to understand why an SSD upgrade is worth your time and effort. Traditional HDDs rely on spinning magnetic disks and mechanical arms to read and write data, which introduces latency and limits speed. SSDs, on the other hand, have no moving parts. They use interconnected flash memory chips to store and access data almost instantly. This fundamental difference results in several key benefits:
- ✅ Blazing-fast boot times: Most laptops boot up in under 10 seconds with an SSD, compared to 30 seconds or more with an HDD.
- 🎯 Faster application launches: Programs open almost immediately, and large files load in a fraction of the time.
- ⚡ Improved multitasking: Running multiple applications or browser tabs becomes smoother and more efficient.
- 🔋 Better battery life: SSDs consume less power than HDDs, which can extend your laptop’s battery life by up to 15%.
- 🛡️ Enhanced durability: With no moving parts, SSDs are more resistant to physical shocks and drops.
For users with older laptops, an SSD upgrade can feel like a complete system overhaul. It’s a cost-effective way to extend the lifespan of your device and delay the need for a full replacement. Even budget-friendly SSDs can deliver noticeable improvements, making this one of the best value-for-money upgrades you can make.
🔍 Understanding SSD Types: NVMe vs. SATA
Not all SSDs are created equal. When shopping for a new SSD, you’ll encounter two primary types: SATA SSDs and NVMe SSDs. Each has its own advantages and limitations, and choosing the right one depends on your laptop’s compatibility and your performance needs.
📊 What is a SATA SSD?
A SATA SSD is the more traditional and widely compatible option. It uses the same interface as HDDs, which means it can be easily installed in most laptops that have a 2.5-inch drive bay. SATA SSDs typically offer read and write speeds ranging from 500 MB/s to 600 MB/s, which is a massive improvement over HDDs but still slower than their NVMe counterparts.
- ✅ Wide compatibility: Works in almost any laptop with a SATA port.
- 💰 Affordable: Generally cheaper than NVMe SSDs.
- 🔌 Easy installation: Simple plug-and-play replacement for HDDs.
However, SATA SSDs are limited by the SATA interface’s theoretical maximum speed of 600 MB/s. This makes them ideal for general use, everyday tasks, and budget-conscious upgrades but not the best choice for high-performance applications like video editing, 3D rendering, or gaming.
⚡ What is an NVMe SSD?
NVMe (Non-Volatile Memory Express) SSDs represent the next generation of solid-state storage. They connect directly to the PCIe (Peripheral Component Interconnect Express) bus in your laptop, which allows for significantly faster data transfer rates. NVMe SSDs can achieve read and write speeds of up to 7,000 MB/s, making them ideal for demanding workloads.
- ✅ Lightning-fast speeds: Up to 10x faster than SATA SSDs.
- 🎯 Low latency: Faster response times for real-time applications.
- 🔋 Efficient power usage: Better battery life on laptops.
However, NVMe SSDs have some limitations. They require an M.2 slot on your laptop’s motherboard, which isn’t available in all models. Additionally, NVMe SSDs tend to be more expensive than SATA SSDs. For users with compatible laptops, the performance boost is well worth the investment.
🛠️ Tools and Software You’ll Need
🔧 Hardware Tools
Before you begin the upgrade process, gather the following hardware tools to ensure a smooth installation:
- ✅ New SSD: Choose the right type (SATA or NVMe) based on your laptop’s compatibility.
- 🔨 Small Phillips-head screwdriver: Most laptop screws require a #0 or #1 size.
- 📦 Anti-static wrist strap: Optional but recommended to prevent static damage to components.
- 🔄 External SSD enclosure or USB-to-SATA adapter: Useful for cloning your old drive before installation.
- 📜 Backup drive: Always back up your data before making any hardware changes.
💻 Software Tools
To clone your existing data to the new SSD, you’ll need reliable cloning software. Here are some of the best options available:
- ✅ Clonezilla: A free and open-source cloning tool that supports a wide range of drives and file systems. It’s powerful but has a steep learning curve for beginners.
- 🎯 Macrium Reflect: A user-friendly option with a free edition that’s perfect for home users. It offers intuitive cloning and imaging features.
- 🔍 EaseUS Todo Backup: Another excellent choice with a free version that includes SSD-specific cloning tools.
- ⚡ Samsung Data Migration: If you’re using a Samsung SSD, this free tool is optimized for seamless data transfer.
Each of these tools has its strengths, so choose the one that best fits your needs and comfort level. For most users, Macrium Reflect or EaseUS Todo Backup will provide the easiest experience.
📋 Step 1: Backup Your Data
Before you even think about swapping out your SSD, it’s critical to back up all your important data. Upgrading your SSD involves significant changes to your laptop’s storage, and there’s always a small risk of data loss during the process. A full backup ensures you won’t lose any files if something goes wrong.
There are several ways to back up your data, depending on your preferences and the tools you have available:
- ✅ External Hard Drive: Copy all your files to an external HDD or SSD. This is the simplest method but requires a large enough drive to hold all your data.
- 📁 Cloud Storage: Services like Google Drive, Dropbox, or OneDrive can automatically sync your important files to the cloud.
- 💾 Windows Backup and Restore: Use Windows’ built-in backup tool to create a system image or back up specific files.
- 🔄 Disk Cloning Software: Tools like Macrium Reflect can create a full clone of your current drive, which you can restore later if needed.
Once your backup is complete, verify that all critical files are intact and accessible. This step might seem tedious, but it’s your safety net. Skipping it could result in permanent data loss.
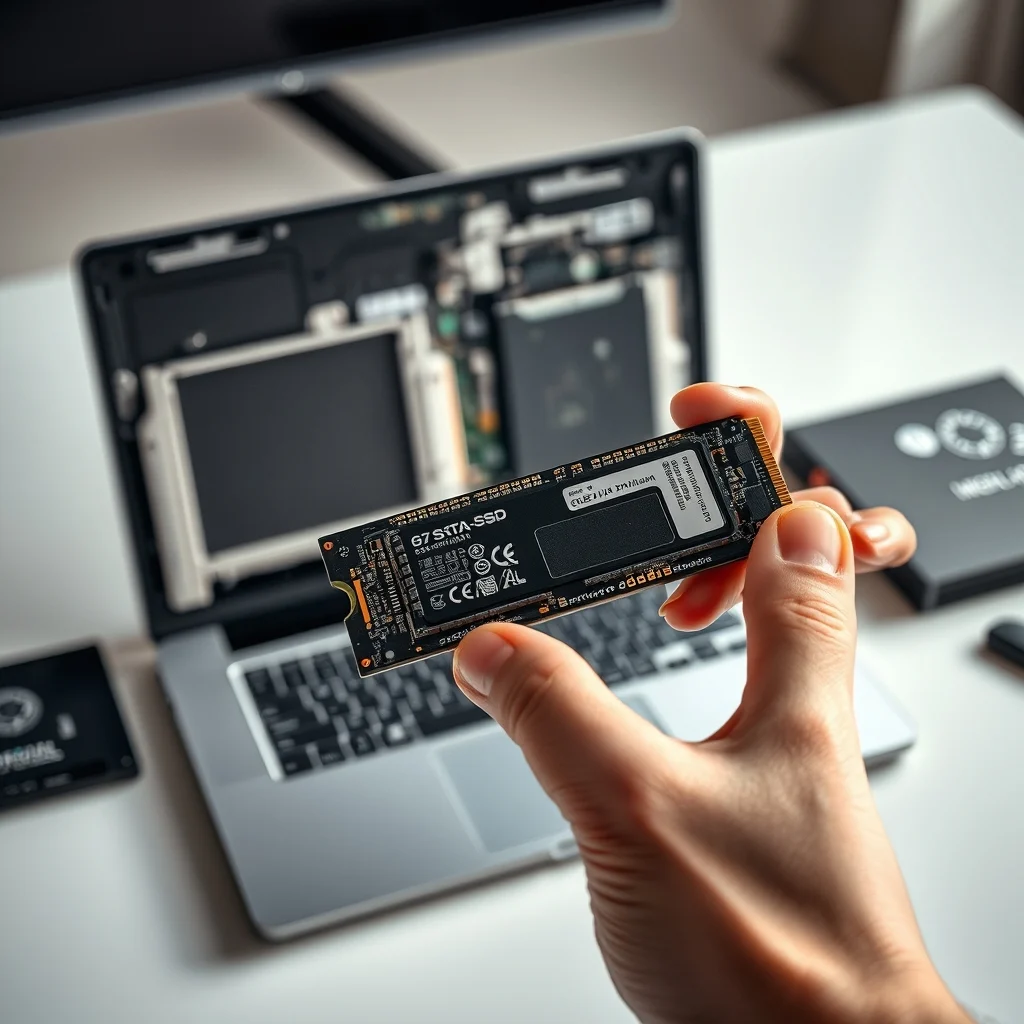
📋 Step 2: Clone Your Existing Data to the New SSD
Cloning your existing data to the new SSD ensures that you don’t have to reinstall your operating system, applications, and files from scratch. This process creates an exact copy of your old drive, including the boot partition, system files, and personal data. Here’s how to do it using two popular cloning tools: Macrium Reflect and Clonezilla.
🎯 Using Macrium Reflect
Macrium Reflect is a user-friendly tool that simplifies the cloning process. Follow these steps to clone your drive:
- Install Macrium Reflect: Download and install the free version of Macrium Reflect from the official website.
- Connect Your New SSD: Use an external SSD enclosure or USB-to-SATA adapter to connect your new SSD to your laptop. This allows your laptop to recognize the drive without installing it internally.
- Launch Macrium Reflect: Open the application and select your current (source) drive from the list of available disks.
- Choose the Destination Drive: Select your new SSD as the destination drive for the clone.
- Verify Cloning Options: Ensure that the “Clone selected partitions only” option is selected. This clones only the necessary partitions and avoids copying empty space or unnecessary files.
- Start the Cloning Process: Click “Next” to begin. The process may take anywhere from 30 minutes to a few hours, depending on the size of your drive and its data.
- Verify the Clone: Once complete, safely eject the SSD and verify that all files are accessible. You can do this by connecting it to another device or using a disk management tool in Windows.
🔧 Using Clonezilla
Clonezilla is a more advanced tool, but it’s free and highly effective. Here’s how to use it for cloning your drive:
- Create a Clonezilla Bootable USB: Download the Clonezilla ISO file and use a tool like Rufus to create a bootable USB drive.
- Boot from the USB Drive: Restart your laptop and enter the BIOS/UEFI settings to boot from the USB drive. You may need to disable Secure Boot and enable Legacy Mode for compatibility.
- Select Clonezilla: Choose the “Clonezilla live” option from the boot menu.
- Choose Language and Keyboard Layout: Follow the on-screen prompts to set your language and keyboard preferences.
- Select the Source Drive: Clonezilla will ask you to select the drive you want to clone. This is your old SSD or HDD.
- Select the Destination Drive: Choose your new SSD as the destination drive. Be careful to select the correct drive to avoid overwriting important data.
- Start Cloning: Follow the prompts to begin the cloning process. Clonezilla will display a progress bar and estimated time remaining.
- Finish and Reboot: Once the clone is complete, shut down your laptop and remove the bootable USB drive.
Clonezilla is powerful but requires more technical knowledge than Macrium Reflect. If you’re uncomfortable with its interface, consider using Macrium Reflect instead.
📋 Step 3: Physically Install the New SSD
Now that your data is safely cloned to the new SSD, it’s time to physically install it in your laptop. This step varies depending on whether you’re replacing an existing HDD or adding an SSD to an empty slot. Below are the general steps for both scenarios.
🔌 Replacing an Existing HDD with a SATA SSD
If your laptop has a 2.5-inch HDD bay, replacing it with a SATA SSD is straightforward:
- Power Down and Unplug: Shut down your laptop completely and unplug the power cable. Remove the battery if it’s removable.
- Access the Hard Drive Bay: Most laptops require you to remove the bottom panel to access the hard drive. Use your screwdriver to remove the screws securing the panel.
- Remove the Old HDD: Gently disconnect the SATA cable and power connector from the old HDD. Slide the HDD out of its bay and set it aside.
- Install the New SSD: Place the new SSD into the bay, ensuring it aligns with the SATA connectors. Reconnect the SATA cable and power connector.
- Secure the SSD: Replace the screws to secure the SSD in place.
- Reassemble the Laptop: Put the bottom panel back on and screw it in tightly.
- Power On: Plug in your laptop and power it on. Your new SSD should now be recognized by the system.
🚀 Installing an NVMe SSD
Installing an NVMe SSD is slightly more complex because it requires access to the M.2 slot on your laptop’s motherboard. Not all laptops have this slot, so check your device’s specifications first. Here’s how to do it:
- Power Down and Unplug: Shut down your laptop and unplug the power cable. Remove the battery if it’s removable.
- Access the M.2 Slot: Depending on your laptop, you may need to remove the keyboard, a small access panel, or the entire bottom cover to reach the M.2 slot.
- Locate the Slot: The M.2 slot is a small, elongated connector, typically labeled with “SSD” or “M.2”.
- Insert the NVMe SSD: Gently insert the SSD into the slot at a 30-degree angle. Apply even pressure to push it in until it clicks into place.
- Secure the SSD: Most M.2 slots have a small screw to hold the SSD in place. Secure it with the screw.
- Reassemble the Laptop: Put everything back together, ensuring all screws and connectors are secure.
- Power On: Plug in your laptop and power it on. Your new NVMe SSD should now be detected by the system.
📋 Step 4: Configure BIOS/UEFI Settings
After installing the new SSD, your laptop might not recognize it immediately. This is often due to BIOS/UEFI settings that need to be adjusted. Here’s how to ensure your system detects the new drive:
🔍 Accessing BIOS/UEFI
To access your laptop’s BIOS/UEFI settings, follow these steps:
- Power On the Laptop: Start your laptop and immediately press the key required to enter BIOS/UEFI. Common keys include F2, F12, DEL, or ESC. The exact key depends on your laptop’s manufacturer (e.g., HP, Dell, Lenovo, ASUS).
- Navigate to Boot Options: Once in the BIOS/UEFI menu, look for a section labeled “Boot“, “Storage“, or “Advanced Settings“.
- Enable AHCI Mode: If your SSD is an NVMe or SATA drive, ensure that the AHCI (Advanced Host Controller Interface) mode is enabled. AHCI is essential for SSDs to achieve optimal performance. If you see an option for “RAID Mode“, change it to “AHCI“.
- Save and Exit: Save your changes and exit the BIOS/UEFI. Your laptop will reboot, and the new SSD should now be detected.
🛠️ Troubleshooting BIOS Detection Issues
If your laptop’s BIOS doesn’t detect the new SSD, try these troubleshooting steps:
- ✅ Check Connections: Ensure the SSD is properly seated in its slot or bay. For M.2 SSDs, verify that the screw is tightened securely.
- 🔄 Update BIOS/UEFI: An outdated BIOS might not recognize newer SSDs. Visit your laptop manufacturer’s website to download and install the latest BIOS update.
- 🔌 Try a Different Port: If your SSD is NVMe, some laptops have multiple M.2 slots. Try inserting it into the other slot.
- 🧩 Check for Drive Health: Use a tool like CrystalDiskInfo to check if the SSD is detected by another device. If the SSD isn’t recognized at all, it might be defective.
If none of these steps work, consult your laptop’s manual or contact the manufacturer’s support for further assistance.
📋 Step 5: Restore Cloned Data and Finalize Setup
Once your laptop recognizes the new SSD, it’s time to restore your cloned data and ensure everything is working correctly. Here’s what to do next:
🔄 Restoring Cloned Data
If you used a cloning tool like Macrium Reflect or Clonezilla, your new SSD should already have a bootable copy of your operating system and files. However, you may need to adjust a few settings to ensure optimal performance:
- Boot from the New SSD: Enter your BIOS/UEFI settings again and set the new SSD as the primary boot device. This ensures your laptop starts from the SSD instead of any connected external drives.
- Verify Data Integrity: Open File Explorer and check that all your files, applications, and settings are intact. If anything is missing, you may need to restore from your backup.
- Update Drivers: Visit your laptop manufacturer’s website to download and install the latest drivers for your SSD and other components.
- Optimize Windows for SSD: Windows includes built-in optimizations for SSDs, but you can manually ensure they’re enabled by opening Command Prompt as Administrator and running the following commands:
winsat disk -drive C
fsutil behavior query DisableDeleteNotify
These commands enable TRIM (a feature that maintains SSD performance over time) and verify its status.
🎯 Finalizing Your Setup
With your data restored and your system booting from the new SSD, take a moment to ensure everything is running smoothly:
- ✅ Check Disk Health: Use the CrystalDiskInfo tool to monitor your SSD’s health and performance. Look for metrics like “Total Host Writes” and “Wear Leveling Count” to ensure your drive is in good condition.
- 📊 Benchmark Performance: Tools like CrystalDiskMark can help you test your SSD’s read and write speeds. Compare these results to the manufacturer’s specifications to ensure everything is working as expected.
- 🔧 Adjust Power Settings: If you’re using a laptop, tweak your power settings to maximize performance. Go to Control Panel > Power Options and select the “High Performance” plan.
📊 Performance Comparison: SSD vs. HDD
To truly appreciate the impact of your SSD upgrade, let’s compare its performance to a traditional HDD in real-world scenarios. The following table summarizes key performance metrics for both types of drives:
| Category | HDD | SATA SSD | NVMe SSD |
|---|---|---|---|
| Boot Time | 30-60 seconds | 10-20 seconds | 5-10 seconds |
| Application Launch Time | 5-15 seconds | 1-3 seconds | 0.5-1 second |
| File Transfer Speed | 80-160 MB/s | 500-600 MB/s | 3000-7000 MB/s |
| Power Consumption (Idle) | 6-7 watts | 2-3 watts | 1-2 watts |
| Durability | Low (moving parts) | High (no moving parts) | High (no moving parts) |
| Price per GB | $0.02 – $0.05 | $0.08 – $0.15 | $0.10 – $0.25 |
As the table illustrates, SSDs—especially NVMe models—offer dramatic improvements in speed, power efficiency, and durability compared to HDDs. While HDDs are cheaper per gigabyte, the performance benefits of SSDs make them a worthwhile investment for most users. Whether you opt for a SATA SSD or an NVMe SSD, you’re guaranteed a noticeable boost in performance.
🆚 SATA SSD vs. NVMe SSD: Which One Should You Choose?
Choosing between a SATA SSD and an NVMe SSD depends on several factors, including your laptop’s compatibility, budget, and performance needs. Below is a detailed comparison to help you make an informed decision:
- ✅ Use a SATA SSD if:
- Your laptop has a 2.5-inch drive bay and no M.2 slot.
- You’re on a tight budget but still want a significant performance boost.
- You use your laptop for everyday tasks like web browsing, office work, and media consumption.
- ⚡ Use an NVMe SSD if:
- Your laptop has an M.2 slot and supports NVMe drives.
- You need maximum performance for tasks like video editing, 3D rendering, or gaming.
- You’re willing to invest a bit more for faster speeds and better future-proofing.
For most users, a SATA SSD offers the best balance of performance and affordability. However, if you have a compatible laptop and demand the absolute best speeds, an NVMe SSD is the way to go. Keep in mind that NVMe SSDs are more expensive, so weigh the cost against the benefits before making your purchase.
💡 Tips for Maximizing Your SSD’s Lifespan
SSDs are incredibly durable and reliable, but they do have a limited lifespan based on the number of write cycles. To ensure your new SSD lasts as long as possible, follow these best practices:
🎯 Best Settings for Maximum Performance
- ✅ Enable TRIM: TRIM is a feature that helps maintain your SSD’s performance over time. Windows enables TRIM by default, but you can check its status by running Command Prompt as Administrator and typing:
fsutil behavior query DisableDeleteNotify
If the result is “0“, TRIM is enabled. If it’s “1“, enable it with:
fsutil behavior set DisableDeleteNotify 0 - 📊 Adjust Virtual Memory: Windows uses a page file for virtual memory. To reduce unnecessary writes to your SSD, move the page file to a secondary HDD if you have one. Otherwise, keep it on the SSD but limit its size.
- 🔄 Avoid Defragmentation: Unlike HDDs, SSDs don’t benefit from defragmentation. In fact, defragmenting an SSD can reduce its lifespan. Windows automatically disables defragmentation for SSDs, so there’s no need to worry about it.
- 🧹 Regularly Clean Up Files: Use tools like CCleaner to remove temporary files, cache, and other unnecessary data. This reduces the amount of data written to your SSD over time.
📌 Advanced Tricks Few Know
- ✅ Disable Hibernation: Hibernation writes your entire RAM contents to disk, which can wear out your SSD over time. If you don’t use hibernation, disable it with:
powercfg /h off
in Command Prompt (as Administrator). - 🎯 Optimize Startup Programs: Fewer programs launching at startup means less wear on your SSD. Use the Task Manager to disable unnecessary startup programs.
- 🔍 Monitor SSD Health: Use tools like CrystalDiskInfo to keep an eye on your SSD’s health. Look for metrics like “Total Host Writes” and “Wear Leveling Count” to ensure your drive is performing well.
- 💾 Partition Your SSD: If you’re using a large SSD, consider partitioning it into multiple drives (e.g., one for the operating system and another for games or media). This can help organize your data and reduce clutter.
By following these tips, you can extend the lifespan of your SSD and ensure it continues to perform optimally for years to come.
🔍 Common Issues and How to Fix Them
Even with careful planning, you might encounter some issues during or after the SSD upgrade. Below are common problems and their solutions:
❌ BIOS Does Not Detect the New SSD
- ⚠️ Problem: Your laptop’s BIOS doesn’t recognize the new SSD after installation.
- 🔧 Solution:
- Check the SSD’s connections. Ensure it’s properly seated in the slot or bay.
- Try a different M.2 slot if your laptop has multiple slots.
- Update your BIOS/UEFI to the latest version.
- Ensure the SSD is not faulty by testing it on another device.
🛑 Windows Fails to Boot from the New SSD
- ⚠️ Problem: Your laptop boots into Windows but doesn’t recognize the SSD as the primary drive.
- 🔧 Solution:
- Enter BIOS/UEFI and set the new SSD as the primary boot device.
- If the SSD is not listed, check the cloning process. Ensure all partitions were cloned correctly.
- Reinstall Windows on the new SSD if the cloning process failed.
📉 Slow Performance After Upgrade
- ⚠️ Problem: Your new SSD is slower than expected.
- 🔧 Solution:
- Ensure AHCI mode is enabled in BIOS/UEFI.
- Check if TRIM is enabled and running properly.
- Run a benchmark tool like CrystalDiskMark to verify speeds.
- If using an NVMe SSD, ensure it’s connected to a PCIe 3.0 or 4.0 slot for maximum performance.
💻 System Requirements for SSD Upgrade
Not all laptops are compatible with every type of SSD. Before purchasing a new SSD, check your laptop’s specifications to ensure compatibility. Below is a table summarizing common requirements for different SSD types:
| SSD Type | Interface | Laptop Compatibility | Performance Level |
|---|---|---|---|
| SATA SSD | SATA III (6 Gbps) | 2.5-inch drive bay or M.2 SATA slot | 500-600 MB/s read/write |
| NVMe SSD | PCIe 3.0/4.0 (up to 32 Gbps) | M.2 NVMe slot | 3000-7000 MB/s read/write |
To check your laptop’s compatibility:
- ✅ Consult the Manual: Your laptop’s user manual will list the types of storage drives supported.
- 🔍 Use System Information: On Windows, press Win + R, type msinfo32, and press Enter. Look for “Storage” or “System Summary” to find drive information.
- 🛠️ Check the Manufacturer’s Website: Visit your laptop manufacturer’s support page to download specifications or use their online tool to check compatibility.
🏁 Final Verdict: Should You Upgrade Your Laptop’s SSD?
Upgrading your laptop’s SSD is one of the most impactful and cost-effective ways to breathe new life into an aging device. Whether you choose a SATA SSD for general use or an NVMe SSD for maximum performance, the benefits are undeniable. Faster boot times, quicker application launches, improved multitasking, and better battery life make this upgrade a no-brainer for most users.
While the process requires some technical know-how, following the steps outlined in this guide ensures a smooth and successful upgrade. From cloning your data to installing the new SSD and troubleshooting common issues, you now have all the tools and knowledge needed to complete the job with confidence.
So, is it worth it? Absolutely. An SSD upgrade can transform a sluggish laptop into a responsive and efficient machine, extending its lifespan and delaying the need for an expensive replacement. Whether you’re a student, a professional, or a casual user, the performance boost you’ll experience is well worth the effort and investment.
Call to Action: If your laptop is feeling slow and outdated, don’t wait any longer. Choose the right SSD for your needs, follow this guide, and enjoy the benefits of a faster, more responsive device. Your future self will thank you!
❓ Frequently Asked Questions
-
Can I upgrade my laptop’s SSD myself, or do I need professional help?
You can upgrade your laptop’s SSD yourself with the right tools and guidance. Most SSDs are designed for easy installation, and cloning your data ensures a seamless transition. However, if you’re uncomfortable opening your laptop or handling internal components, consider seeking professional assistance.
-
How do I know if my laptop supports an NVMe SSD?
Check your laptop’s specifications by consulting the manual or visiting the manufacturer’s website. Look for an M.2 slot that supports NVMe (PCIe) drives. Not all M.2 slots are compatible with NVMe SSDs, so double-check before purchasing.
-
What happens if I install an SSD that’s larger than my current drive?
If your new SSD is larger than your old drive, the cloning process will copy all your data to the new SSD, leaving the remaining space unallocated. You can then expand the partition in Windows Disk Management to utilize the full capacity of the SSD.
-
Do I need to reinstall Windows after upgrading to an SSD?
No, you don’t need to reinstall Windows if you clone your existing drive to the new SSD. Cloning creates an exact copy of your old drive, including the operating system, applications, and files. However, if the cloning process fails or you encounter issues, reinstalling Windows on the new SSD is an alternative.
-
How long does it take to clone a drive to an SSD?
The cloning process typically takes 30 minutes to a few hours, depending on the size of your drive and the amount of data it contains. Cloning tools like Macrium Reflect or Clonezilla will display a progress bar and estimated time remaining.
-
What is TRIM, and why is it important for SSDs?
TRIM is a feature that helps maintain an SSD’s performance over time by allowing the operating system to inform the SSD which blocks of data are no longer in use. This enables the SSD to efficiently manage its storage space and improve write speeds. Windows enables TRIM by default, but it’s important to verify its status after upgrading to an SSD.
-
Can I use an external SSD enclosure to clone my drive?
Yes, an external SSD enclosure or USB-to-SATA adapter allows you to connect your new SSD to your laptop via USB. This is useful for cloning your drive before physically installing the SSD. Many cloning tools support external drives, making it easy to transfer your data.
-
What should I do if my laptop doesn’t recognize the new SSD after installation?
First, ensure the SSD is properly seated in its slot or bay. Check BIOS/UEFI settings to confirm AHCI mode is enabled. If the SSD is still not detected, try updating your BIOS/UEFI, testing the SSD on another device, or consulting your laptop’s manual for specific troubleshooting steps.
-
Is it worth upgrading to an NVMe SSD if my laptop only supports SATA?
No, if your laptop only supports SATA SSDs, upgrading to an NVMe SSD won’t provide any benefits. NVMe SSDs require an M.2 slot with PCIe support, which isn’t available in all laptops. Stick with a SATA SSD for maximum compatibility and performance in such cases.
-
How often should I replace my SSD?
SSDs have a limited lifespan based on the number of write cycles, but modern SSDs are designed to last for several years under normal usage. Most consumer SSDs have a warranty of 3-5 years, and their performance degrades slowly over time. You’ll likely notice performance issues before the SSD completely fails, making replacement unnecessary for a long time.